 LTS Connect Help Center
System Maintenance
Storage device maintenance, log search and export, configuration import/export, system upgrade, default restore, and stream encryption for the Platinum Series NVR V4.
Storage Device Maintenance
Configure Disk Clone
Purpose: Select the HDDs to clone to the eSATA HDD.
Before you start: Connect an eSATA disk to the device.
Open HDD Clone
Go to Maintenance > HDD Operation > HDD Clone.
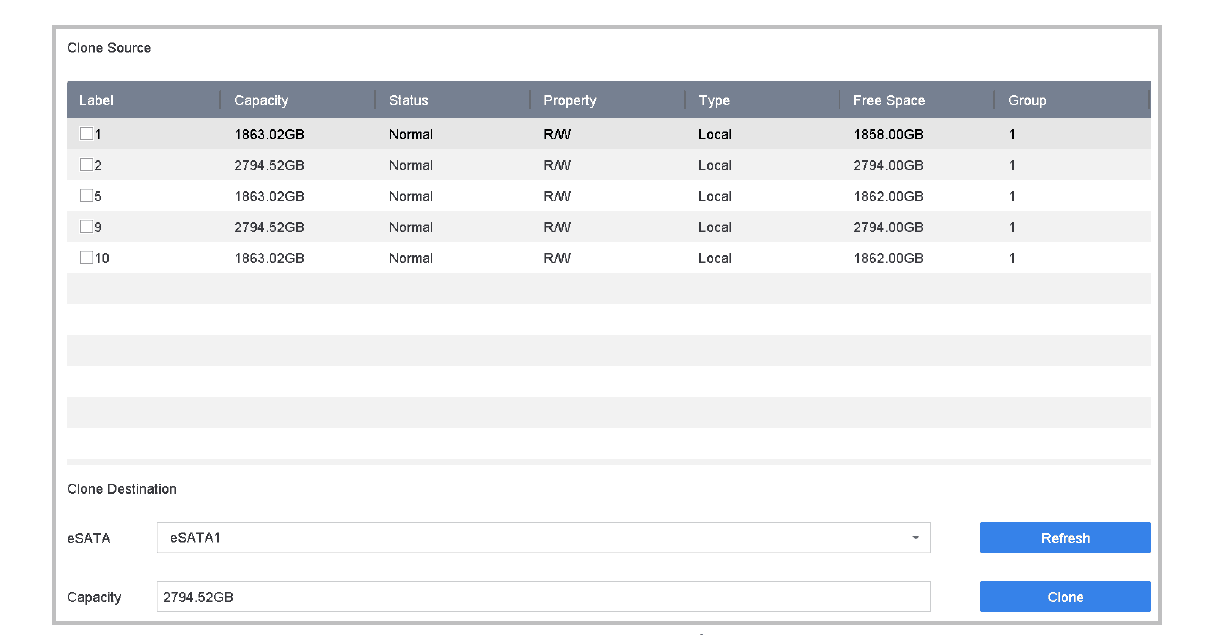
Figure 18-1 HDD Clone
Select HDD
Check the HDD to clone. The capacity of the selected HDD must match the capacity of the clone destination.
Clone
Click Clone.
Confirm
Click Yes on the popup message box to create the clone.
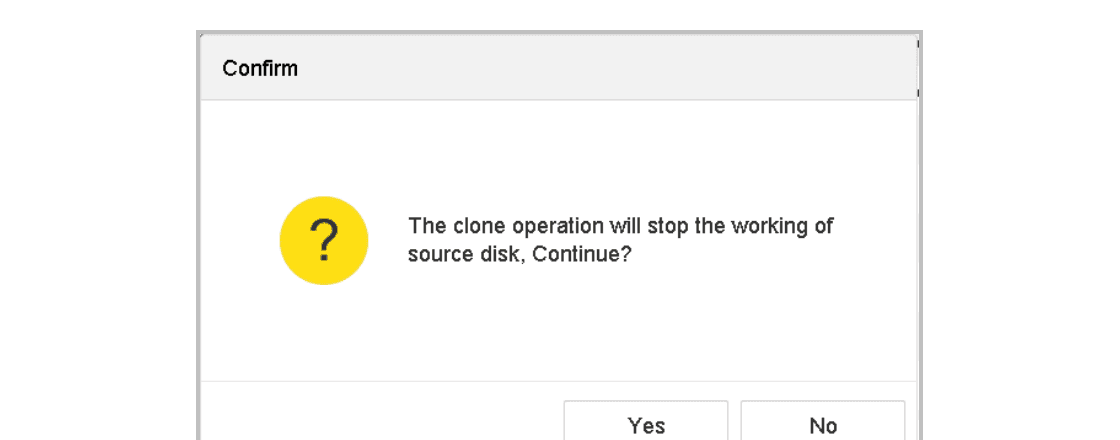
Figure 18-2 Message Box
S.M.A.R.T. Detection
Purpose: HDD detection functions such as the adopting of the S.M.A.R.T. and the Bad Sector Detection techniques. S.M.A.R.T. (Self-Monitoring, Analysis and Reporting Technology) are HDD monitoring systems to detect various reliability indicators in the hopes of anticipating failures.
Open S.M.A.R.T.
Go to Maintenance > HDD Operation > S.M.A.R.T.
Select HDD
Select the HDD to view its S.M.A.R.T. information list.
Select self-test type
Select the self-test types as Short Test, Expanded Test, or the Conveyance Test.
Run self-test
Click Self-Test to start the S.M.A.R.T. HDD self-evaluation.
Review results
The related S.M.A.R.T. information is shown, and you can check the HDD status.
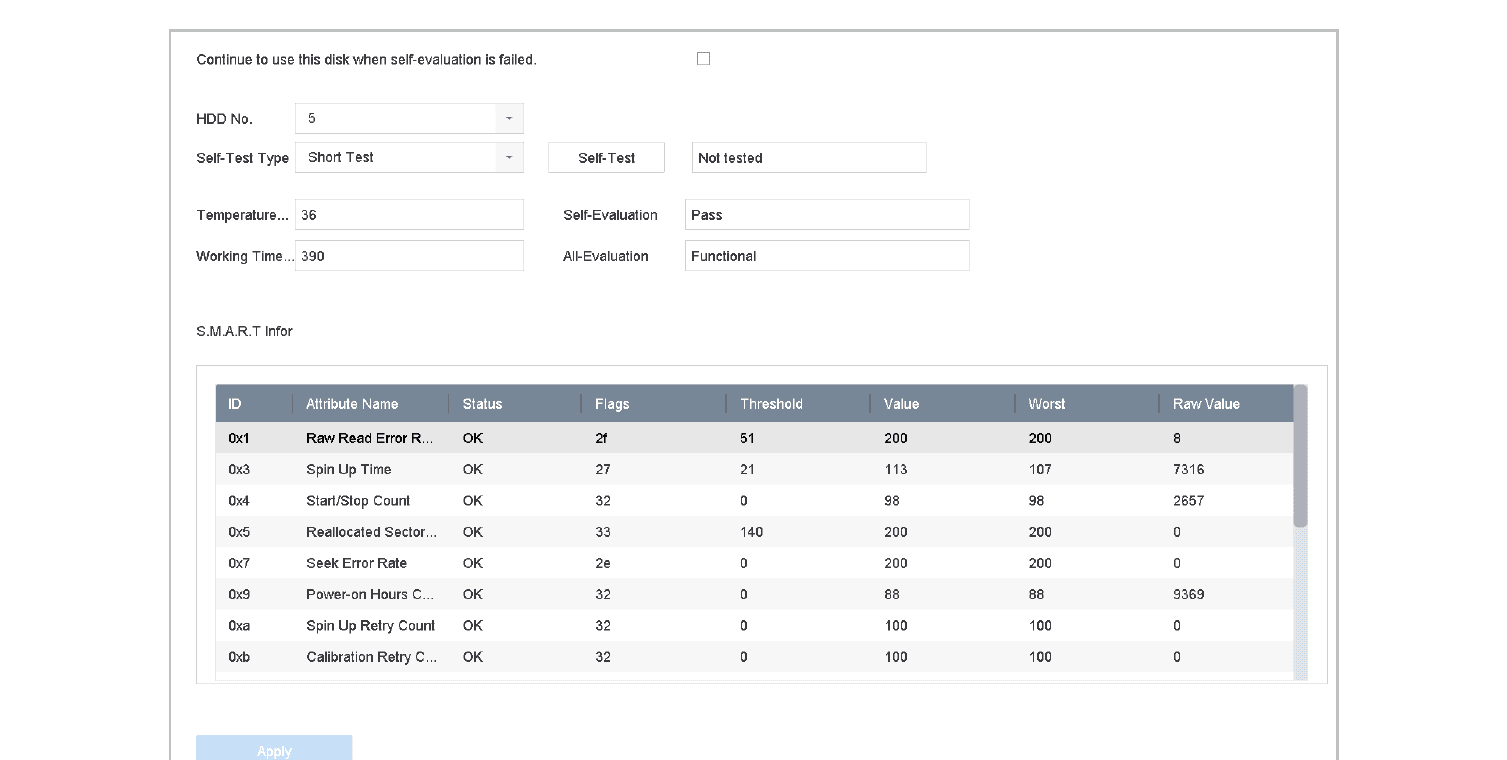
Figure 18-3 S.M.A.R.T. Settings Interface
To use the HDD even when the S.M.A.R.T. checking has failed, check Continue to use the disk when self-evaluation is failed checkbox.
Bad Sector Detection
Open Bad Sector Detection
Go to Maintenance > HDD Operation > Bad Sector Detection.
Select HDD
Select the HDD No. you want to configure in the dropdown list.
Select detection type
Select All Detection or Key Area Detection as the detection type.
Start detection
Click the Self-Test button to start the detection.
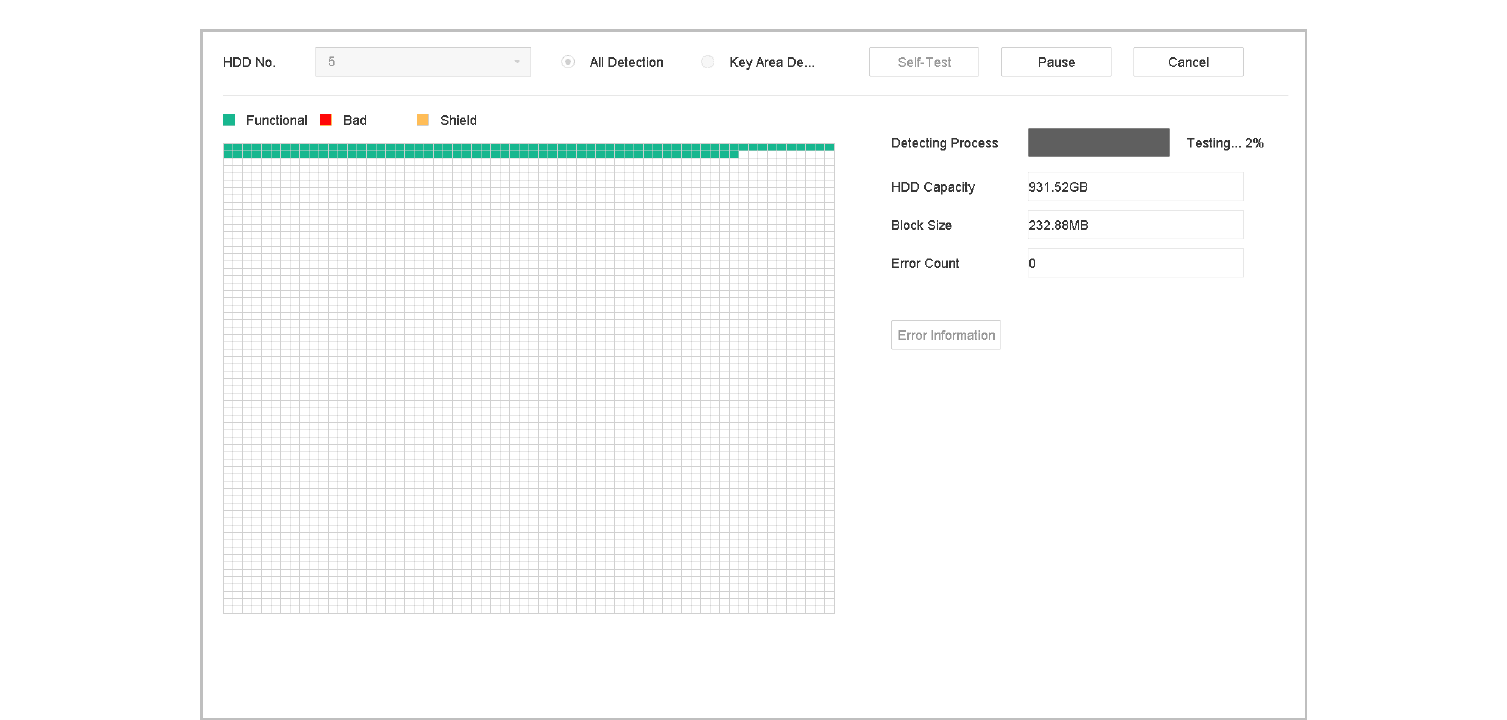
Figure 18-4 Bad Sector Detection
- You can pause/resume or cancel the detection.
- After testing has been completed, you can click Error information to see the detailed damage information.
HDD Health Detection
Purpose: You can view the health status of a 4 TB to 8 TB Seagate HDD that generated after October 1, 2017. Use this function to help troubleshoot HDD problems. Health Detection shows a more detailed HDD status than the S.M.A.R.T. function.
Open Health Detection
Go to Maintenance > HDD Operation > Health Detection.
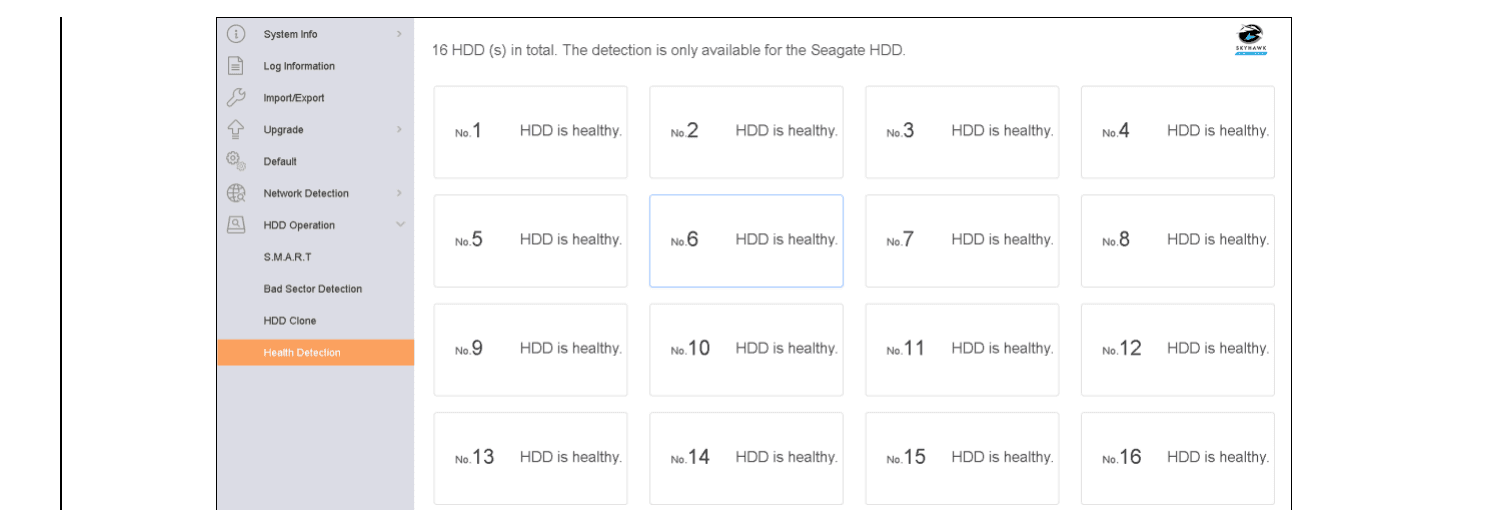
Figure 18-5 Health Detection
View HDD details
Click an HDD to view details.
Search and Export Log Files
Purpose: The device operation, alarm, exception, and information can be stored in log files, which can be viewed and exported at any time.
Search the Log Files
Open Log Information
Go to Maintenance > Log Information.
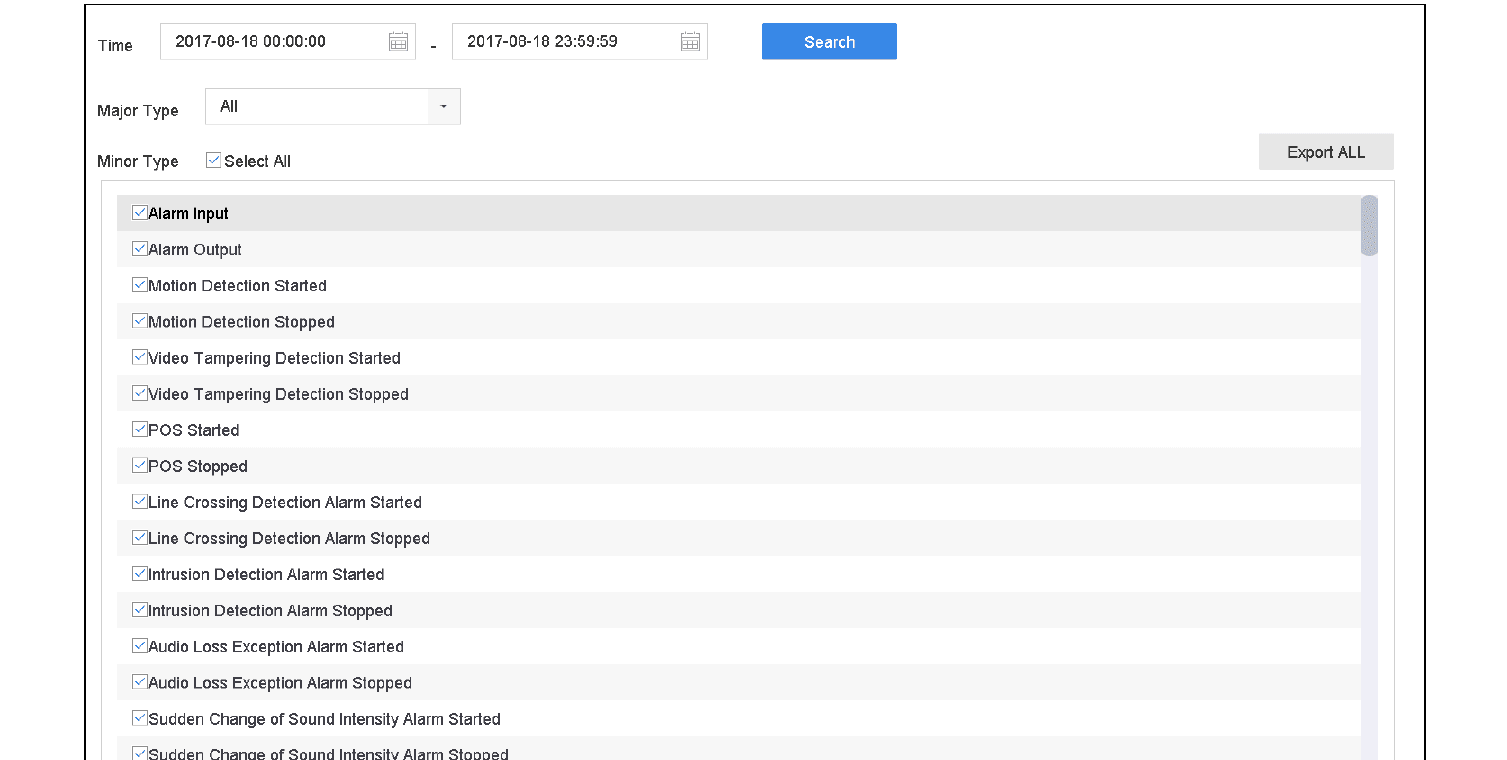
Figure 18-6 Log Search Interface
Set search conditions
Set the log search conditions, including the time, major type and minor type.
Search
Click Search to start searching the log files.
View results
The matched log files will be displayed on the list, as shown below.
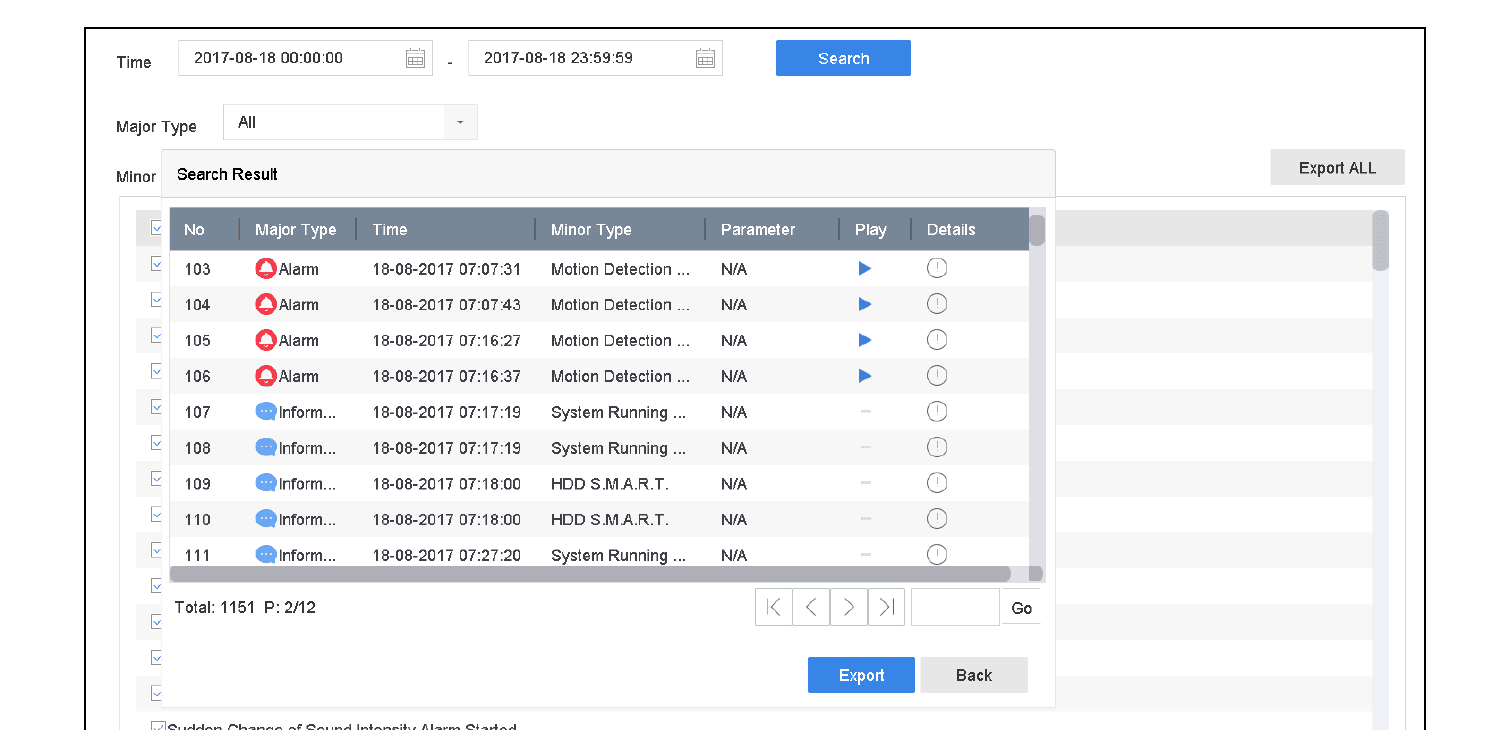
Figure 18-7 Log Search Results
Up to 2,000 log files can be displayed each time.
Step 5 Related Operation:
- Click the details icon or double-click it to view detailed information.
- Click the play icon to view the related video file.
Export the Log Files
Before you start: Connect a storage device to the NVR.
Search log files
Search the log files. Refer to Search the Log Files.
Select and export
Select the log files you want to export, and click Export or click Export ALL on the Log Search interface to export all the system logs to the storage device.
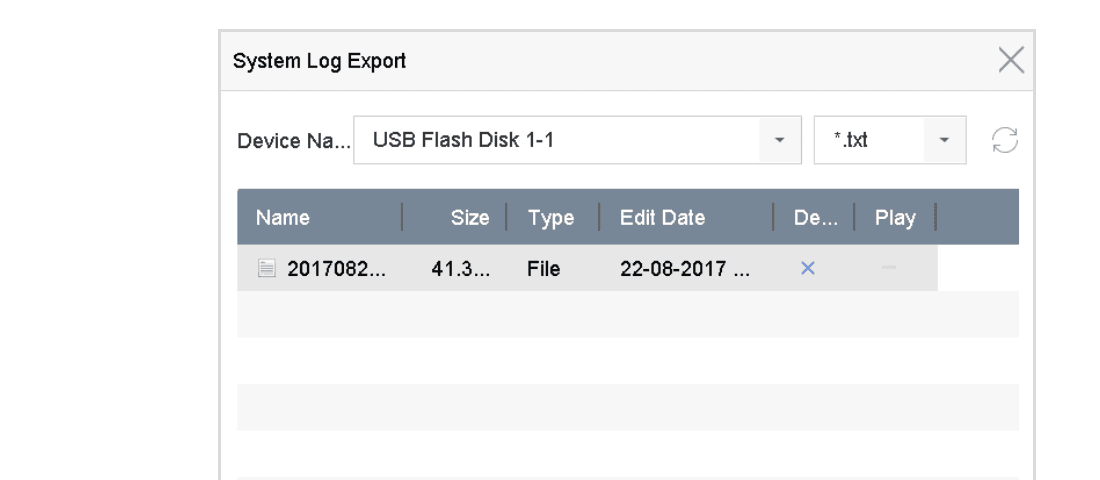
Figure 18-8 Export Log Files
Select storage device
On the Export interface, select the storage device from Device Name.
Select format
Select the format of the log files to be exported. Up to 15 formats are selectable.
Export
Click Export to export the log files to the selected storage device.
- Click the New Folder button to create a new folder in the storage device.
- Click the Format button to format the storage device before exporting the log(s).
Import/Export IP Camera Configuration Files
Purpose: The IP camera information, including the IP address, manage port, password of admin, etc., can be saved in Microsoft Excel format and backed up to the local device. The exported file can be edited on a PC, including adding or deleting the content, and copying the setting to other devices by importing the Excel file to it.
Before you start: When importing the configuration file, connect the storage device that contains the configuration file to the NVR.
Open IP Camera Import/Export
Go to Camera > IP Camera Import/Export.
Open the tab
Click the IP Camera Import/Export tab, and the detected external device contents appear.
Export or import
Export or import the IP camera configuration files.
- Click Export to export the configuration files to the selected local backup device.
- To import a configuration file, select the file from the selected backup device and click Import.
After the importing process is completed, you must reboot the device to activate the settings.
Import/Export Device Configuration Files
Purpose: The device configuration files can be exported to a local device for backup; and the configuration files of one device can be imported to multiple devices if they are to be configured with the same parameters.
Before you start: Connect a storage device to your device. To import the configuration file, the storage device must contain the file.
Open Import/Export
Go to Maintenance > Import/Export.
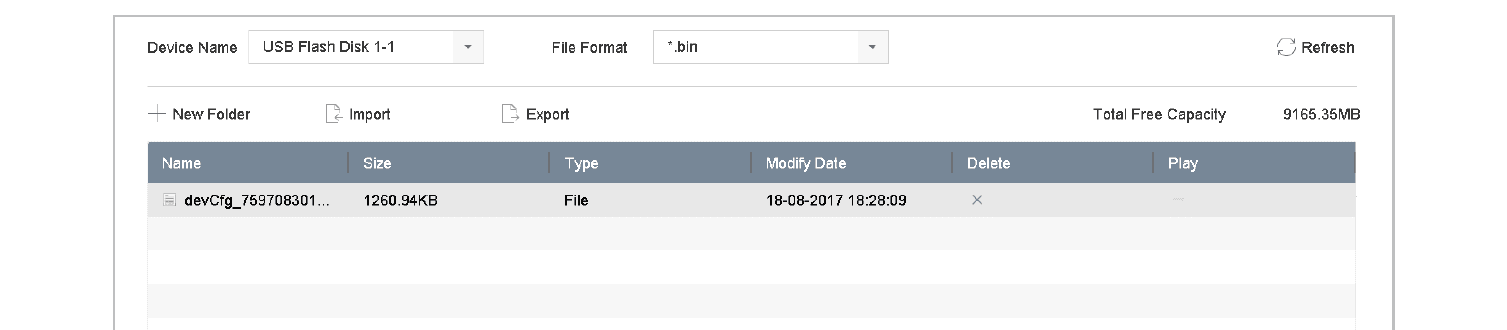
Figure 18-9 Import/Export Config File
Export or import
Export or import the device configuration files.
- Click Export to export configuration files to the selected local backup device.
- To import a configuration file, select the file from the selected backup device and click Import.
After having finished importing configuration files, the device will reboot automatically.
Configure System Services
I-VIEW-NOW UPNP Reporting
The I-VIEW-NOW UPNP Reporting service allows the system to automatically send the device network parameters to authorized receivers by e-mail.
Open I-VIEW-NOW UPNP Reporting
Go to Menu > Maintenance > System Service > More Settings > I-VIEW-NOW UPNP Reporting.
Enable
Check the checkbox of I-VIEW-NOW UPNP Reporting.
Apply
Click Apply.
Configure Stream Encryption
The stream encryption enables to encrypt the streams for live view, playback, download, backup, etc.
Open Stream Encryption
Go to Menu > Maintenance > System Service > Stream Encryption.
Enable
Check Enable Stream Encryption.
Create password
Create the encryption password.
The stream encryption password is synchronized with the LTS-Connect service verification code. After enabling the encryption code, the LTS-Connect stream will be forcedly encrypted. Make sure the LTS-Connect service supports the stream encryption as well.
Upgrade the System
Purpose: The firmware on your device can be upgraded with a local backup device or remote FTP server.
Upgrade with a Local Backup Device
Before you start: Connect your device to a local storage device that contains the firmware update file.
Open Upgrade
Go to Maintenance > Upgrade.
Open Local Upgrade tab
Click the Local Upgrade tab to enter the local upgrade interface.

Figure 18-10 Local Upgrade Interface
Select firmware file
Select the firmware update file from the storage device.
Upgrade
Click Upgrade to start upgrading.
Reboot
After the upgrade is complete, the device will reboot automatically to activate the new firmware.
Upgrade by FTP
Before you start: Ensure the network connection of the PC (running FTP server) and the device are valid and correct. Run the FTP server on the PC and copy the firmware into the corresponding directory of your PC.
Open Upgrade
Go to Maintenance > Upgrade.
Open FTP tab
Click the FTP tab to enter the local upgrade interface.
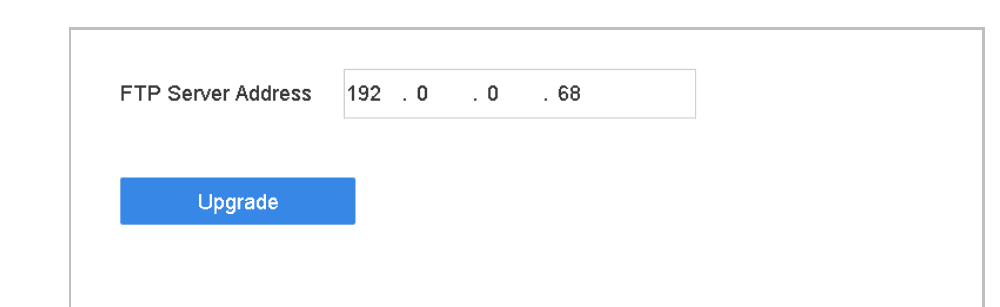
Figure 18-11 FTP Upgrade Interface
Enter FTP address
Enter FTP Server Address in the text field.
Upgrade
Click Upgrade to start upgrading.
Reboot
After the upgrading is complete, reboot the device to activate the new firmware.
Restore Default Settings
Open Default
Go to Maintenance > Default.

Figure 18-12 Restore Defaults
Select restore type
Select the restore type from the following three options.
- Restore Defaults: Restore all parameters, except the network (including IP address, subnet mask, gateway, MTU, NIC working mode, default route, server port, etc.) and user account parameters, to the factory default settings.
- Factory Defaults: Restore all parameters to the factory default settings.
- Restore to Inactive: Restore the device to inactive status.
The device will reboot automatically after restoring to the default settings.