 LTS Connect Hjælpecenter
System Settings
Configure the CVI DVR system settings, including general and holiday settings, RS232, security, maintenance, export/import, restoring defaults, and upgrading.
Configuring General System Settings
You can configure the device basic settings, time settings, and holiday settings.
For details about basic and time settings, see 5.1.4.2 Configuring General Settings and 5.1.4.3 Configuring Date and Time Settings.
To configure the holiday settings, do the following:
Open the Holiday interface
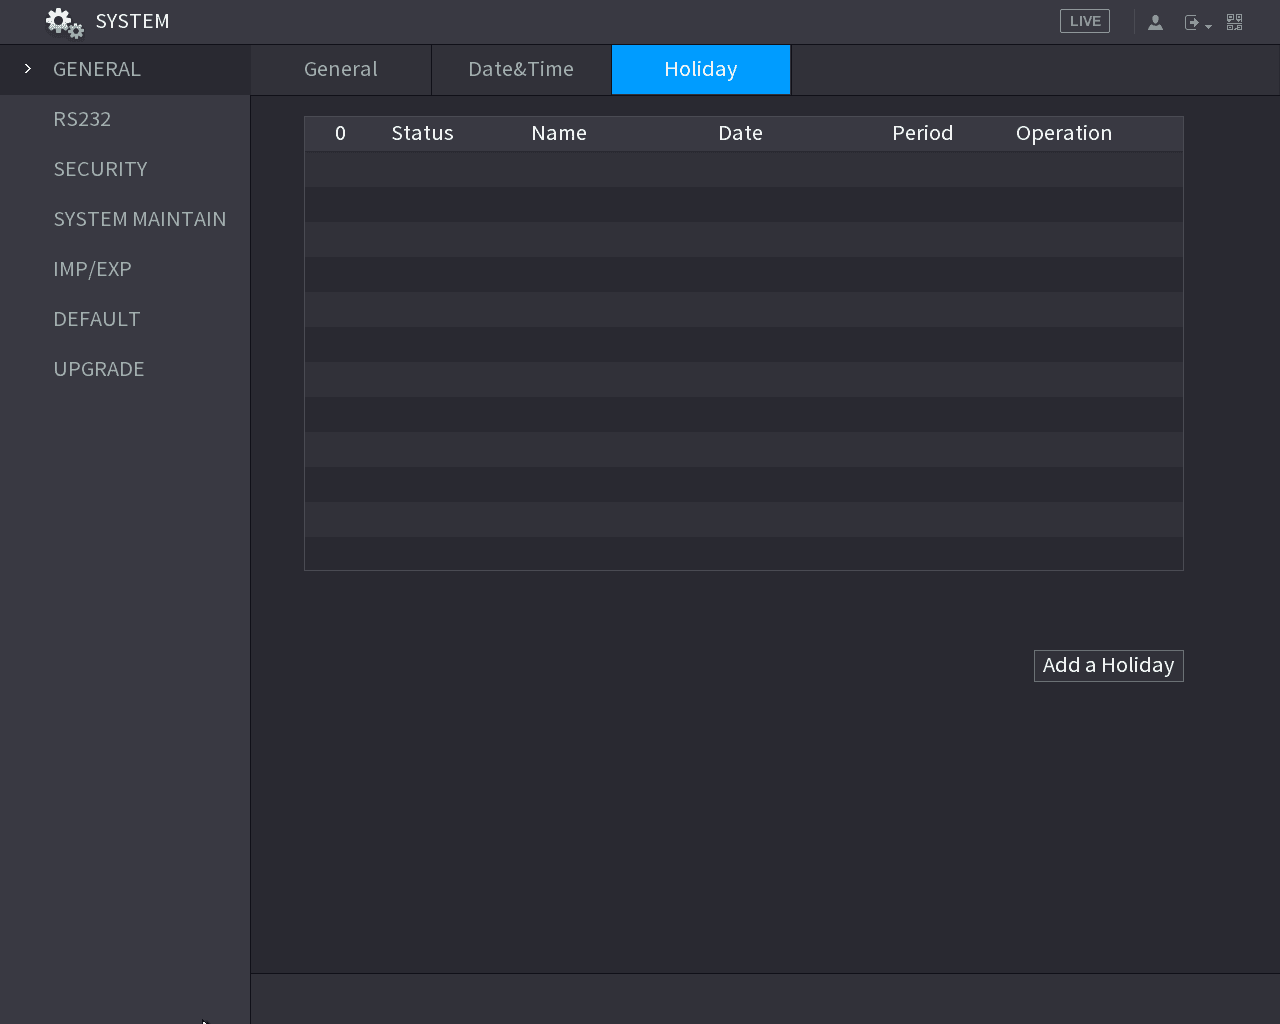
Select Main Menu > SYSTEM > GENERAL > Holiday.
The Holiday interface is displayed. See Figure 5-256.
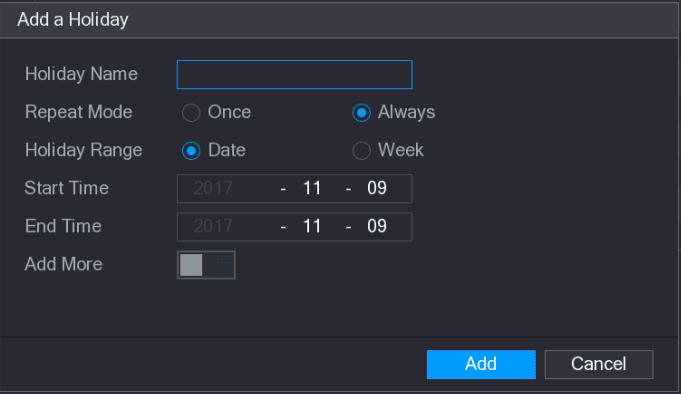
Configure the holiday
Configure the holiday name, repeat mode, time range according to your actual situation.
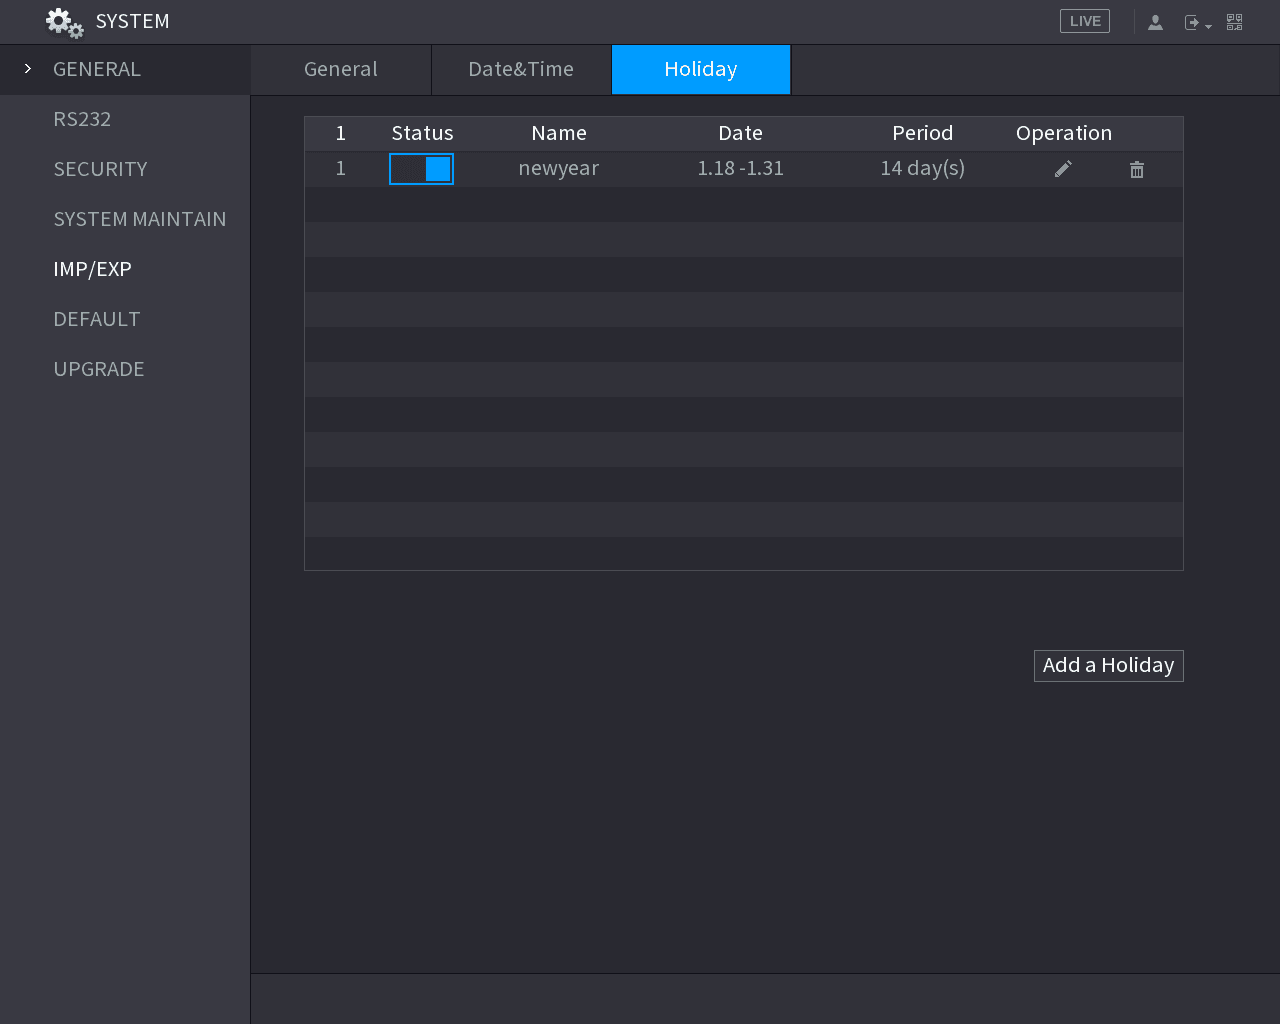
Enable the Add More function, so you can continue adding holiday information.
Configuring RS232 Settings
You can configure serial port function, Baud rate and so on.
Only some series products support this RS232.
Select Main Menu > SYSTEM > RS232.
The RS232 interface is displayed. See Figure 5-259.
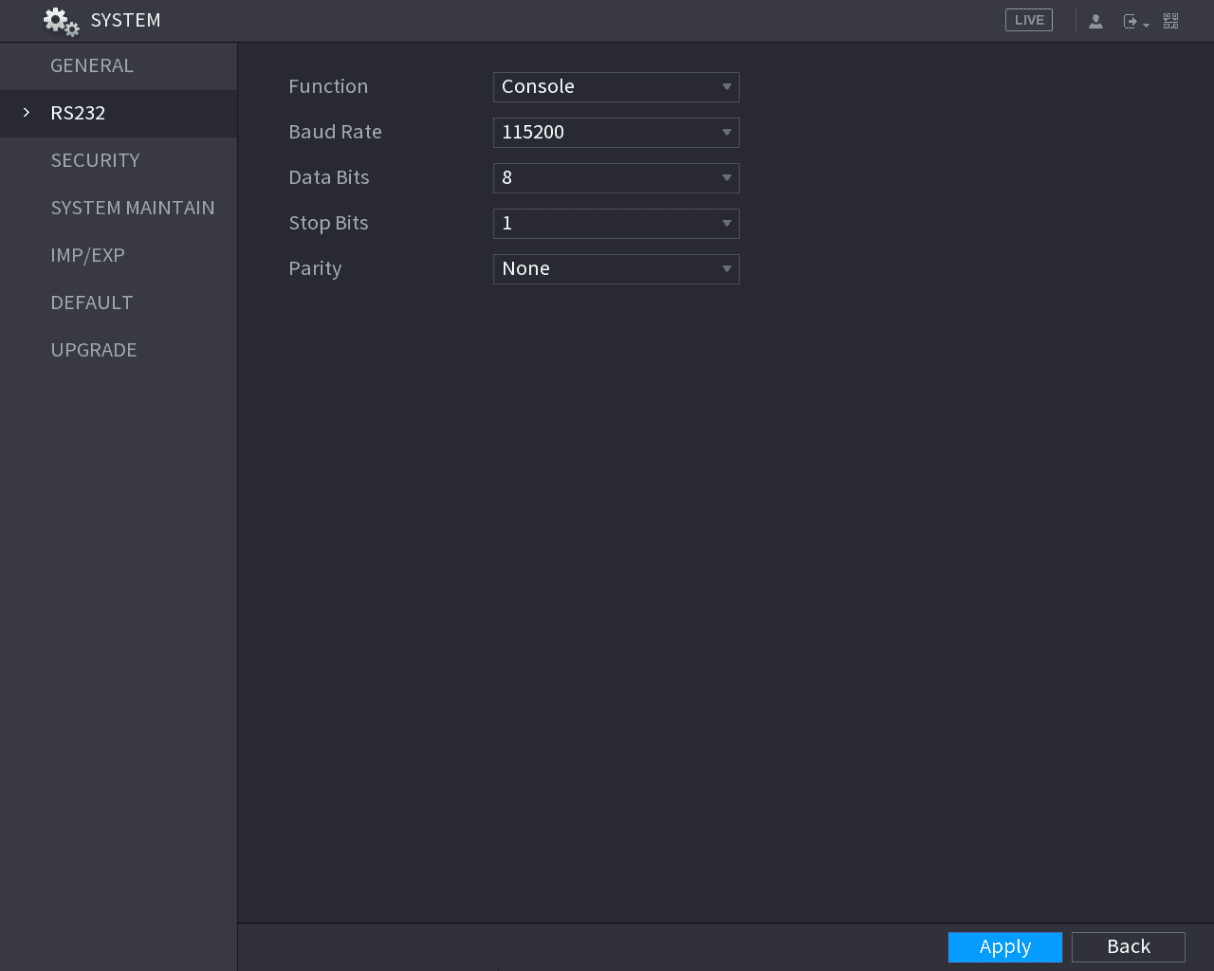
Table 5-75
| Parameter | Description |
|---|---|
| Function | Select serial port control protocol. Console: Upgrade the program and debug with the console and mini terminal software. Keyboard: Control this Device with special keyboard. Adapter: Connect with PC directly for transparent transmission of data. Protocol COM: Configure the function to protocol COM, in order to overlay card number. PTZ Matrix: Connect matrix control. It is Console by default. |
| Baud Rate | Select Baud rate, which is 115200 by default. |
| Data Bits | It ranges from 5 to 8, which is 8 by default. |
| Stop Bits | It includes 1 and 2. |
| Parity | It includes none, odd, even, mark and null. It is none by default. |
Configuring Security Settings
To ensure the network security and protect data, you can configure the access permission to the Device from host IP (host IP means the PC or server that has an IP).
- White list includes the host IP that are permitted to access the Device.
- Black list includes the host IP that are not permitted to access the Device.
- Updata time white list includes the host IP that are permitted to sync the Device time.
Configuring Firewall
Open the Firewall interface
Select Main Menu > SYSTEM > SECURITY > Firewall.
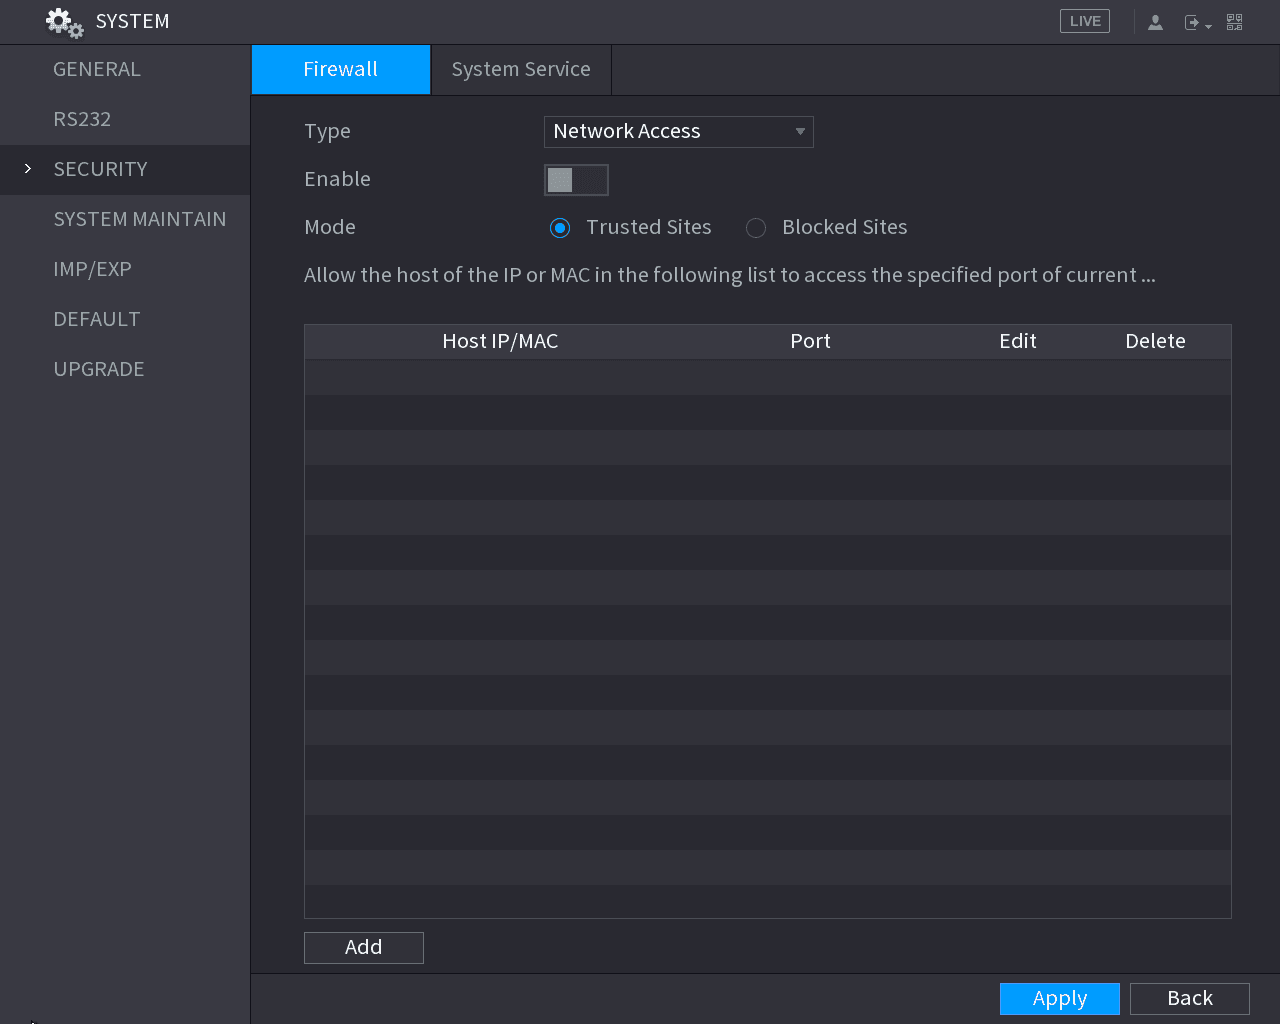
The Firewall interface is displayed. See Figure 5-260.
Enable the function
Select Enable to enable function in the Type list.
Configure the parameters
Configure the parameters. See Table 5-76.
Table 5-76
| Parameter | Description |
|---|---|
| Type | In the Type list, you can select Network Access, Sync Time-Whitelist, Forbid Ping and Semi Join. Network Access: Configure access right of IP host. Sync Time-Whitelist: Allow designated IP host to synchronize or change Device time. Prevent multiple IP hosts from synchronizing system time with one Device repeatedly. Forbid Ping: The Device does not respond to Ping requests. Semi Join: Protect Device operation from hacker attack. |
| Mode | Mode can be configured when Type is Network Access. If Trusted Sites is enabled, you can visit device port successfully with IP/MAC hosts in Trusted Sites. If Blocked Sites is enabled, you cannot visit device port with IP/MAC hosts in Blocked Sites. |
| Add | When Type is Network Access, you can configure IP Address, IP Segment and MAC Address. |
| IP Address Start Port End Port | Enter IP Address, Start Port and End Port that is allowed or forbidden. When Type is IP Address, they can be configured. Start Port and End Port can be configured only in Network Access Type. |
| Start Address End Address | Enter Start Address and End Address of IP Segment. When Type is IP Segment, they can be configured. |
| MAC Address | Enter MAC Address that is allowed or forbidden. When Type is MAC Address, it can be configured. |
Apply the settings
Click Apply to complete the settings.
Configuring System Service Settings
You can enable or disable the system internal services.
Open the System Service interface
Select Main Menu > SYSTEM > SECURITY > System Service.
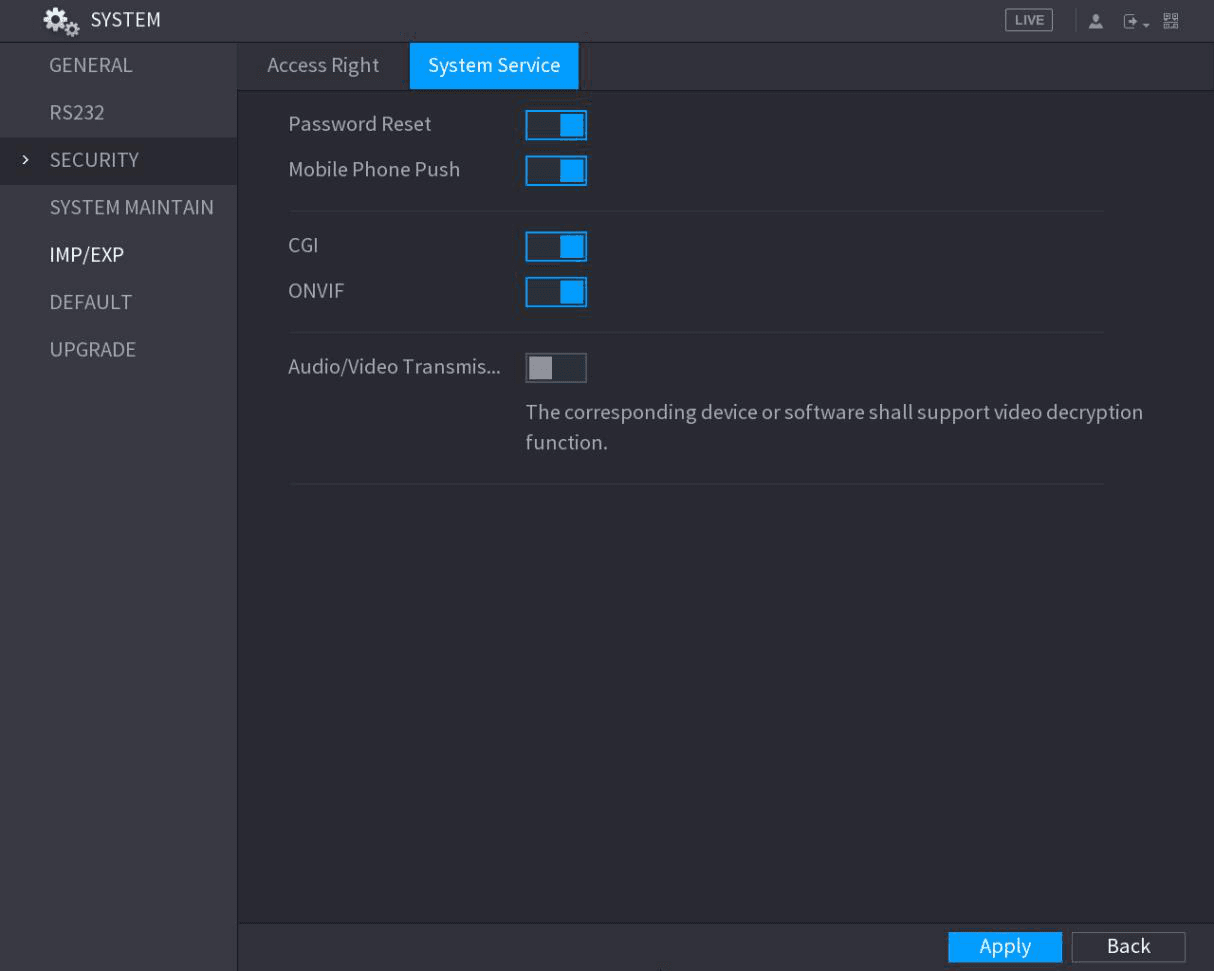
The System Service interface is displayed. See Figure 5-261.
Configure the parameters
Configure the parameters. For details, see Table 5-77.
Table 5-77
| Parameter | Description |
|---|---|
| Password Reset | Enable or disable the password reset function. It is enabled by default. If the password reset function is disabled, you can find back the password by the security questions. Make sure you have configured the security questions. |
| Mobile Phone Push | If you enable this function, the snapshots that are activated by the alarm event on the Device can be sent to mobile phone. This function is enabled by default. |
| CGI | If this function is enabled, the remote devices can be added through the CGI protocol. This function is enabled by default. |
| ONVIF | If this function is enabled, the remote devices can be added through the ONVIF protocol. This function is enabled by default. |
| Audio/Video Transmission | Enable or disable the audio and video stream encryption. If enabled, make sure the devices or software support decryption. The audio and video data with third-party platform or device cannot be encrypted for transmission. To guarantee audio and video data safety, it is recommended to disable CGI and ONVIF services. |
Apply the settings
Click Apply to complete the settings.
Configuring System Maintenance Settings
When the Device has been running for a long time, you can configure the auto reboot when the Device is not working. You can also configure the case fan mode to reduce noise and extend the service life.
Open the SYSTEM MAINTAIN interface
Select Main Menu > SYSTEM > SYSTEM MAINTAIN.
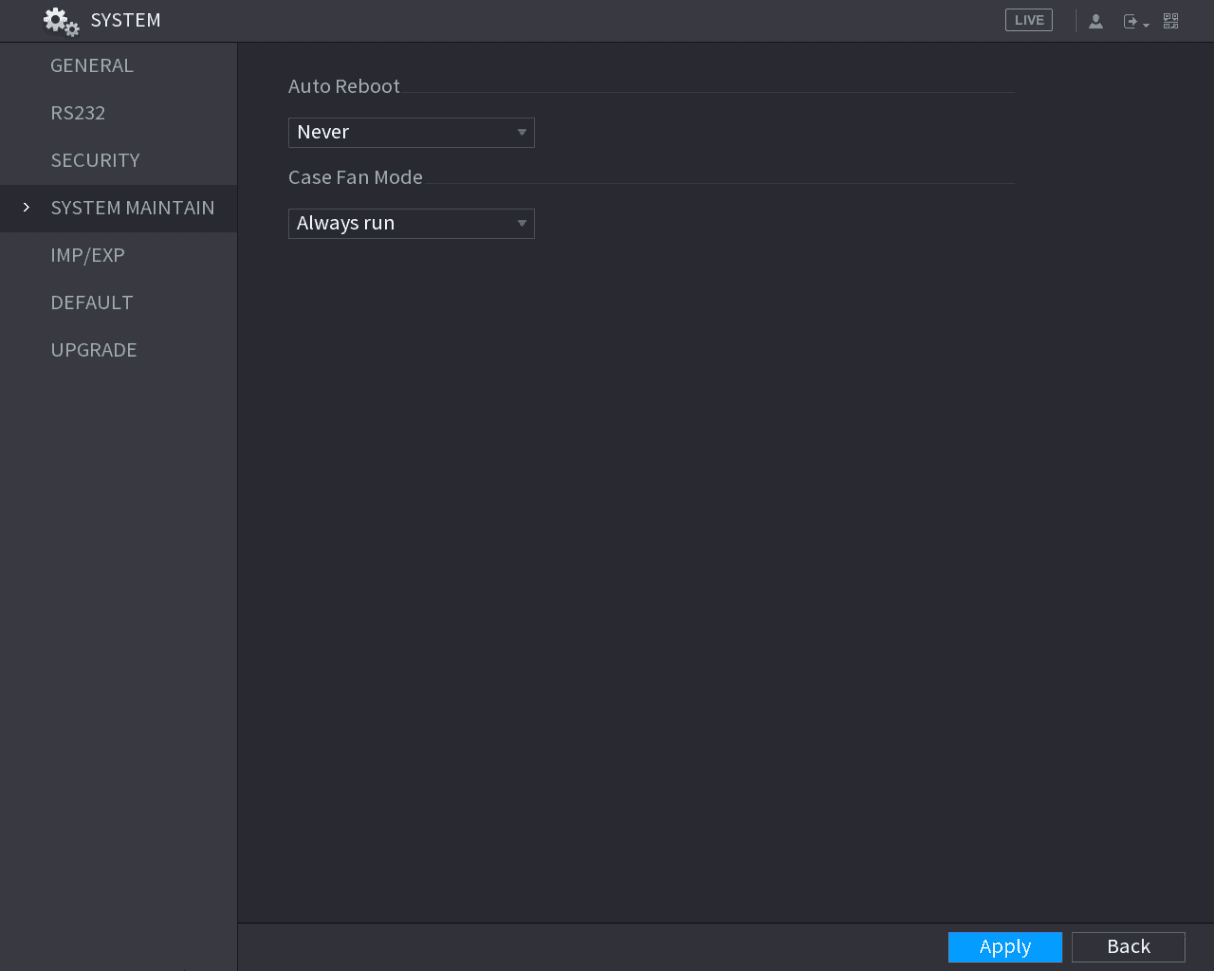
The SYSTEM MAINTAIN interface is displayed. See Figure 5-262.
Configure the parameters
Configure the settings for the system maintenance parameters. See Table 5-78.
Table 5-78
| Parameter | Description |
|---|---|
| Auto Reboot | In the Auto Reboot list, select the reboot time. |
| Case Fan Mode | In the Case Fan Mode list, you can select Always run or Auto. If you select Auto, the case fan will stop or start according to the external conditions such as the Device temperature. Not all models support this function, and it is only supported on the local configuration interface. |
Apply the settings
Click Apply to complete the settings.
Exporting and Importing System Settings
You can export or import the Device system settings if there are several Devices that require the same setup.
- The IMP/EXP interface cannot be opened if the backup operation is ongoing on the other interfaces.
- When you open the IMP/EXP interface, the system refreshes the devices and sets the current directory as the first root directory.
- Click Format to format the USB storage device.
Exporting System Settings
Open the IMP/EXP interface
Select Main Menu > SYSTEM > IMP/EXP.
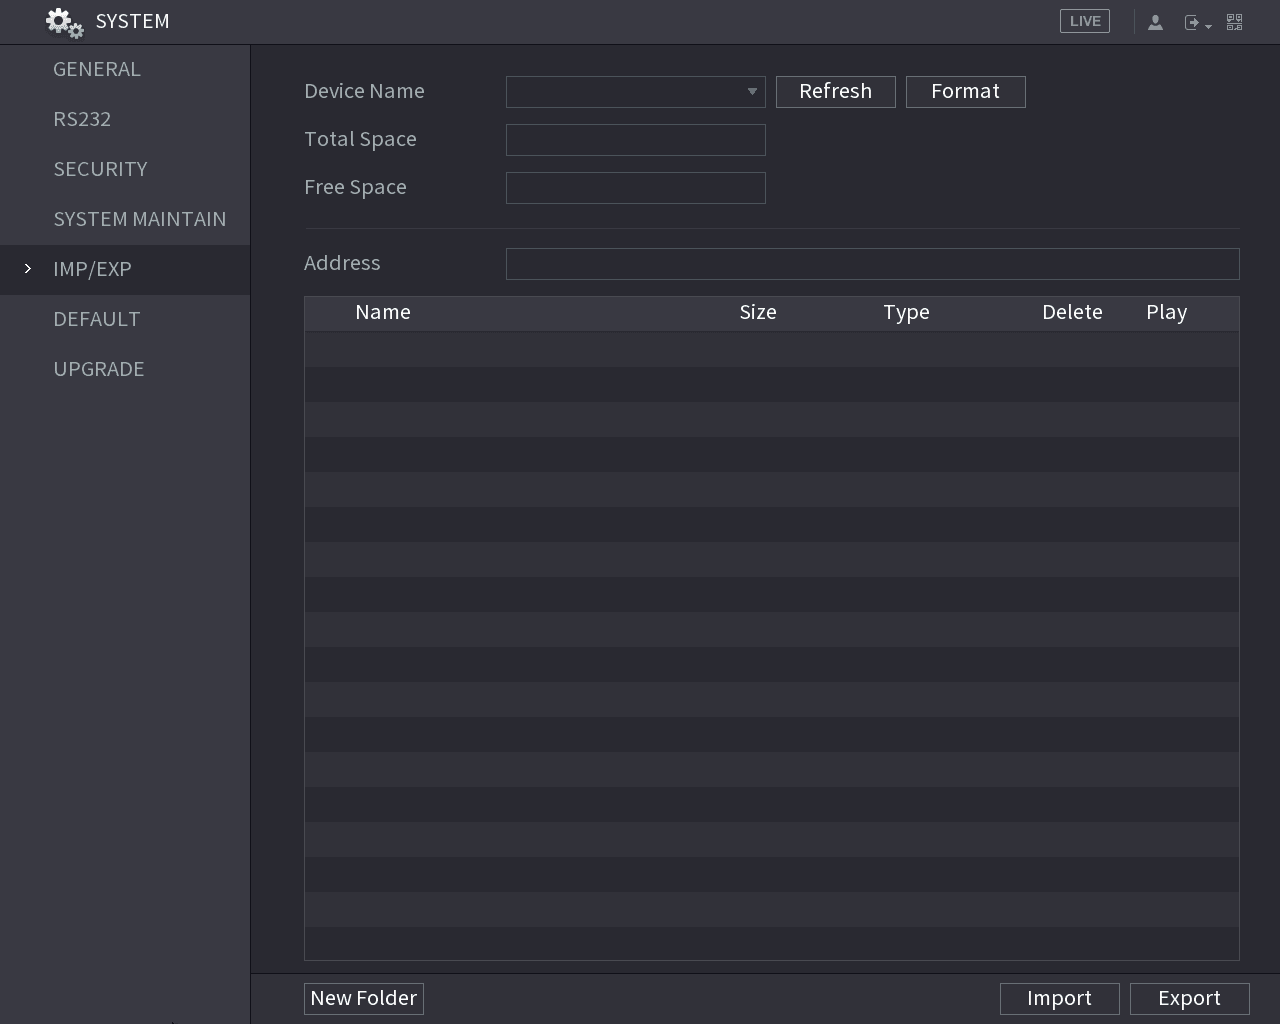
The IMP/EXP interface is displayed. See Figure 5-263.
Insert the USB storage device
Insert a USB storage device into one of the USB ports on the Device.
Refresh the interface
Click Refresh to refresh the interface.
The connected USB storage device is displayed. See Figure 5-264.
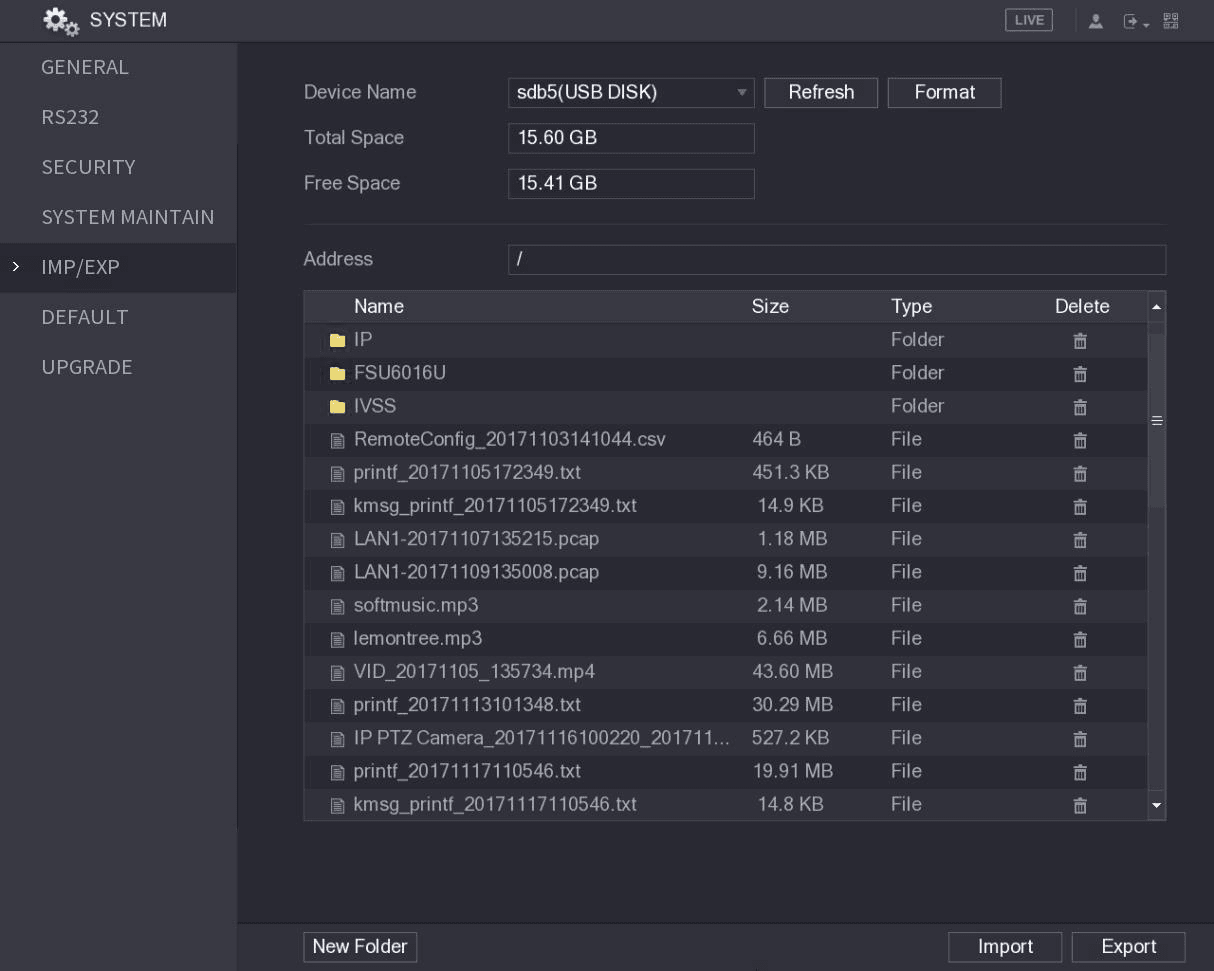
Export the settings
Click Export.
There is a folder under the name style of "Config_[YYYYMMDDhhmmss]". Double-click this folder to view the backup files.
Importing System Settings
Insert the USB storage device
Insert a USB storage device containing the exported configuration files from another Device) into one of the USB ports on the Device.
Refresh the interface
Click Refresh to refresh the interface.
The connected USB storage device is displayed.
Select the configuration folder
Click on the configuration folder (under the name style of "Config_[YYYYMMDDhhmmss]") that you want to import.
Restoring Default Settings
Only Admin account supports this function.
You can select the settings that you want to restore to the factory default.
Open the DEFAULT interface
Select Main Menu > SYSTEM > DEFAULT.
The DEFAULT interface is displayed. See Figure 5-265.
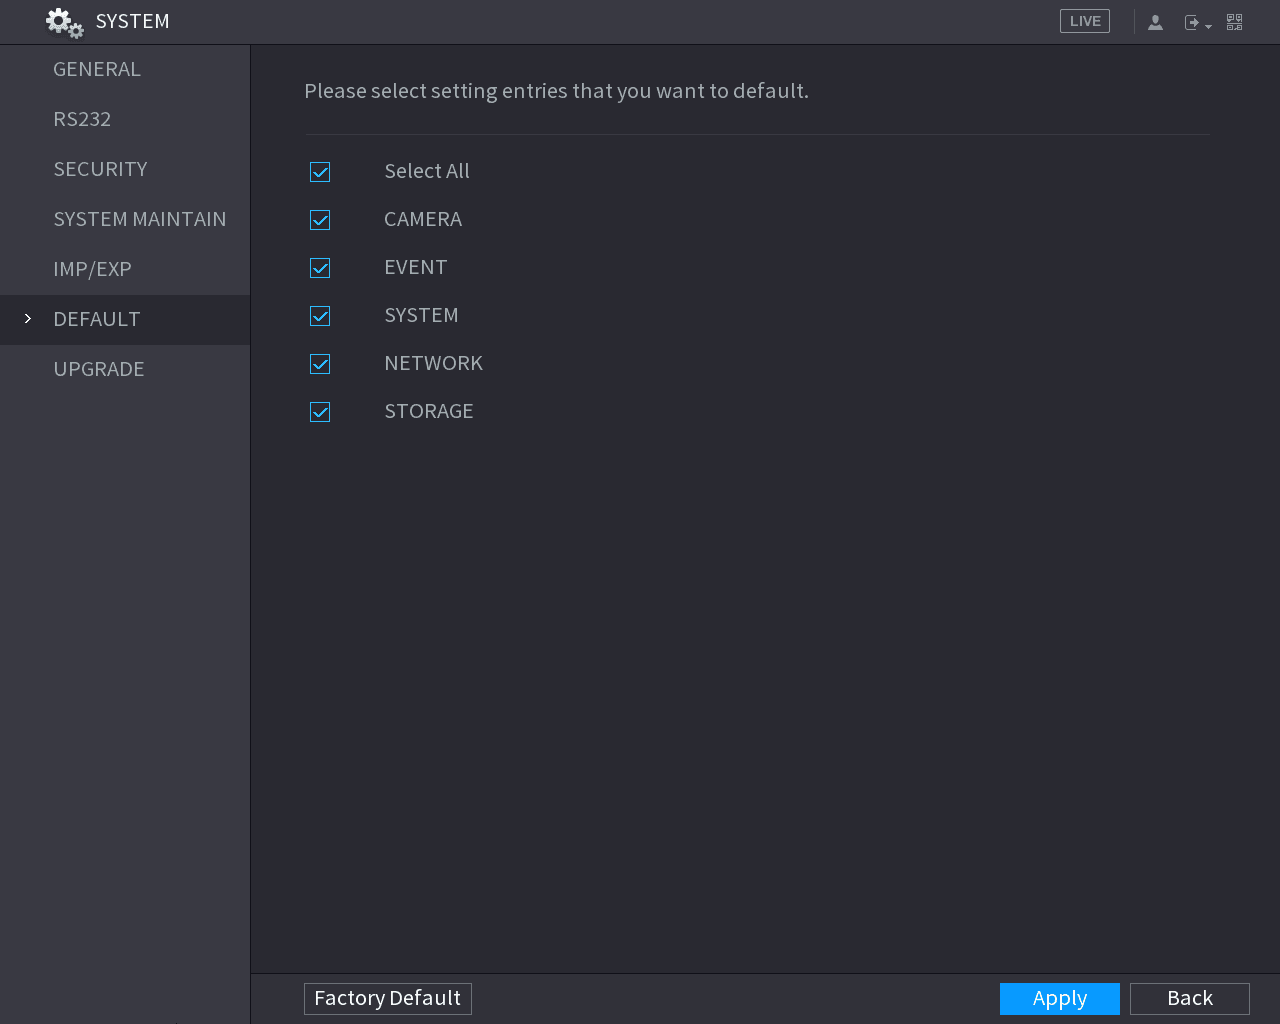
Restore the settings
Restore the settings.
- Select the settings that you want to restore, and then click Apply. The system starts restoring the selected settings.
- Click Factory Default, and then click OK. The system starts restoring the whole settings.
Upgrading the Device
Upgrading File
Insert the USB storage device
Insert a USB storage device containing the upgrade files into the USB port of the Device.
Open the UPGRADE interface
Select Main Menu > SYSTEM > UPGRADE.
The UPGRADE interface is displayed. See Figure 5-266.
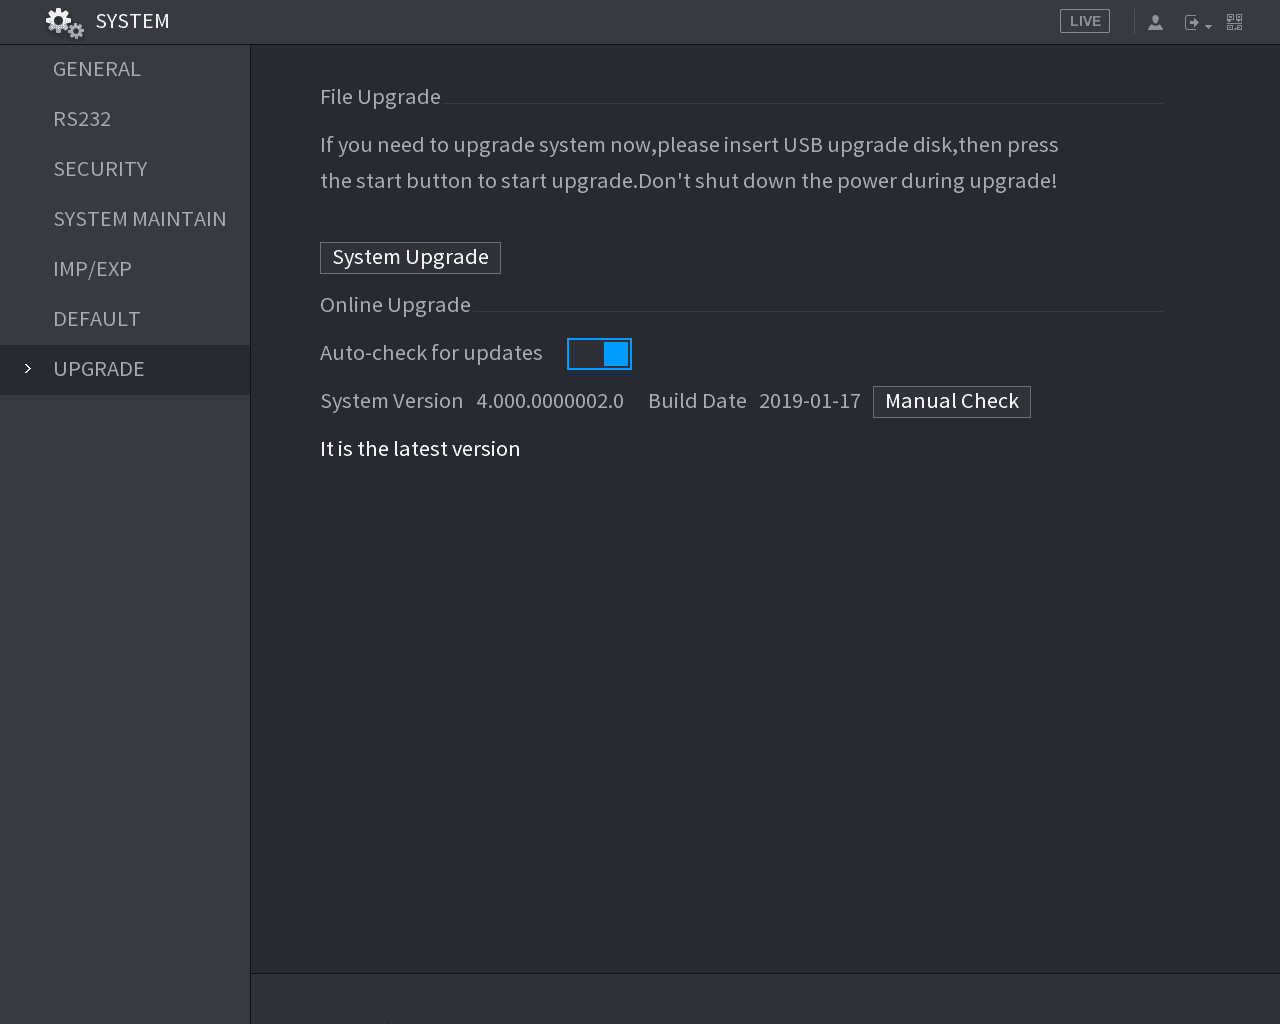
Open the System Upgrade interface
Click System Upgrade.
The System Upgrade interface is displayed. See Figure 5-267.
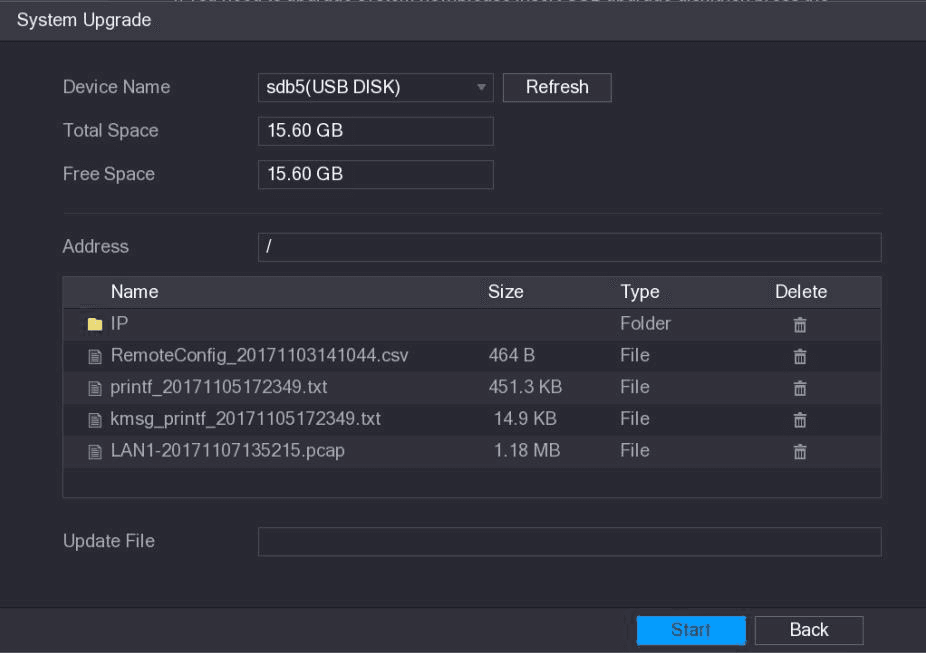
Select the upgrade file
Click the file that you want to upgrade.
The selected file is displayed in the Update File box.
Start the upgrade
Click Start.
Performing Online Upgrade
When the Device is connected to Internet, you can use online upgrade function to upgrade the system.
Before using this function, you need to check whether there is any new version by auto check or manual check.
- Auto check: The Device checks if there is any new version available at intervals.
- Manual check: Perform real-time check whether there is any new version available.
Ensure the correct power supply and network connection during upgrading; otherwise the upgrading might be failed.
Open the UPGRADE interface
Select Main Menu > SYSTEM > UPGRADE.
The UPGRADE interface is displayed. See Figure 5-268.
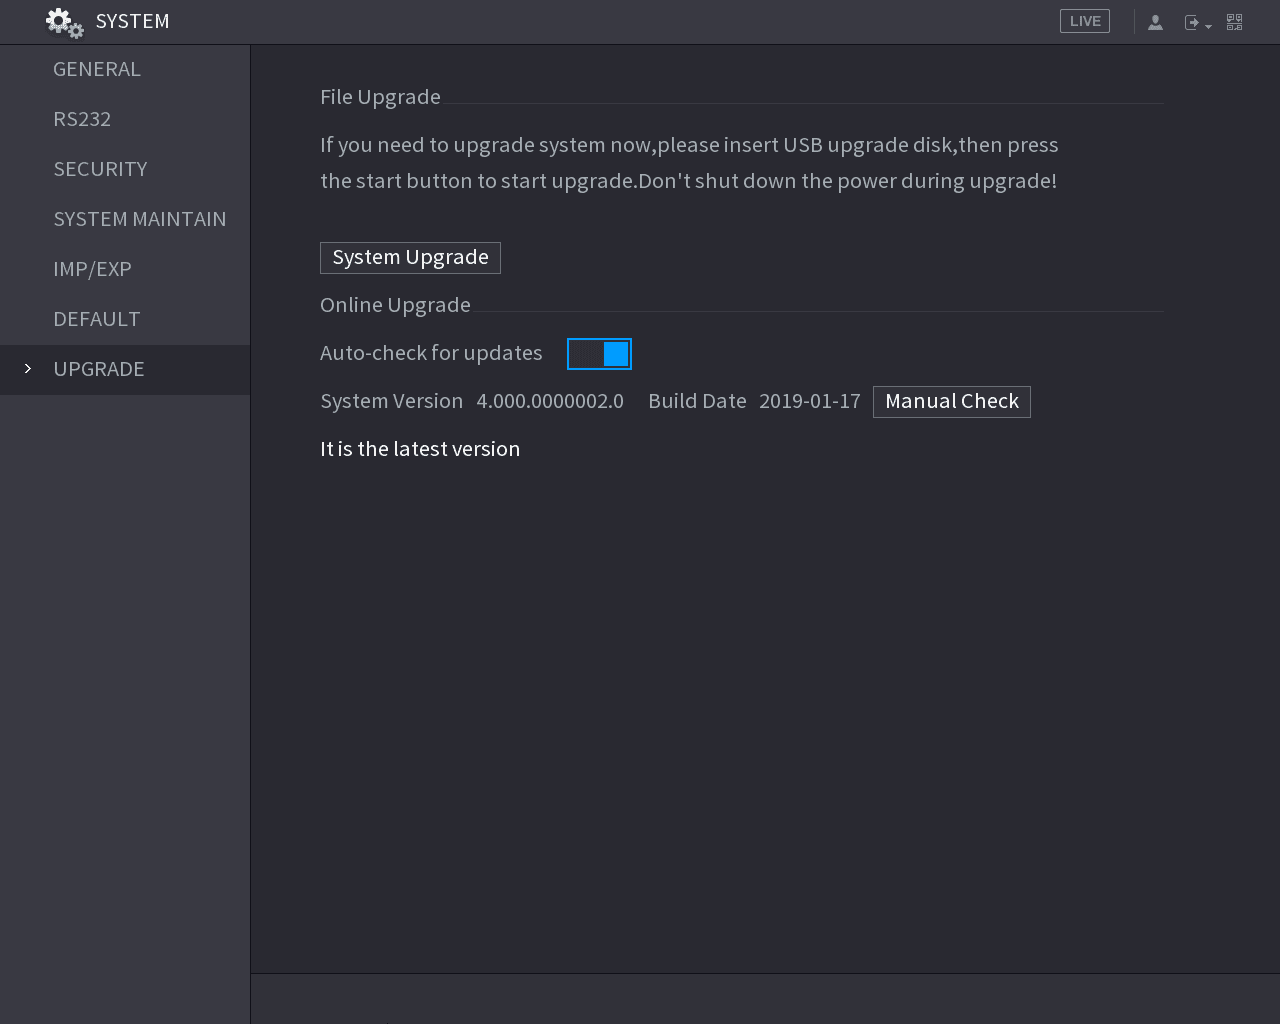
Check for a new version
Check whether there is any new version available.
- Auto check: Enable Auto-check for updates.
- Manual check: Click Manual Check.
The system starts checking the new versions. After checking is completed, the check result is displayed.
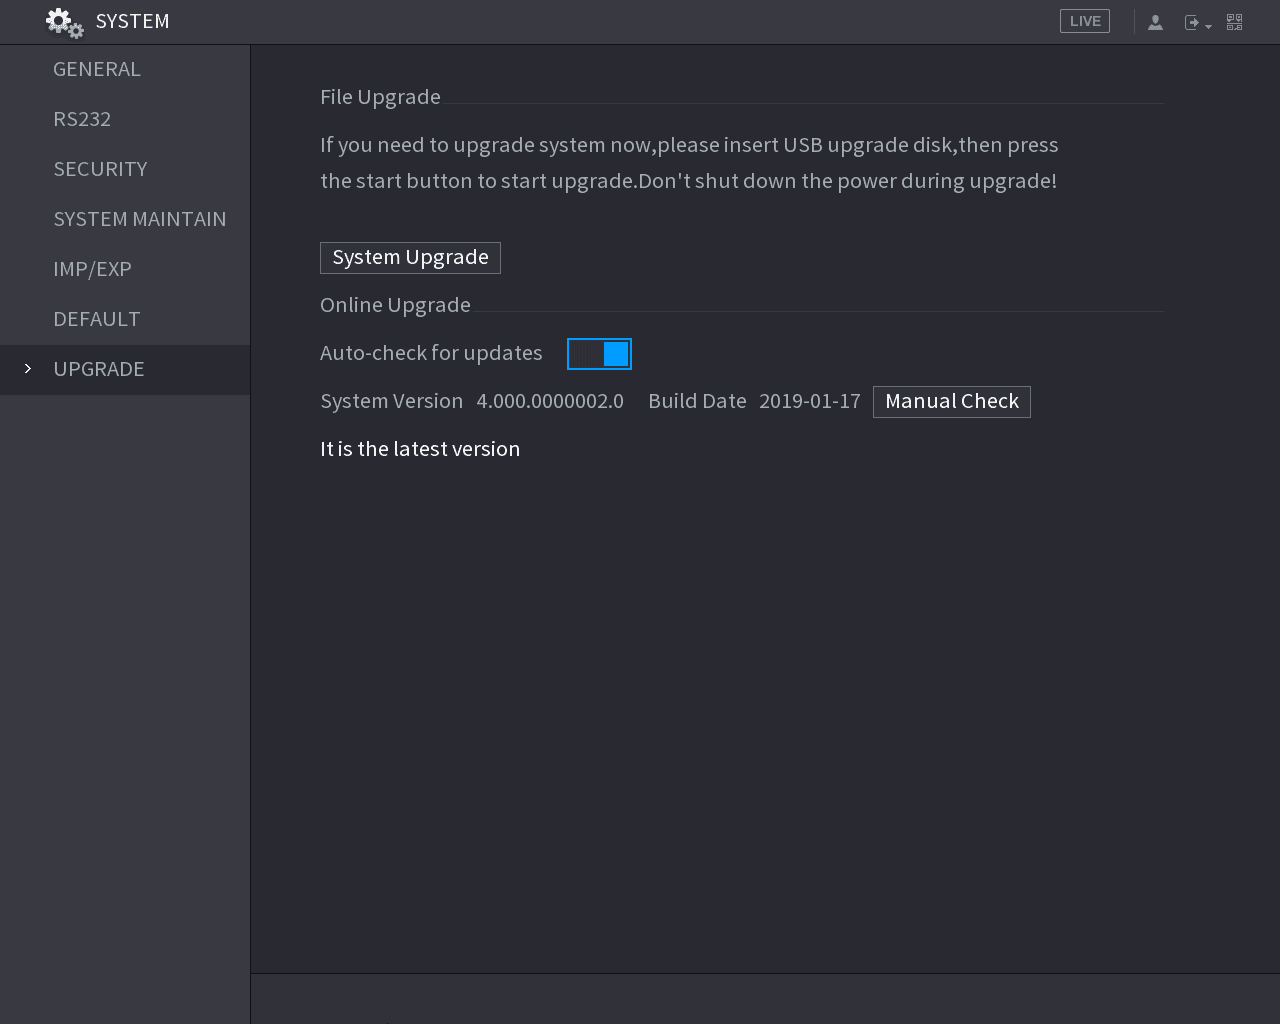
- If the "It is the latest version" text is displayed, you do not need to upgrade.
- If the text indicating there is a new version, please go to step 3. See Figure 5-269.
Storage Management
Configure storage resources on the Sapphire CVI DVR, including basic settings, record and snapshot schedules, HDD manager, advance HDD groups, quota, HDD detecting, record estimate, and FTP storage.
Viewing Information
View the CVI DVR information such as version details, logs, events, network load, online users, HDD, channel, data stream, device status, and PoC, and log out the device.