 LTS Connect -ohjekeskus
Live View
How to start live view, use digital zoom and live view strategy, detect targets, configure live view settings and layout, set up auto-switch of cameras, enable channel-zero encoding, and operate an auxiliary monitor on the Turbo HD DVR GUI 4.0.
Live view shows you the video image getting from each camera in real time.
Start Live View
Click  on the main menu bar to enter the live view.
- You can select a window and double click a camera from the list to play the video from the camera in the selected window.
- Use the toolbar at the playing window bottom to realize the capture, instant playback, audio on/off, digital zoom, live view strategy, show information and start/stop recording, etc.
Digital Zoom
Digital Zoom is for zooming in the live image. You can zoom in the image to different proportions (1 to 16X).
Enter the digital zoom interface
In the live view mode, click  from the toolbar to enter the digital zoom interface.
Zoom in or out
You can move the sliding bar or scroll the mouse wheel to zoom in/out the image to different proportions (1 to 16X).
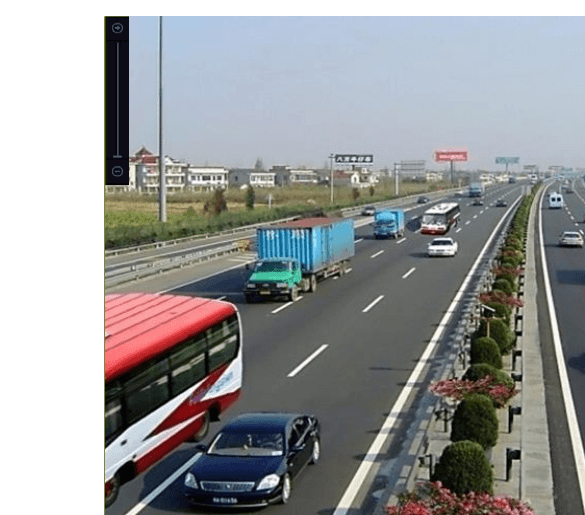
Figure 5-1 Digital Zoom
Live View Strategy
In the live view mode, click  to enter the digital zoom operation interface in full screen mode.
Select the live view strategy to Real-time, Balanced or Fluency.
Target Detection
In live view mode, the target detection function can be used to detect the human motion/face/vehicle/human body during the last 5 seconds and the following 10 seconds.
Enter the target detection interface
In the live view mode, click Target Detection tab to enter the target detection interface.
Select detection types
Check the checkbox of the icons to select different detection types: motion detection ( ), vehicle detection (
 ), face detection (
 ) and human body detection (
 ).
).
Select analysis mode
You can select the historical analysis ( ) or the real-time analysis (
 ) to obtain the results.
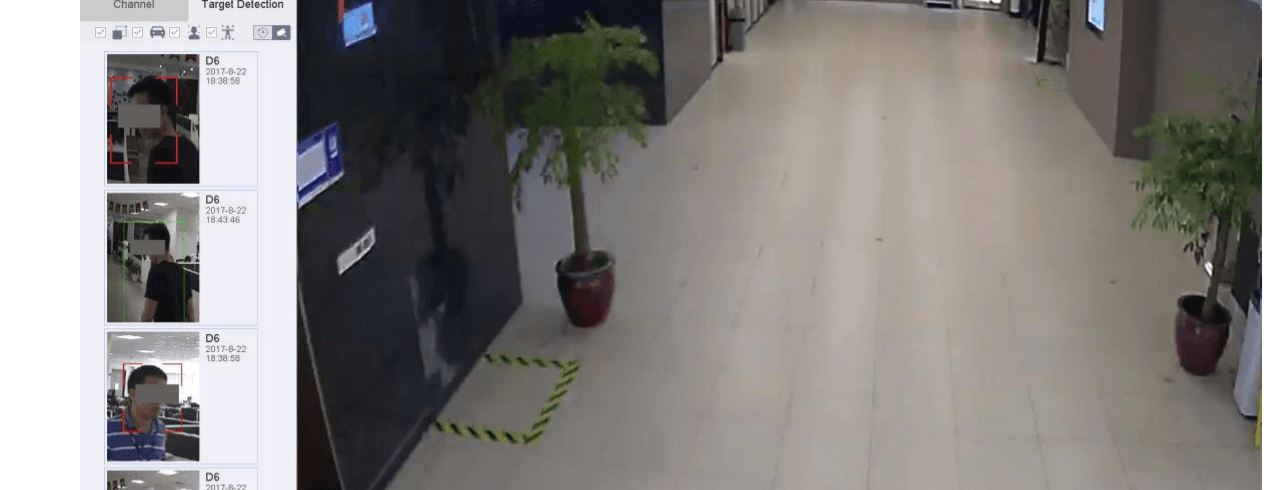
Figure 5-2 Target Detection
Result: The smart analysis results of the detection are displayed in the list. Optionally, click a result in list to play the related video.
Configure Live View Settings
Live View settings can be customized according to different needs. You can configure the output interface, dwell time for screen to be shown, mute or turning on the audio, the screen number for each channel, etc.
Open Live View General settings
Go to System > Live View > General.
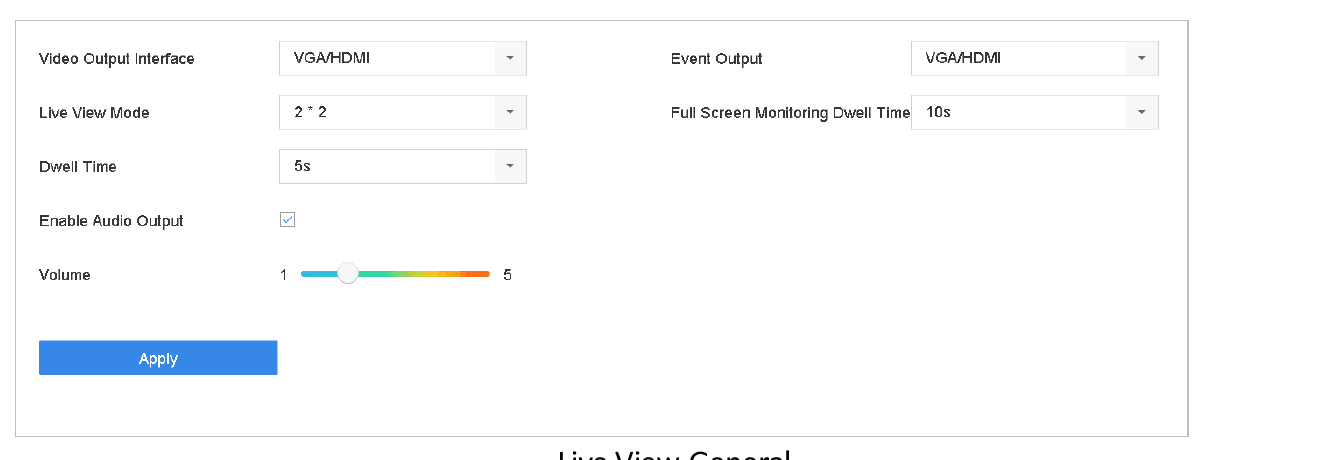
Figure 5-3 Live View-General
Configure the live view parameters
- Video Output Interface: Select the video output to configure.
- Live View Mode: Select the display mode for live view, e.g., 2*2, 1*5, etc.
- Dwell Time: The time in seconds to dwell between switching of cameras when enabling auto-switch in Live View.
- Enable Audio Output: Enable/disable audio output for the selected video output.
- Volume: Adjust the volume of live view, playback and two-way audio for the selected output interface.
- Event Output: Select the output to show event video.
- Full Screen Monitoring Dwell Time: Set the time in seconds to show alarm event screen.
Save
Click OK to save the settings.
Configure Live View Layout
Open Live View View settings
Go to System > Live View > View.
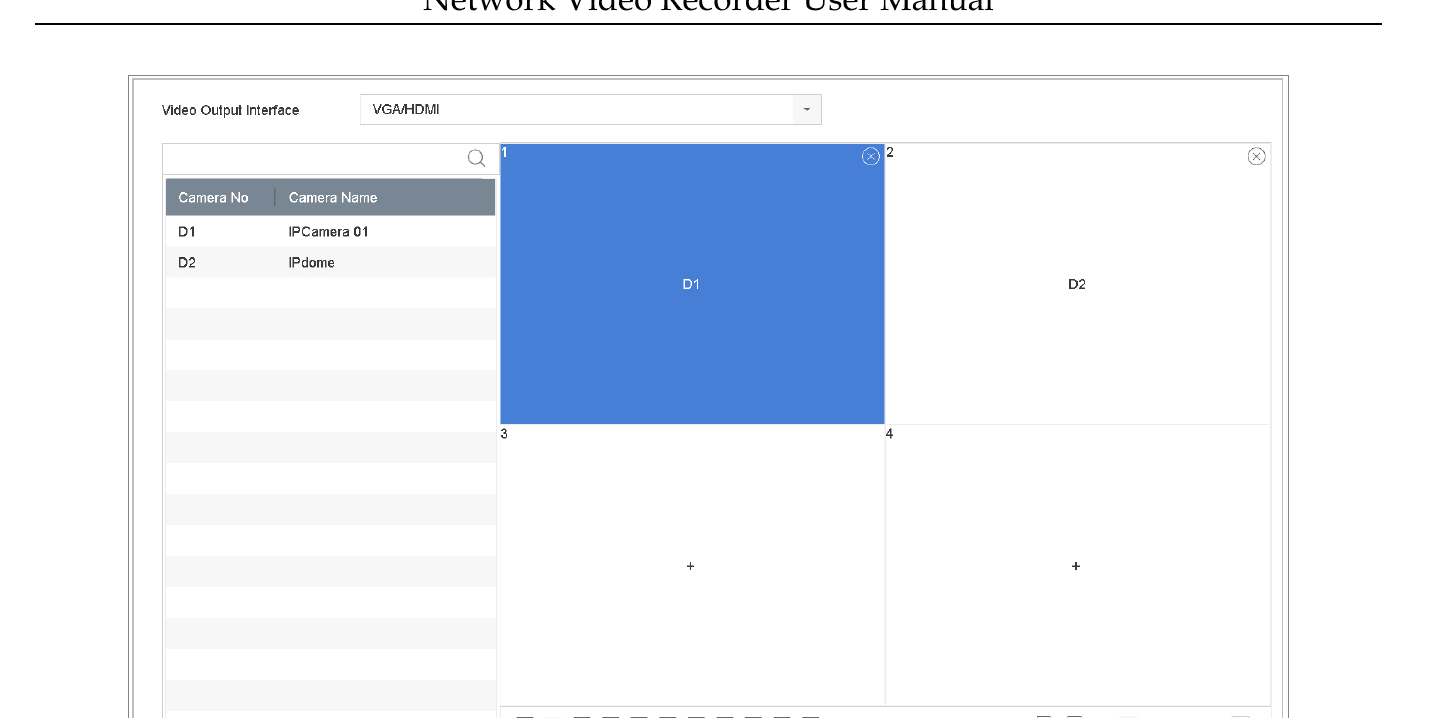
Figure 5-4 Live View
Select video output interface
Select the video output interface, e.g., HDMI/VGA or channel-zero.
Select window division mode
Select a window division mode from the toolbar.
Assign cameras to windows
Select a division window, and double-click on the camera from the list to set the camera to the window.
You can enter the number in the text field to quickly search the camera from the list.
You can also click-and-drag the camera to the desired window on the live view interface to set the camera order.
Related Operation:
Start or stop live view for all channels
- Click
 button to start live view for all the channels.
 - Click
 to stop all the live view.
Click Apply to save the settings.
Configure Auto-Switch of Cameras
You can set the auto-switch of cameras to play in different display modes.
Open Live View General settings
Go to System > Live View > General.
Set the interface and mode
Set the video output interface, live view mode and dwell time.
- Video Output Interface: Select the video output interface.
- Live View Mode: Select the display mode for live view, e.g., 2*2, 1*5, etc.
- Dwell Time: The time in seconds to dwell between switching of cameras when enabling auto-switch. The range is from 5s to 300s.
Set the view layout
Go to View to set the view layout.
Save
Click OK to save the settings.
Configure Channel-zero Encoding
Purpose: You can enable the channel-zero encoding when you need to get a remote view of many channels in real time from web browser or CMS (Client Management System) software, in order to decrease the bandwidth requirement without affecting the image quality.
Go to General settings
Go to System > Live View > General.
Select Channel-Zero output
Select the video output interface to Channel-Zero.
Open Channel-Zero settings
Go to System > Live View > Channel-Zero.
Enable channel-zero
Check the checkbox to enable the channel-zero.
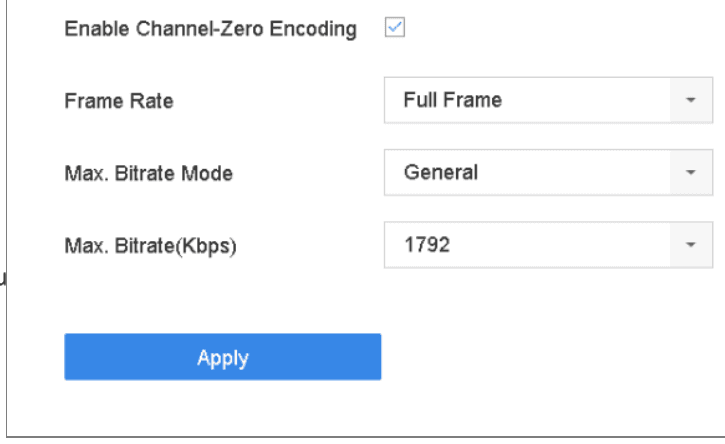
Figure 5-5 Live View-Channel-Zero Encoding
Configure encoding parameters
Configure the Frame Rate, Max. Bitrate Mode and Max. Bitrate(Kbps). The higher frame rate and bitrate settings result in the higher requirement of bandwidth.
Apply
Click Apply.
Result: You can view all of the channels in one screen using the CMS or web browser.
Using an Auxiliary Monitor
Certain features of the Live View are also available while in an Aux monitor. These features include:
- Single Screen: Switch to a full screen display of the selected camera. Camera can be selected from a dropdown list.
- Multi-screen: Switch between different display layout options. Layout options can be selected from a dropdown list.
- Next Screen: When displaying less than the maximum number of cameras in Live View, clicking this feature will switch to the next set of displays.
- Playback: Enter into Playback mode.
- PTZ Control: Enter PTZ Control mode.
- Main Monitor: Enter Main operation mode.
In the live view mode of the main output monitor, the menu operation is not available while Aux output mode is enabled.
Camera Settings
Configure OSD overlays, privacy masks, video parameters, day/night switch, and advanced camera parameters such as exposure, backlight, and image enhancement on the Turbo HD DVR GUI 4.0.
PTZ Control
Complete guide to PTZ Control for the Turbo HD DVR GUI 4.0, covering the PTZ Control Wizard, configuring PTZ parameters, presets, patrols, patterns, linear scan limits, one-touch park, and auxiliary functions.