 Centre d'aide LTS Connect
Storage Management
Configure storage resources on the Sapphire CVI DVR, including basic settings, record and snapshot schedules, HDD manager, advance HDD groups, quota, HDD detecting, record estimate, and FTP storage.
Storage management function manages the stored resources such as recorded video files and storage space. The function aims at providing easier operation and improving the storage efficiency.
Configuring Basic Settings
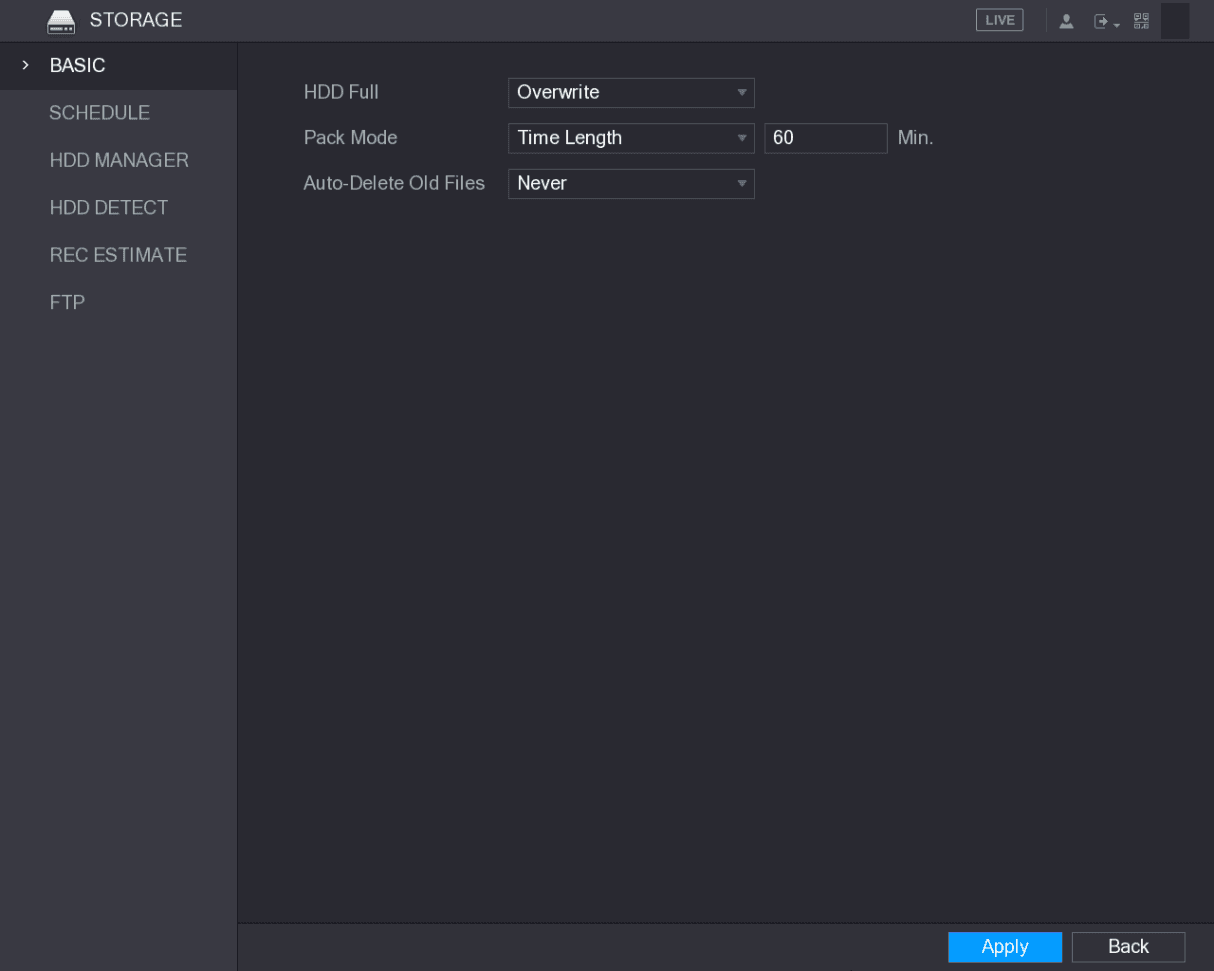
Configure the basic parameters
Configure the settings for the basic settings parameters.
| Parameter | Description |
|---|---|
| HDD Full | Configure the settings for the situation all the read/write discs are full, and there is no more free disc. - Select Stop Record to stop recording. - Select Overwrite to overwrite the recorded video files always from the earliest time. |
| Pack Mode | Configure the time length and file length for each recorded video. |
| Auto-Delete Old Files | Configure whether to delete the old files and if yes, configure the days. |
Apply the settings
Click Apply to complete the settings.
Configuring the Recording and Snapshot Schedule
The system starts recording and taking snapshot according to the configured schedule. For details, see 5.1.4.9 Configuring Recorded Video Storage Schedule and 5.1.4.10 Configuring Snapshot Storage Schedule.
Configuring HDD Manager
You can view the HDD information, format HDD, and configure the HDD type through HDD manager.
Open the HDD MANAGER interface
Select Main Menu > STORAGE > HDD MANAGER.
The HDD MANAGER interface is displayed.
In the table, you can view the information of current HDD, such as device name, HDD type, status, total space and free space, and serial number of the HDD port.
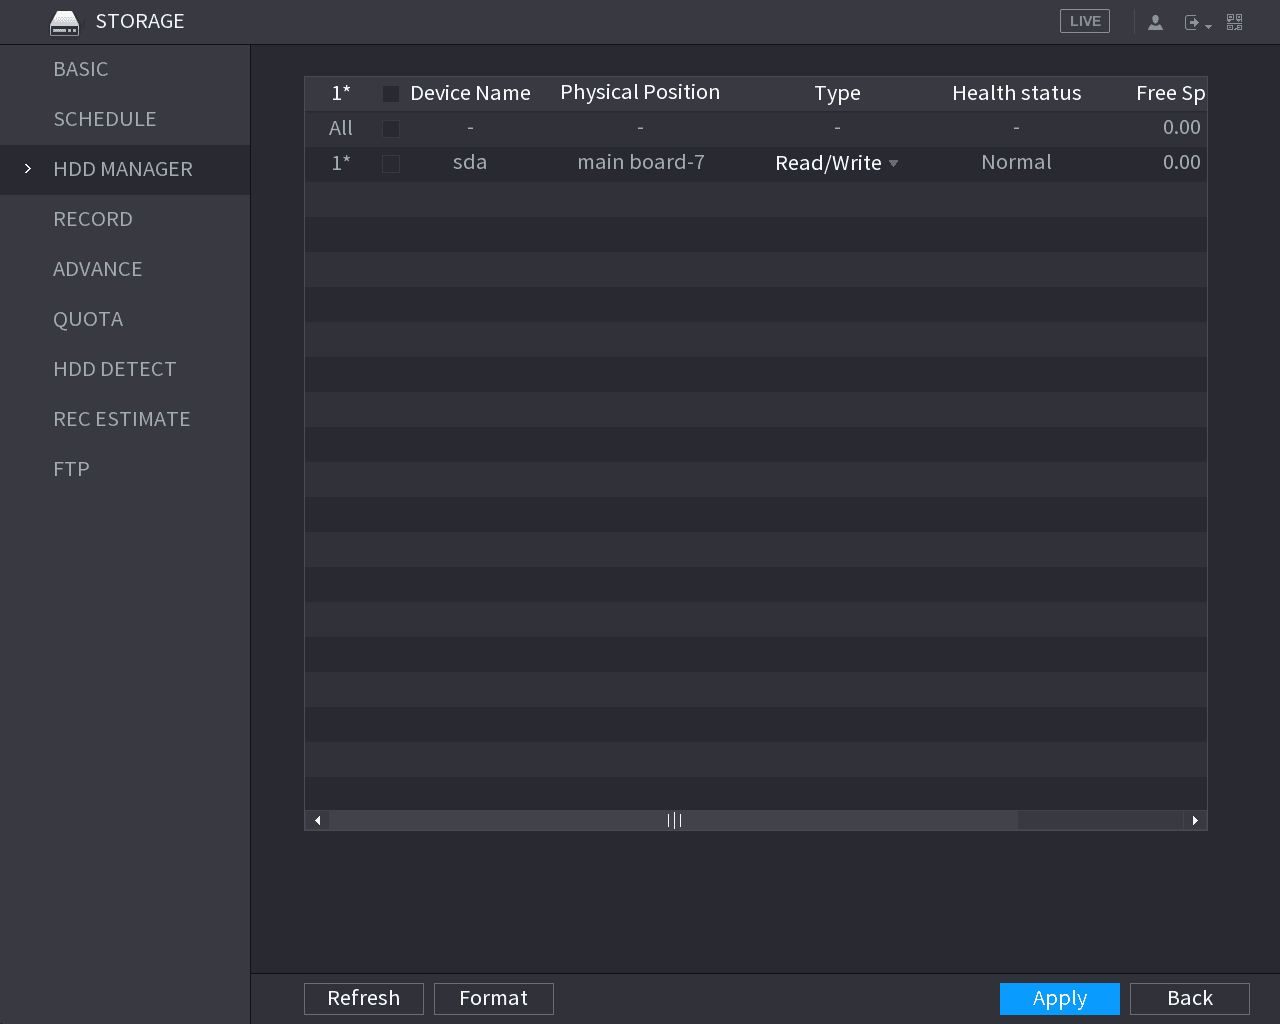
Configure the HDD manager settings
Configuring the settings for the HDD manager.
- HDD type setting: In the Type list, select Read/Write, Read-Only or Redundant, and then click Apply to save the settings.
- HDD format: Select the HDD that you want to format, click Format, in the pop-up message, click OK to start formatting, and then following the onscreen message to complete formatting.
Configuring Record
Record type includes auto and manual record. You can configure record type of main stream and sub stream. See 5.7 Configuring Record Settings.
Configuring Advance Settings
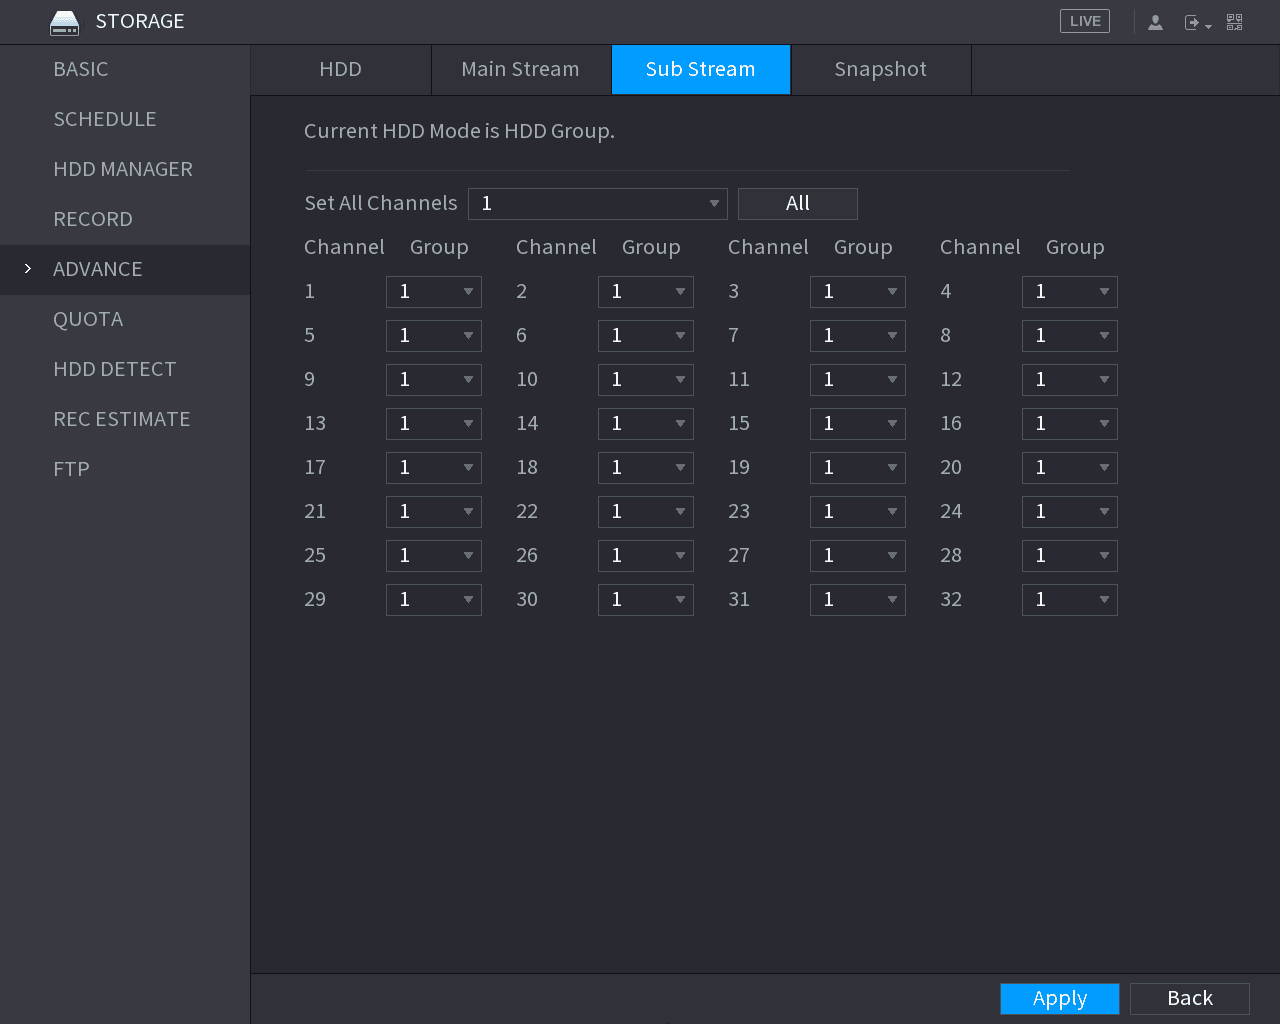
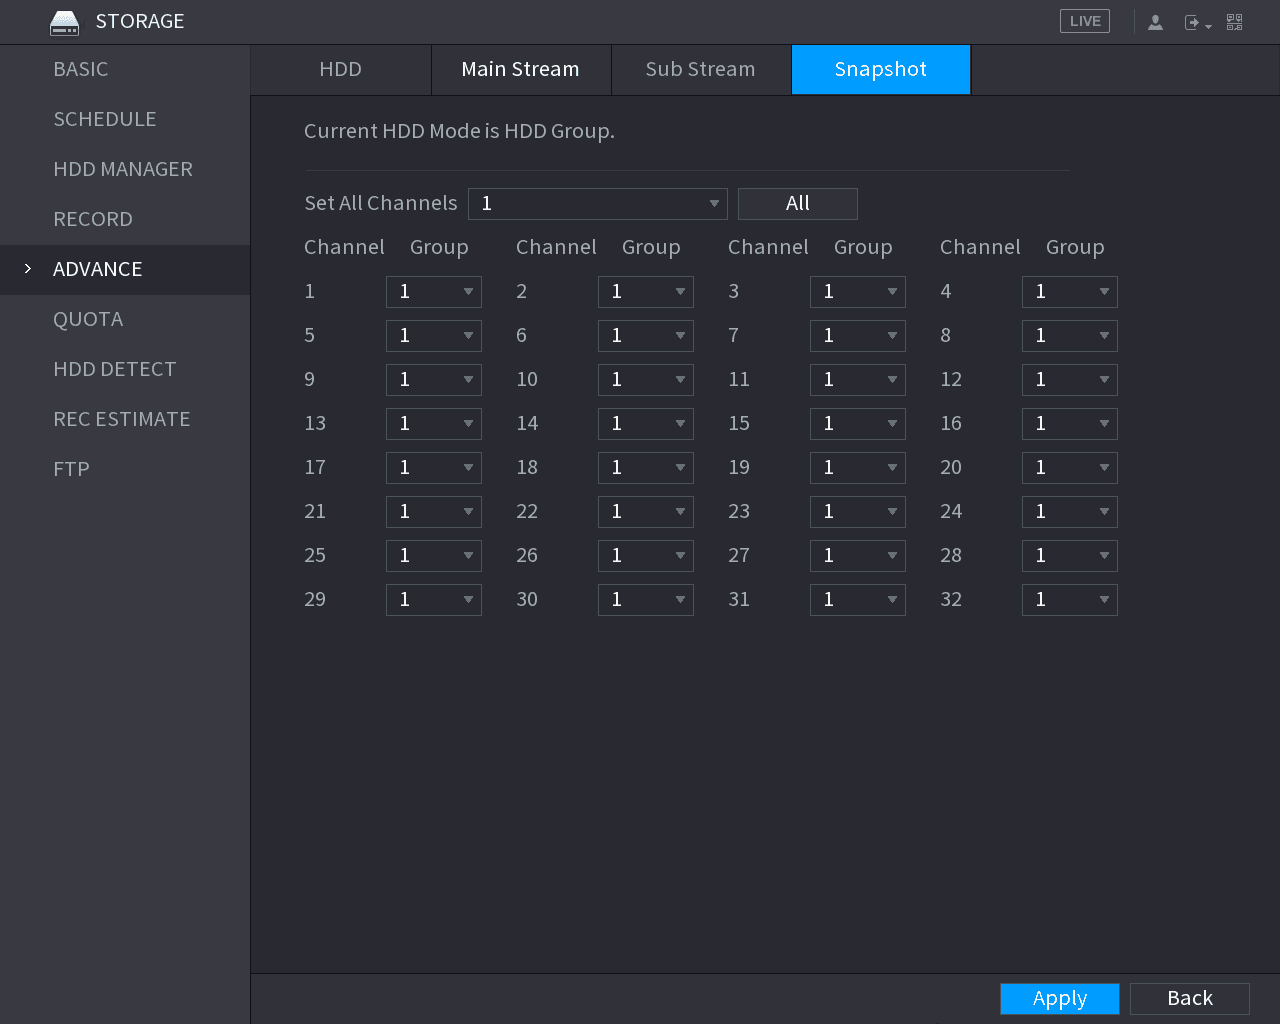
Create HDD group, and save main stream, sub stream and snapshot of designated channels to the HDD group.
- If the interface displays that "Current HDD Mode is Quota Group", click "Change to HDD Group Mode", and then configure HDD group.
- You can enable either HDD Group Mode or Quota Group. The system prompts to reboot the device each time when you switch the mode.
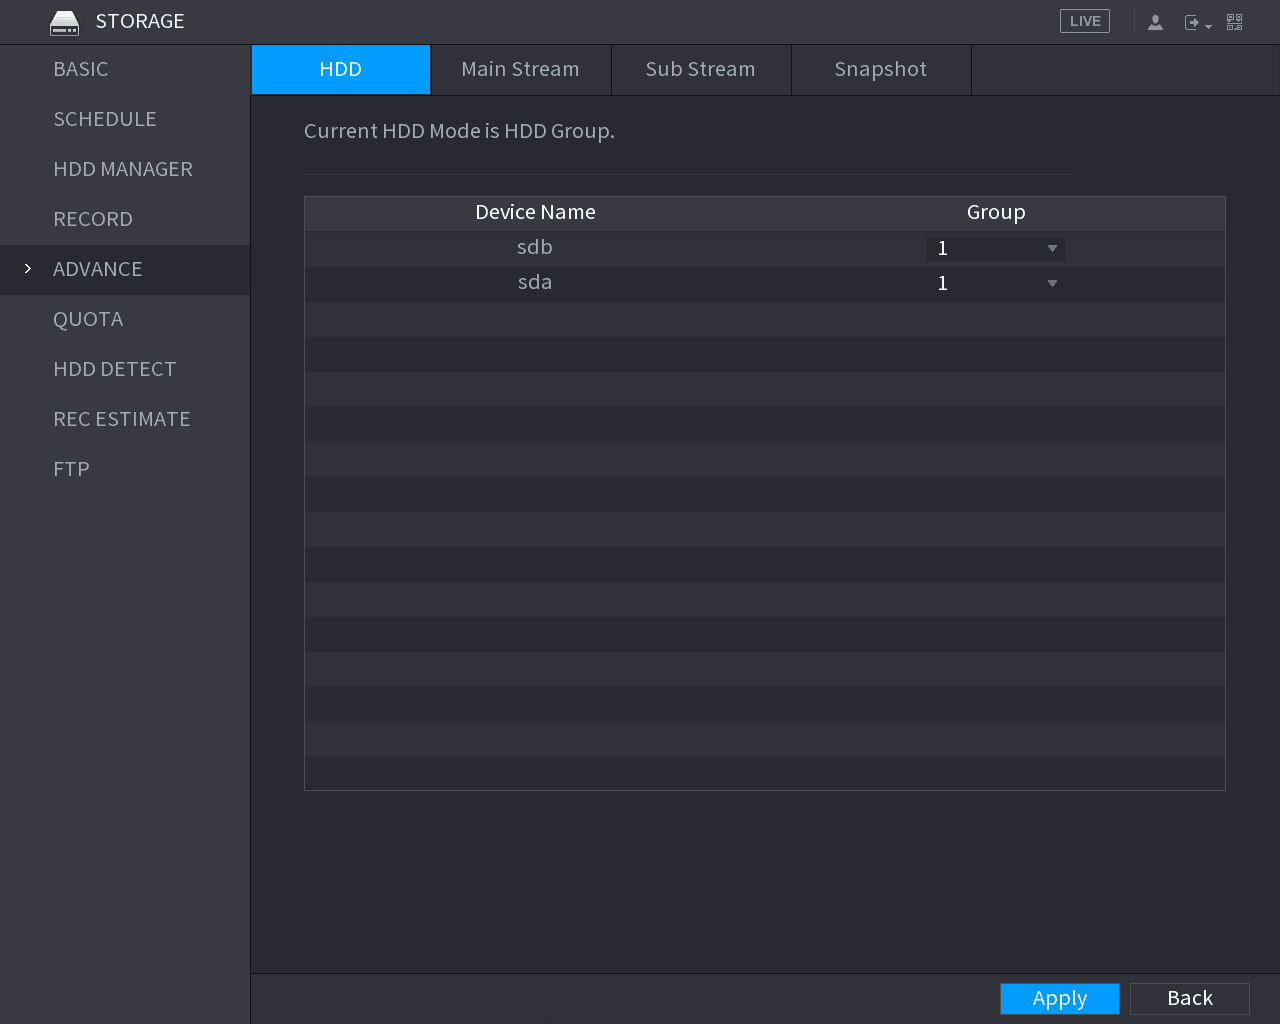
Assign HDD groups
Select group for each HDD, and then click Apply to complete the settings.
After configuring HDD group, click Main Stream, Sub Stream and Snapshot tabs respectively, to configure the saving of main stream, sub stream and snapshot information of different channels to different HDD groups.
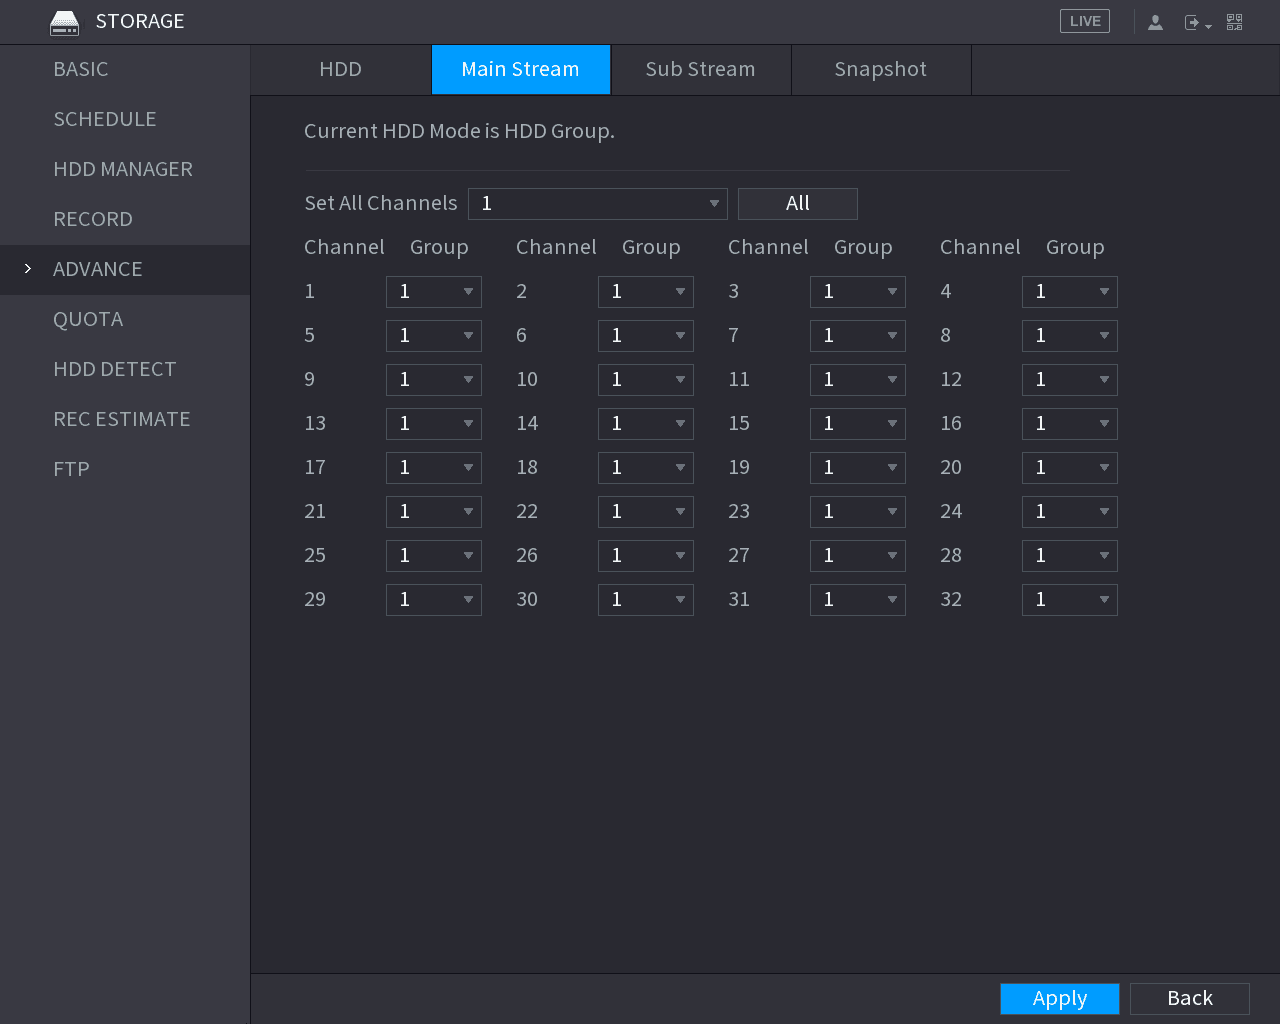
Apply the settings
Click Apply to complete the settings.
Configuring Quota
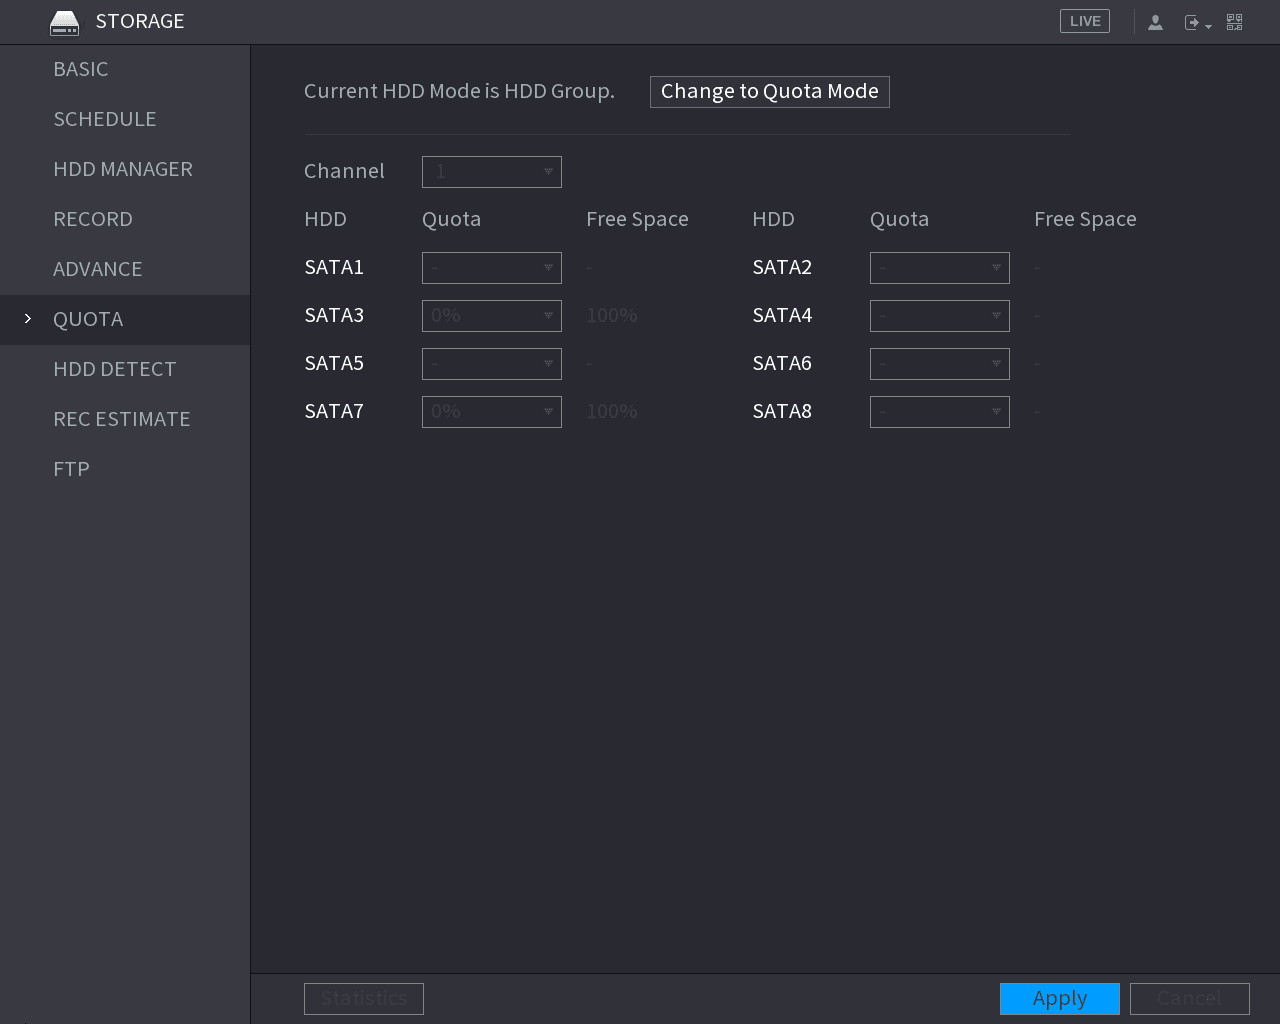
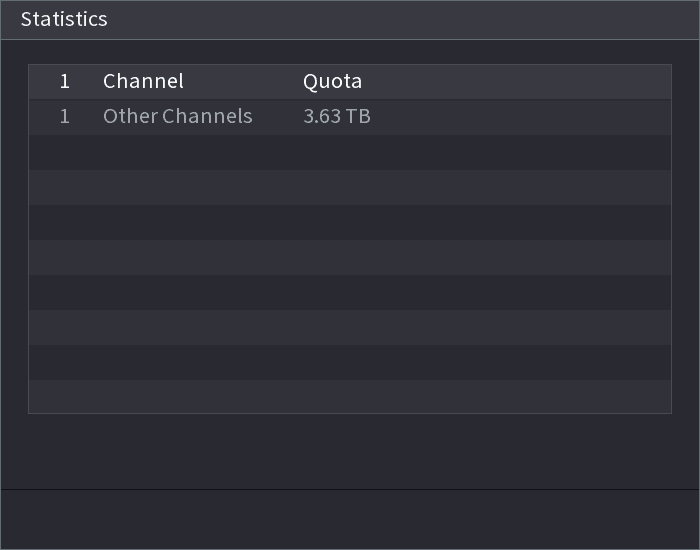
By configuring quota, allocate fixed storage capacity to each channel, and distribute the storage space of each channel reasonably.
- If the interface displays that "Current HDD Mode is HDD Group", click "Change to Quota Mode", and then configure quota.
- You can enable either HDD Group Mode or Quota Group. The system prompts to reboot the device each time when you switch the mode.
Configure the quota
Select the channels you want to configure, and select quota from the drop-down list of corresponding HDD.
Apply the settings
Click Apply to complete the settings.
Configuring HDD Detecting Settings
Not all models support this function.
HDD detecting function detects the current status of HDD to let you know the HDD performance and replace the defective HDD.
Detecting HDD
You can detect HDD by key area detect and global detect.
- Key area detect: Detect the files saved in HDD. The detected bad track can be repaired by formatting. If there are no files in HDD, the system cannot detect the bad track.
- Global detect: Detect the whole HDD through Windows, which takes time and might affect the HDD that is recording the video.
Open the Detect interface
Select Main Menu > STORAGE > HDD DETECT > Detect.
The Detect interface is displayed.
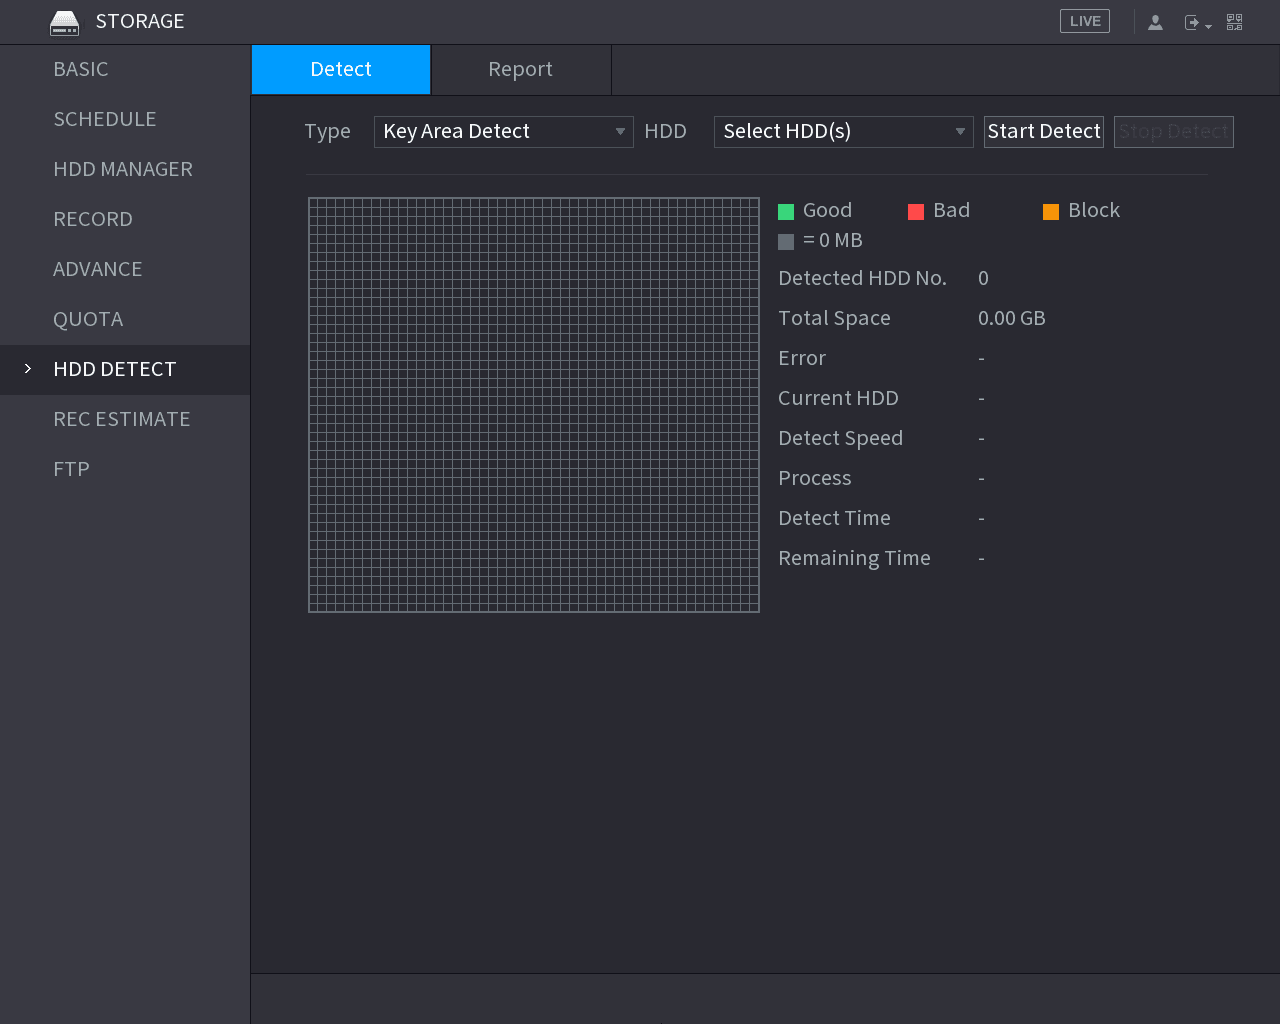
Select the detect type and HDD
In the Type list, select Key Area Detect or Global Detect; and in the HDD list, select the HDD that you want to detect.
Start detecting
Click Start Detect.
The system starts detecting the HDD. After detecting is completed, the results are displayed.
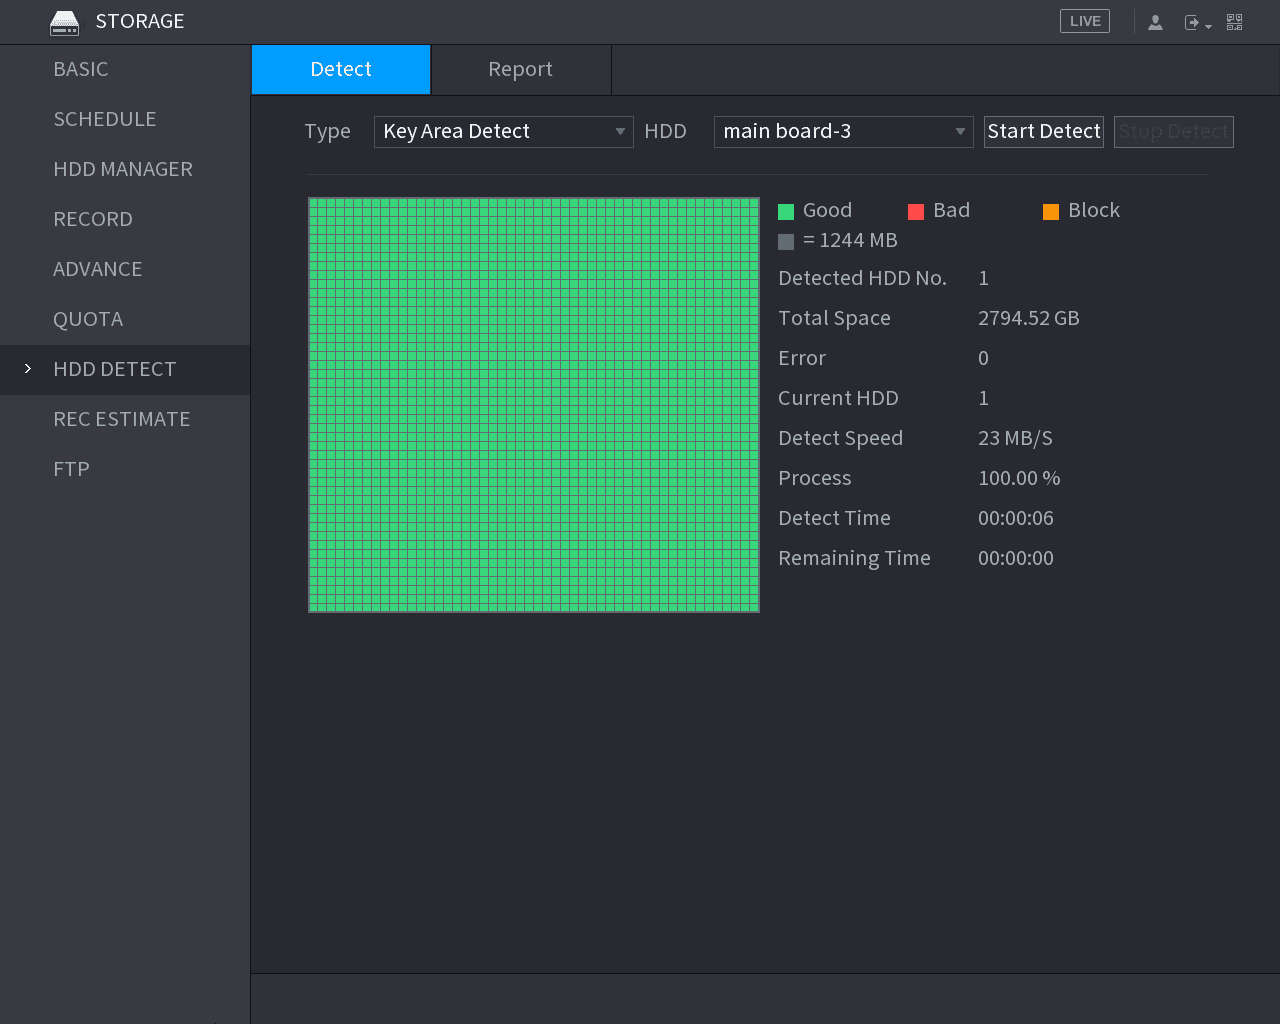
During detecting, click Pause to pause detecting, click Continue to restart detecting, and click Stop Detect to stop detecting.
View Detecting Results
After the detecting is completed, you can view the detecting reports to find out the problem and replace the defective HDD to avoid data loss.
Open the Report interface
Select Main Menu > STORAGE > HDD DETECT > Report.
The Report interface is displayed.
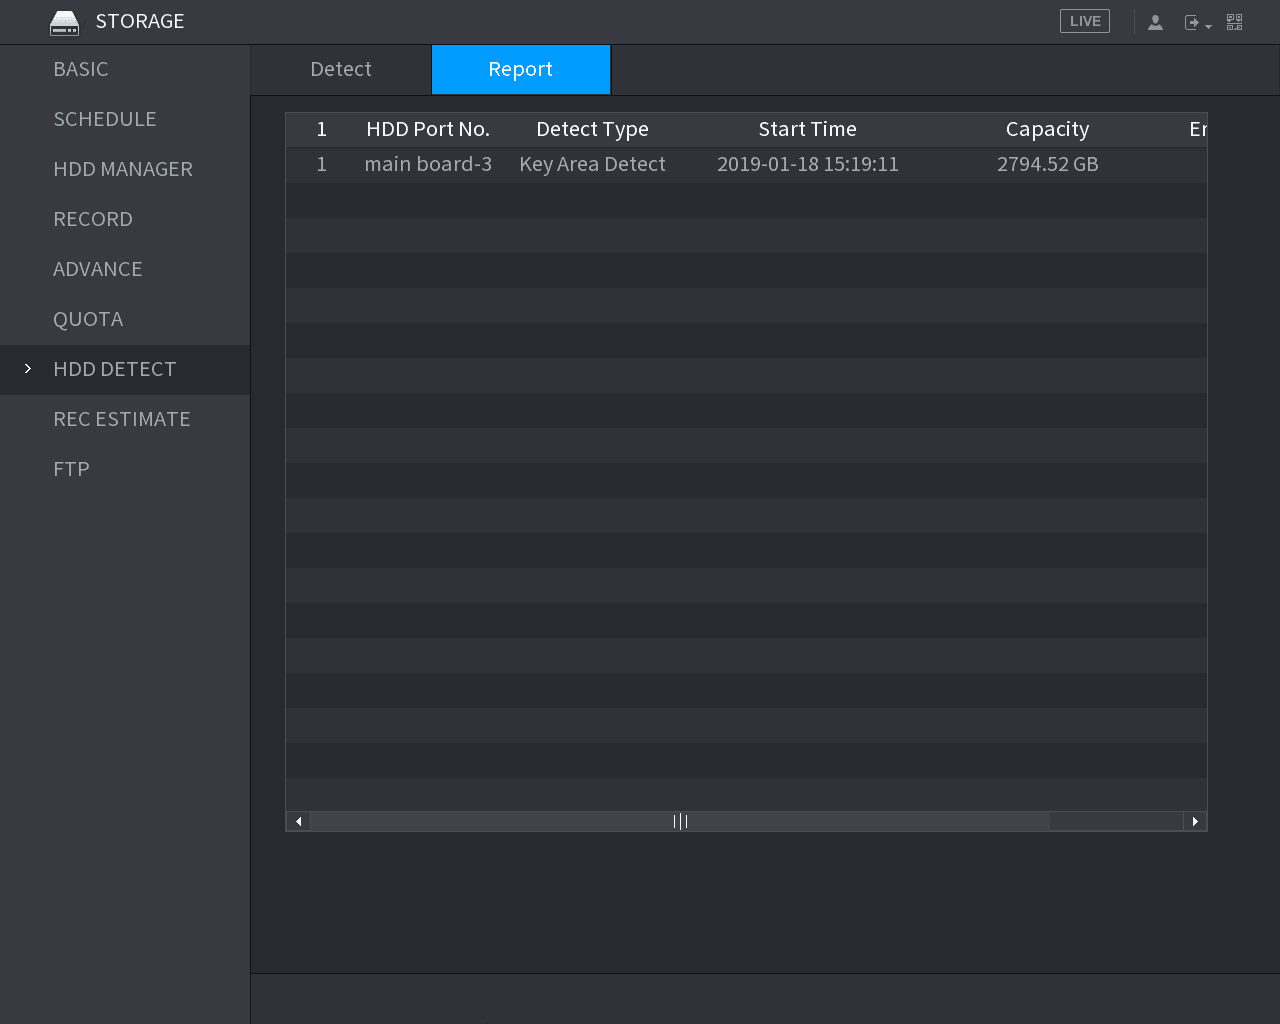
Open the detection details
Click  .
.
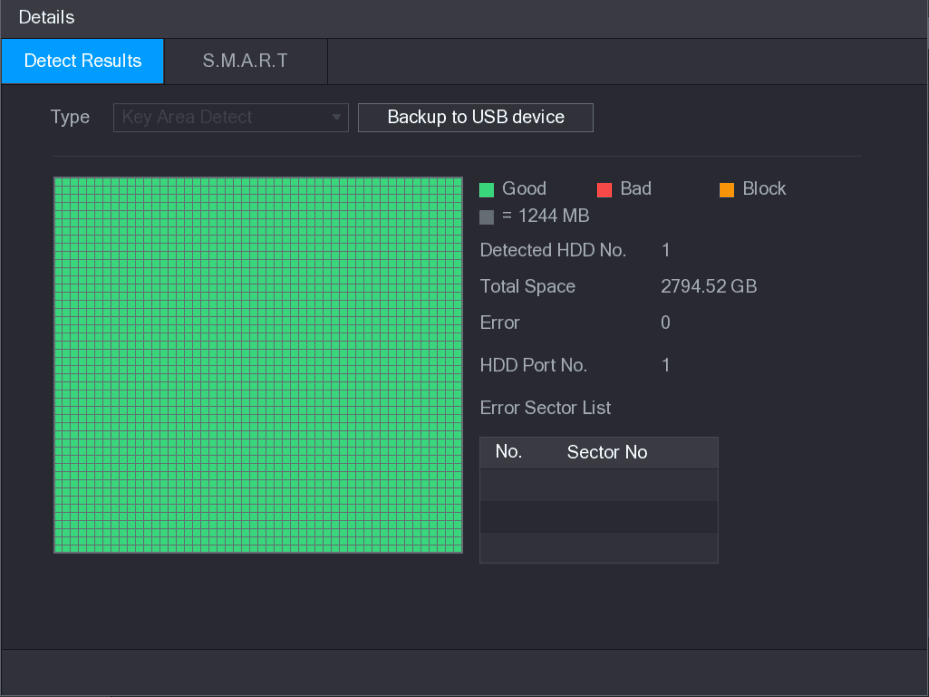
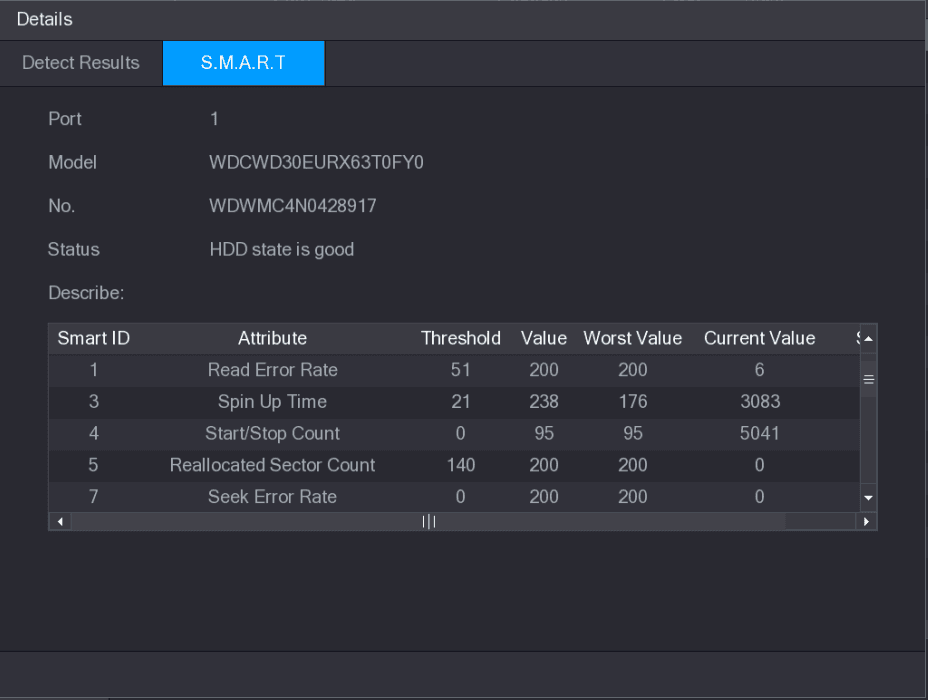
The Details interface is displayed. You can view detecting results and S.M.A.R.T reports.
Configuring Record Estimate
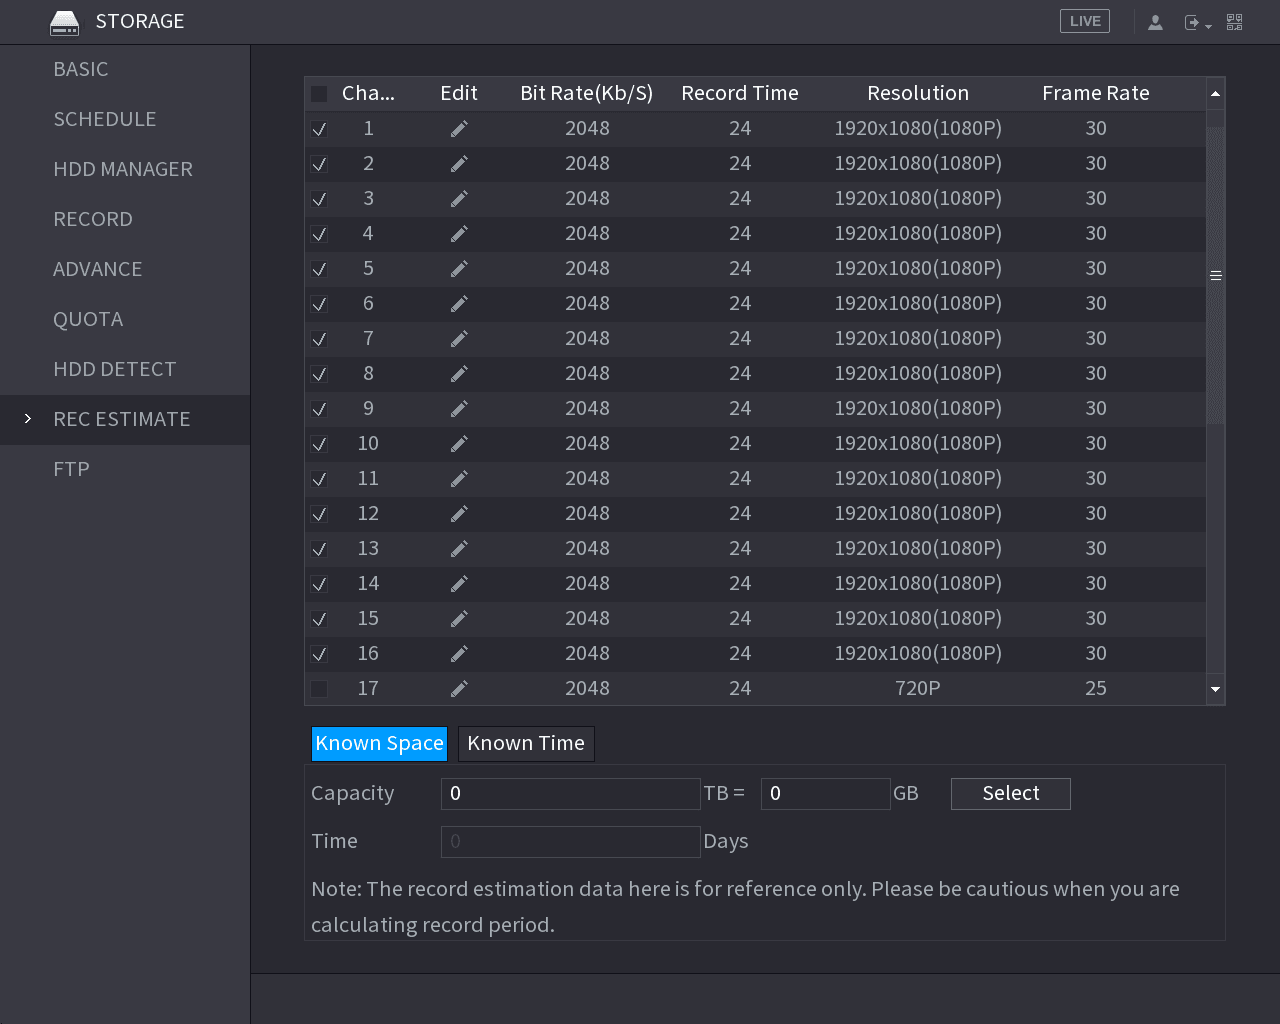
Record estimate function can calculate how long you can record video according to the HDD capacity, and calculate the required HDD capacity according to the record period.
Open the REC ESTIMATE interface
Select Main Menu > STORAGE > REC ESTIMATE.
The REC ESTIMATE interface is displayed.
Edit the channel parameters
Click the edit (pencil) icon.
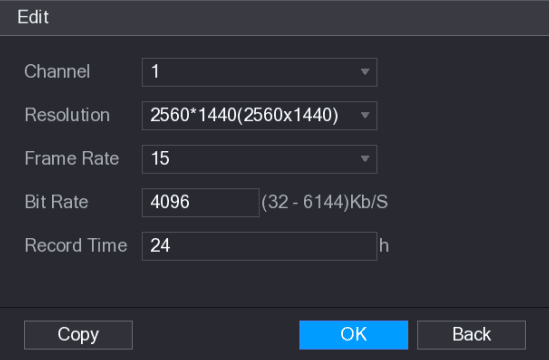
The Edit dialog box is displayed.
You can configure the resolution, frame rate, bit rate and record time for the selected channel.
Save the settings
Click OK to save the settings.
Then the system will calculate the time period that can be used for storage according to the channels settings and HDD capacity.
Click Copy to copy the settings to other channels.
Calculating Recording Time
Open the Known Space tab
On the REC ESTIMATE interface, click the Known Space tab.
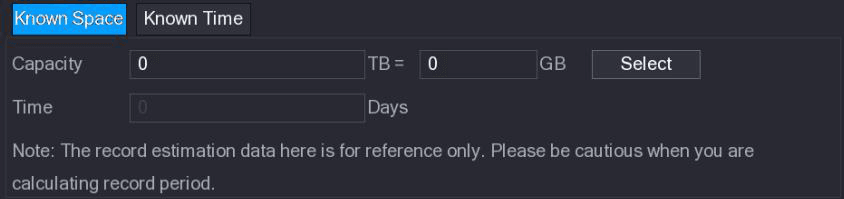
The Known Space interface is displayed.
Select the HDD
Click Select.
The Select HDD(s) interface is displayed.
Select the check box of the HDD that you want to calculate.
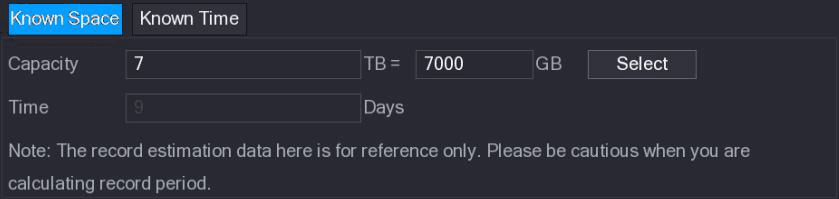
Calculating HDD Capacity for Storage
Open the Known Time tab
On the REC ESTIMATE interface, click the Known Time tab.
The Known Time interface is displayed.
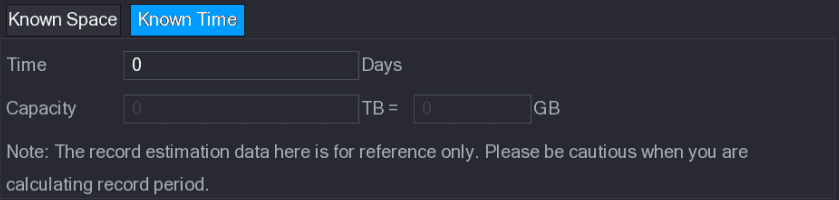
Enter the record period
In the Time box, enter the time period that you want to record.
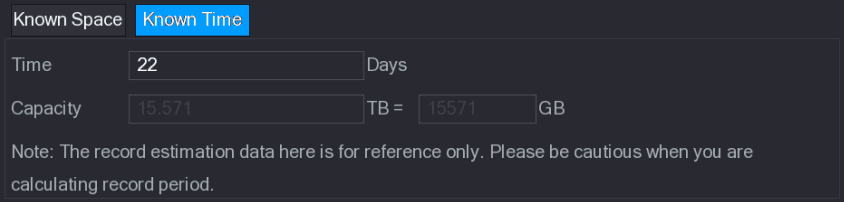
Configuring FTP Storage Settings
You can store and view the recorded videos and snapshots on the FTP server.
Preparation for Configuration
Purchase or download a FTP server and install it on your PC.
For the created FTP user, you need to set the write permission; otherwise the upload of recorded videos and snapshots will be failed.
Configuration Steps
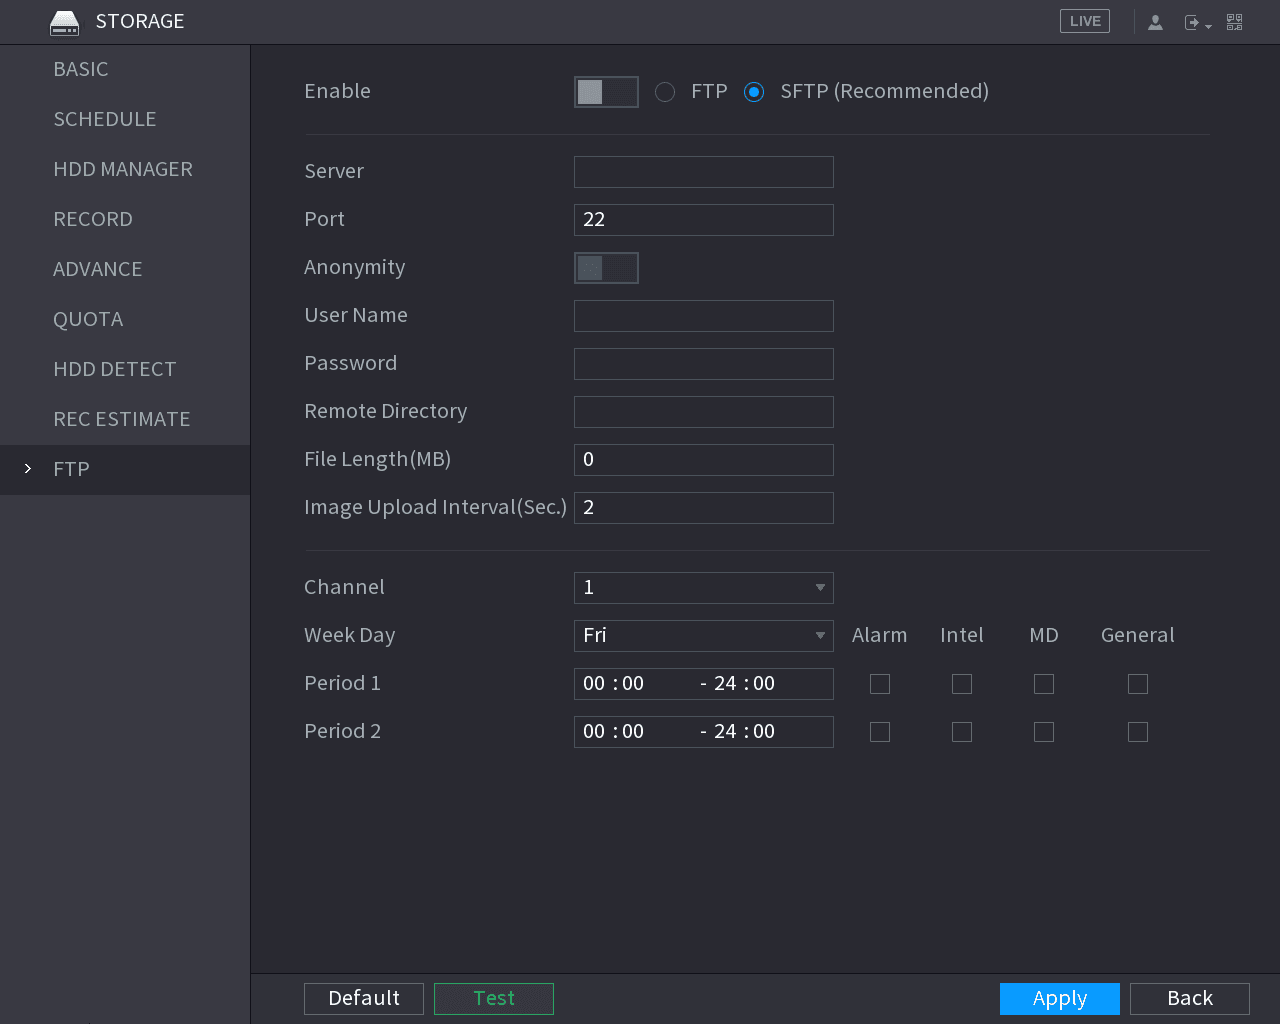
Configure the FTP parameters
Configure the settings for the FTP settings parameters.
| Parameter | Description |
|---|---|
| Enable | Enable the FTP upload function. |
| FTP type | Select FTP type. - FTP: Plaintext transmission. - SFTP: Encrypted transmission (recommended). |
| Server | IP address of FTP server. |
| Port | - FTP: The default is 21. - SFTP: The default is 22. |
| Anonymity | Enable the anonymity function, and then you can login anonymously without entering the user name and password. |
| User Name | Enter the user name and password to login the FTP server. |
| Password | Enter the user name and password to login the FTP server. |
| Remote Directory | Create folder on FTP server. - If you do not enter the name of remote directory, system automatically creates the folders according to the IP and time. - If you enter the name of remote directory, the system creates the folder with the entered name under the FTP root directory first, and then automatically creates the folders according to the IP and time. |
| File Length(M) | Enter the length of the uploaded recorded video. - If the entered length is less than the recorded video length, only a section of the recorded video can be uploaded. - If the entered length is more than the recorded video length, the whole recorded video can be uploaded. - If the entered length is 0, the whole recorded video will be uploaded. |
| Image Upload Interval (Sec.) | - If this interval is longer than snapshot interval, the system takes the recent snapshot to upload. For example, the interval is 5 seconds, and snapshot interval is 2 seconds per snapshot, the system uploads the recent snapshot every 5 seconds. - If this interval is shorter than snapshot interval, the system uploads the snapshot per the snapshot interval. For example, the interval is 5 seconds, and snapshot interval is 10 seconds per snapshot, the system uploads the snapshot every 10 seconds. - To configure the snapshot interval, select Main Menu > CAMERA > ENCODE > Snapshot. |
| Channel | Select the channel that you want to apply the FTP settings. |
| Week Day | Select the week day and set the time period that you want to upload the recorded files. You can set two periods for each week day. |
| Period 1, Period 2 | Select the week day and set the time period that you want to upload the recorded files. You can set two periods for each week day. |
| Record type | Select the record type (Alarm, Intel, MD, and General) that you want to upload. The selected record type will be uploaded during the configured time period. |
Audio Management
Manage audio files and configure the playing schedule on the Sapphire Series CVI DVR so audio is activated when an alarm event occurs.
System Settings
Configure the CVI DVR system settings, including general and holiday settings, RS232, security, maintenance, export/import, restoring defaults, and upgrading.