 Centar za pomoć LTS Connect
POS Configuration
Connect the DVR to a POS machine or server to overlay transaction text on live view and playback, and configure POS event alarms.
The device can be connected with the POS machine/server, and receive the transaction message for overlay on the image during the live view or playback, as well as trigger the POS event alarm.
This chapter is only applicable to DS-7300/8100HQHI-K, DS-7300/8100/9000HUHI-K, and DeepinMind series DVR.
Configure POS Settings
Configure POS Connection
Go to POS Settings
Go to System > POS Settings.
Add a POS device
Click Add to enter the POS adding interface.
Select POS name
Select a POS from the drop-down list.
Enable
Check Enable.

Figure 12-1 POS Settings
The amount of POS devices supported for each device is the half of its channel amount, e.g., 8 POS devices are supported for the DS-9616NI-I8 model.
Select POS protocol
Select the POS protocol to Universal Protocol, EPSON, AVE or NUCLEUS.
When the new protocol is selected, you should reboot the device to activate the new settings.
-
Universal Protocol
Click the Advanced button to expand more settings when selecting the universal protocol. You can set the start line identifier, line break tag and end line tag for the POS overlay characters, and the case-sensitive property of the characters. You can also optionally check the filtering identifier and the XML protocol.
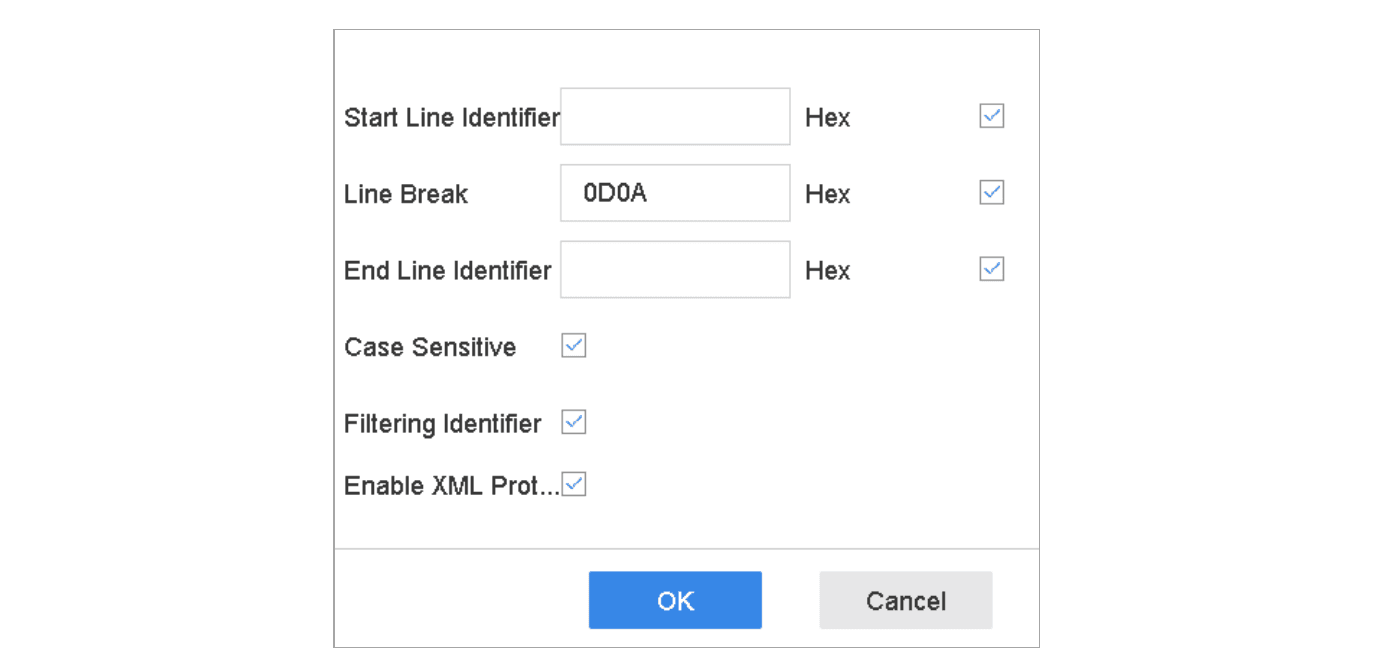
Figure 12-2 Universal Protocol Settings
-
EPSON
The fixed start and end line tag are used for EPSON protocol.
-
AVE
The fixed start and end line tag are used for AVE protocol. And the serial port and virtual serial port connection types are supported.
- Click the Custom to configure the AVE settings.
- Set the rule to VSI-ADD or VNET.
- Set the address bit of the POS message to send.
- Click OK to save the settings.
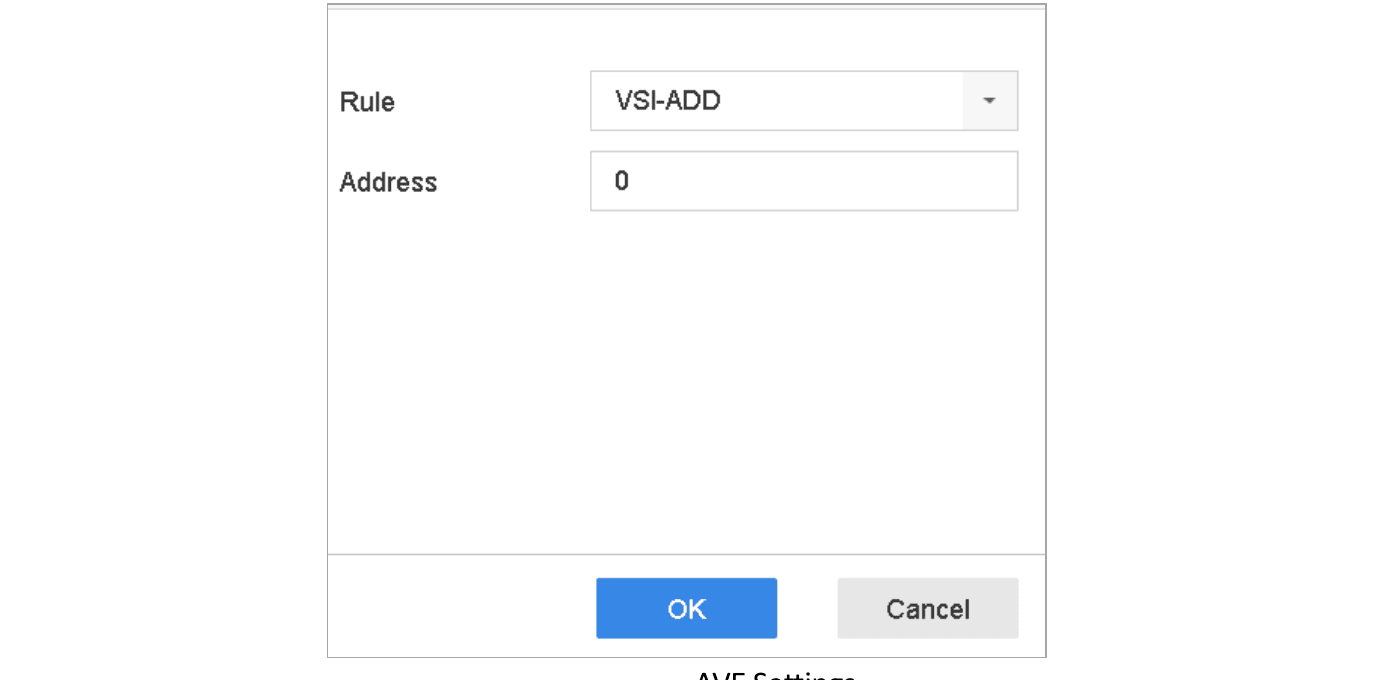
Figure 12-3 AVE Settings
-
NUCLEUS
- Click the Custom to configure the NUCLEUS settings.
- Enter the employee No., shift No., and the terminal No. in the field. The matching message sent from the POS device will be used as the valid POS data.
The NUCLEUS protocol must be used in the RS-232 connection communication.
Select connection mode
Select the connection mode to TCP Reception, UDP Reception, Multicast, RS-232, USB-to-RS-232 or Sniff, and click Parameters to configure the parameters for each connection mode.
-
TCP Connection
- When using TCP connection, the port must be set from 1 to 65535, and the port for each POS machine must be unique.
- Set the Allowed Remote IP Address of the device sending the POS message.
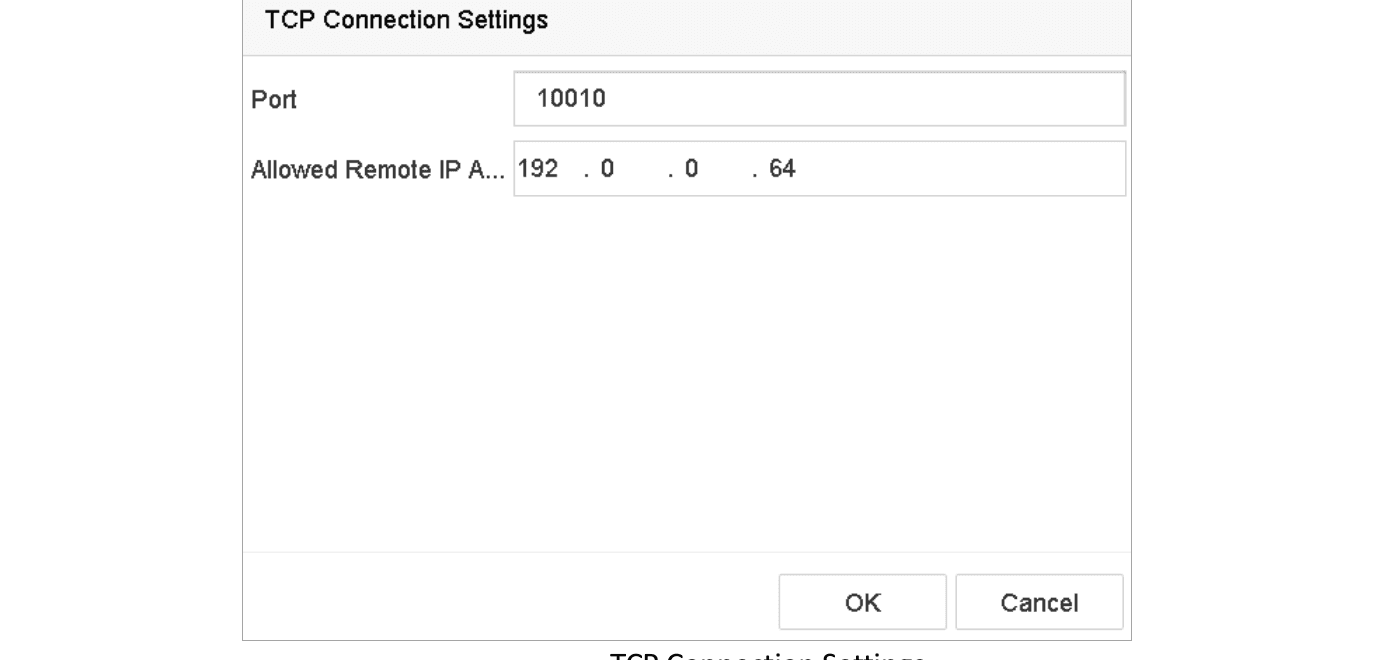
Figure 12-4 TCP Connection Settings
-
UDP Connection
- When using UDP connection, the port must be set from 1 to 65535, and the port for each POS machine must be unique.
- Set the Allowed Remote IP Address of the device sending the POS message.
-
USB-to-RS-232 Connection
Configure the port parameters of USB-to-RS-232 convertor, including the serial number of port, baud rate, data bit, stop bit, parity and flow ctrl.
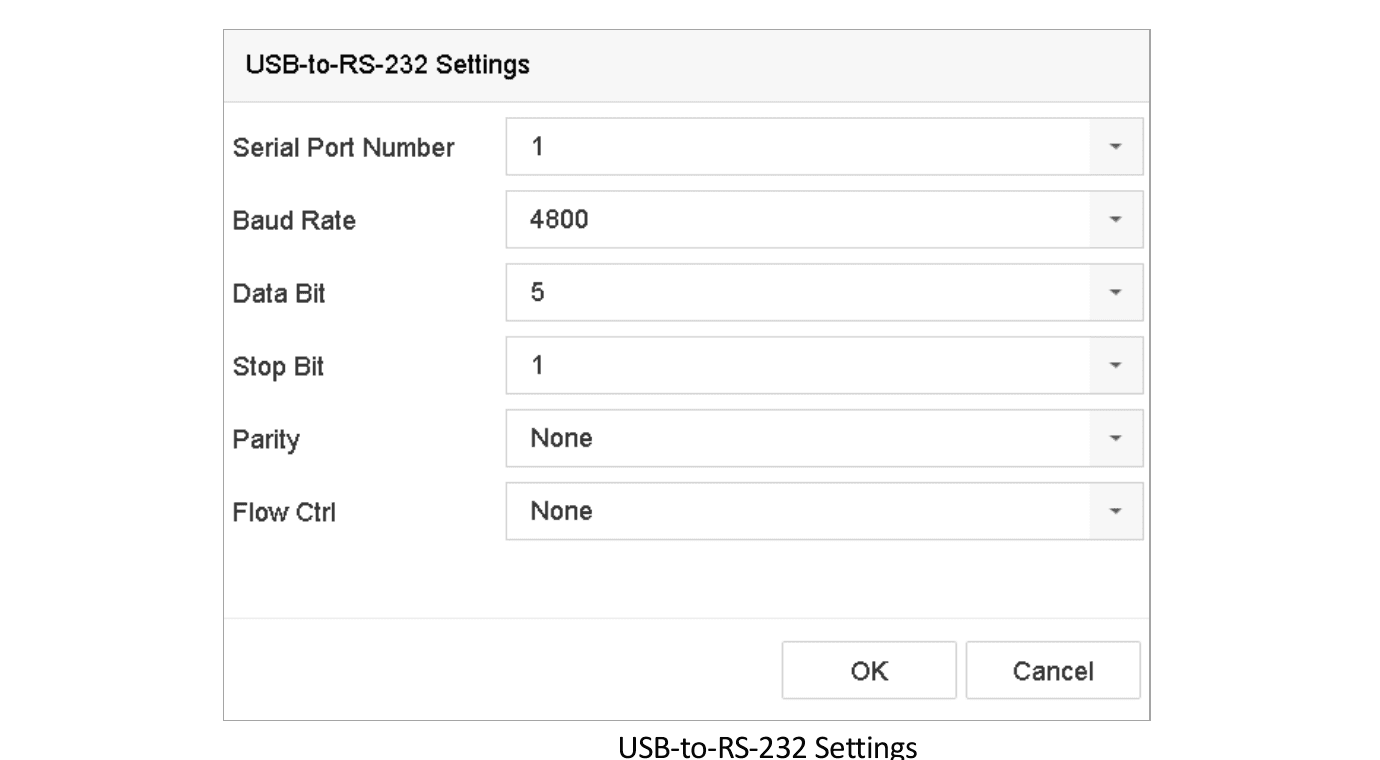
Figure 12-5 USB-to-RS-232 Settings
-
RS-232 Connection
Connect the device and the POS machine via RS-232. The RS-232 settings can be configured in Menu > Configuration > RS-232. The Usage must be set to Transparent Channel.
-
Multicast Connection
When connecting the device and the POS machine via Multicast protocol, set the multicast address and port.
-
Sniff Connection
Connect the device and the POS machine via Sniff. Configure the source address and destination address settings.
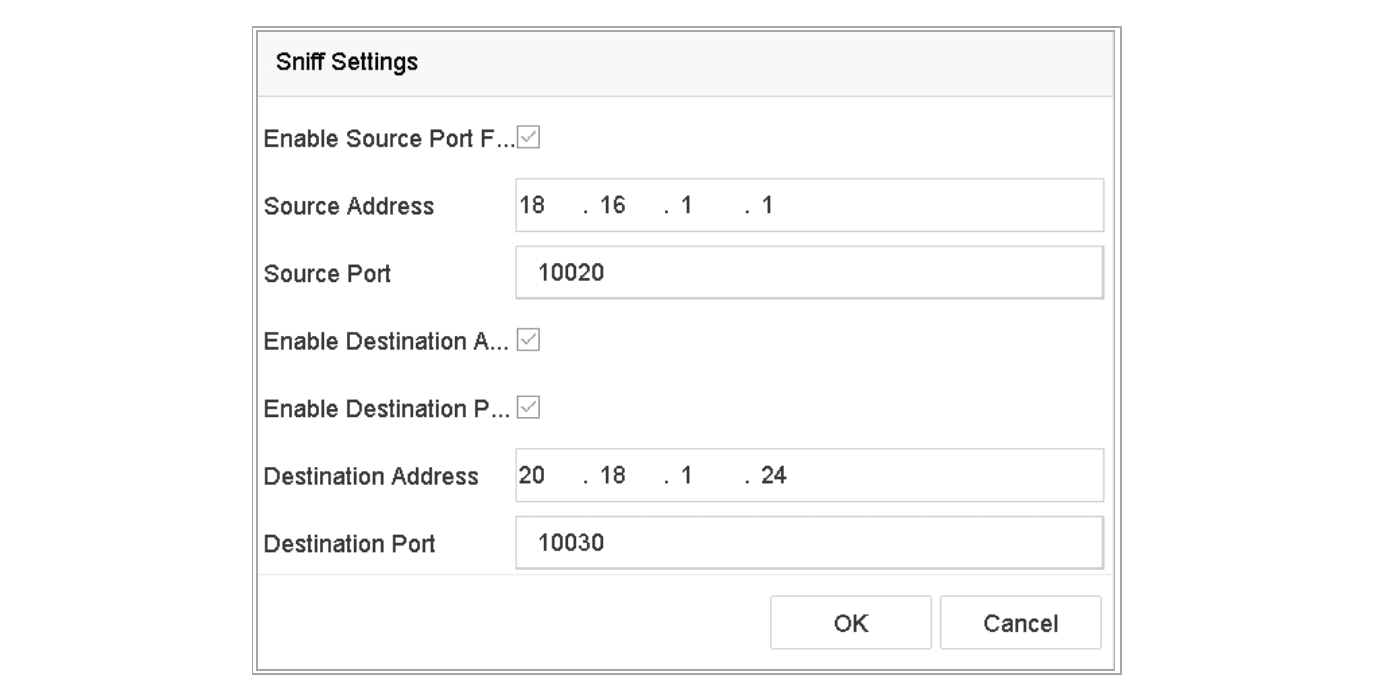
Figure 12-6 Sniff Settings
Configure POS Text Overlay
Go to POS Settings
Go to System > POS Settings.
Open Channel Linkage and Display tab
Click Channel Linkage and Display tab.
Select linked channel
Select the linked channel to overlay the POS characters.
Set characters overlay
Set the characters overlay for the enabled POS.
- Character encoding format: currently the Latin-1 format is available.
- Overlay mode of the characters to display in scrolling or page mode.
- Font size and font color.
- Display time (sec) of the characters. The value ranges 5–3600 sec.
- Timeout of POS event. The value ranges 5–3600 sec. When the device has not received the POS message over the defined time, the transaction is finished.
In the Privacy Settings, set the POS privacy information to not display on the image, e.g., the card number, or the user name, etc.
Result: The defined privacy information will be displayed in *** on the image instead.
(optional) Check the checkbox to enable the Overlay POS in Live View. When this feature is enabled, the POS information can be overlain on the live view image.
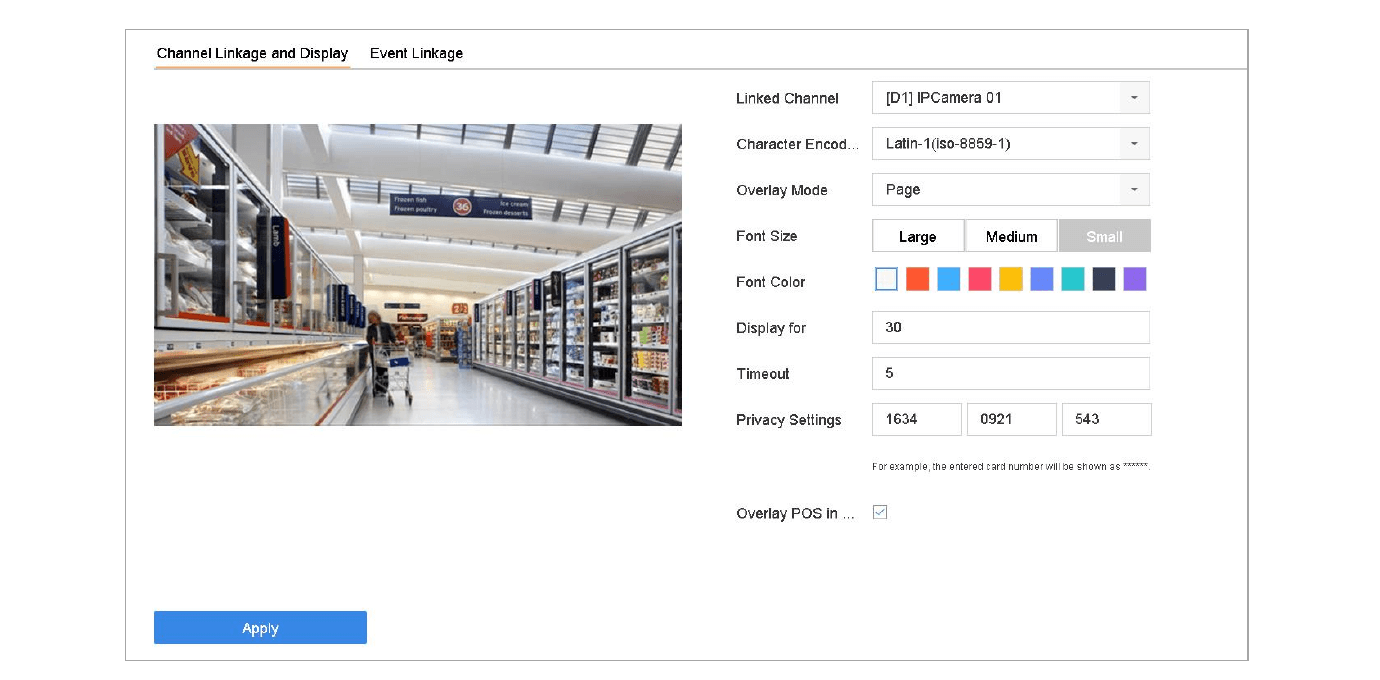
Figure 12-7 Overlay Character Settings
You can adjust the size and position of textbox on the preview screen of POS settings interface by dragging the frame.
Apply settings
Click Apply to activate the settings.
Configure POS Alarm
Purpose: The POS event can trigger channels to start recording, or trigger full screen monitoring, audio warning, notifying the surveillance center, sending email and so on.
Set arming schedule
Go to Storage > Recording Schedule.
Set the arming schedule of the POS event.
Open POS Settings
Go to System > POS Settings.
Open Event Linkage tab
On the POS adding or editing interface, click the Event Linkage tab.
Select normal linkage actions
Select the normal linkage actions: full screen monitoring, audio warning or send Email.
Select alarm outputs
Select one or more alarm output(s) to trigger.
Select trigger channels
Select one or more channels to record or become full-screen monitoring when POS alarm is triggered.
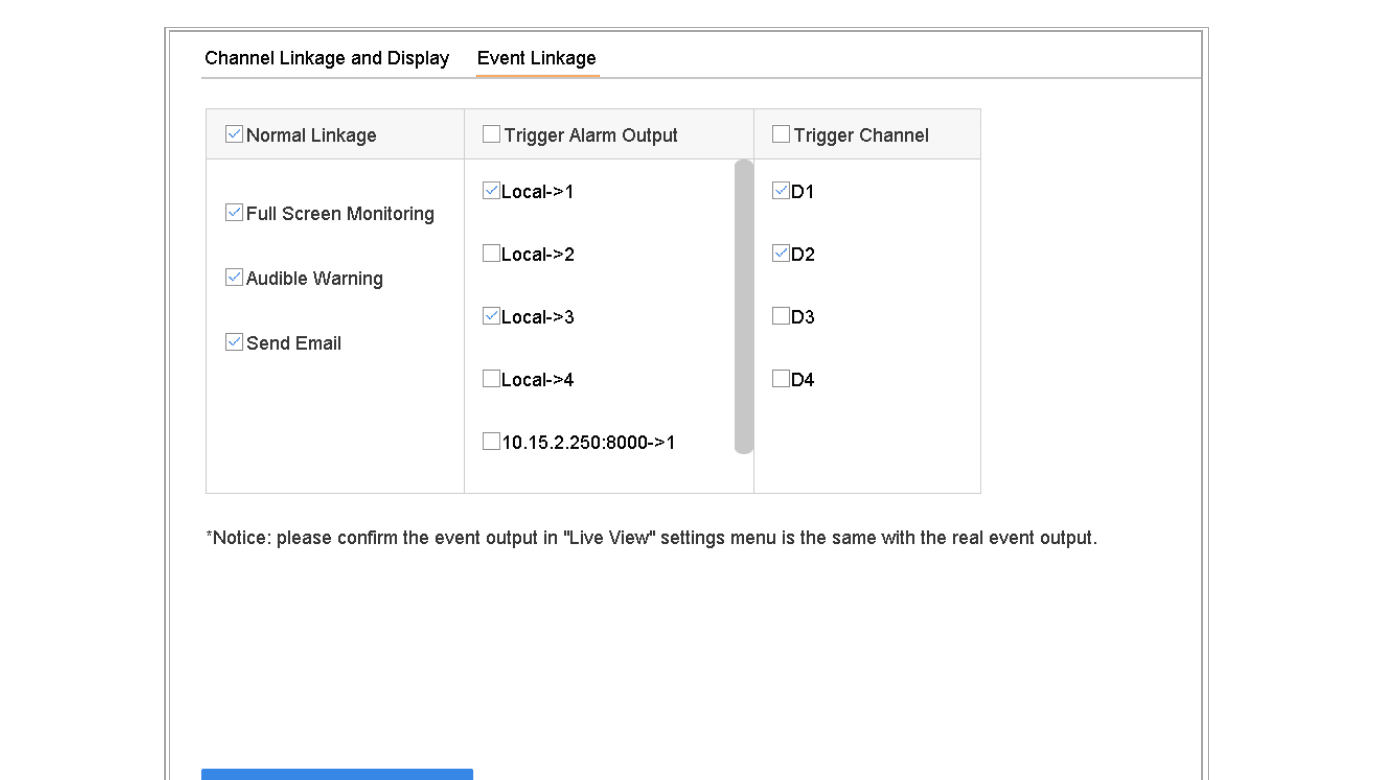
Figure 12-8 Set Trigger Cameras of POS
Save settings
Click Apply to save the settings.
Event and Alarm Settings
Configure arming schedules, alarm linkage actions, motion detection, video loss, video tampering, sensor alarm inputs and outputs, exception handling, and manual alarm control on the Turbo HD DVR GUI 4.0.
VCA Event Alarm
Configure VCA smart event alarms on the Turbo HD DVR GUI 4.0, including human body, face, vehicle, line crossing, intrusion, region entrance/exiting, unattended baggage, object removal, audio exception, sudden scene change, defocus, and PIR detection.