 LTS Connect 도움말 센터
Account
Manage NVR users, user groups, ONVIF users, and admin security questions for password reset on the Sapphire Series NVR.
Account
You can manage users, user group and ONVIF user, set admin security questions.
- For the user name, the string max length is 31-byte, and for the user group, the string max length is 15-byte. The user name can only contain English letters, numbers and "_", "@", ".".
- The default user amount is 64 and the default group amount is 20. System account adopts two-level management: group and user. The user authorities shall be smaller than group authorities (The admin user authorities are set by default).
- For group or user management, there are two levels: admin and user. The user name shall be unique and one user shall only belong to one group.
User
Add User
Open the User interface
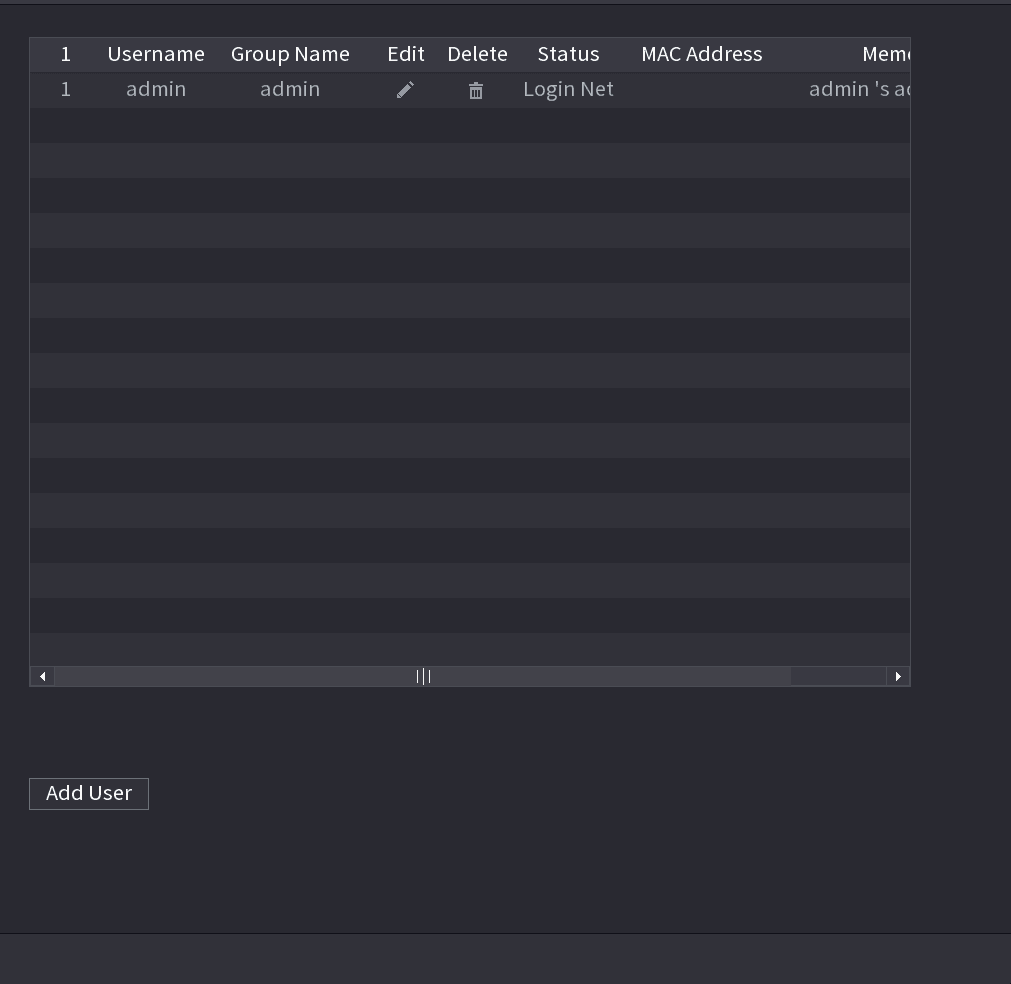
Select Main Menu > ACCOUNT > User. The User interface is displayed. See Figure 4-238.
Open the Add User interface
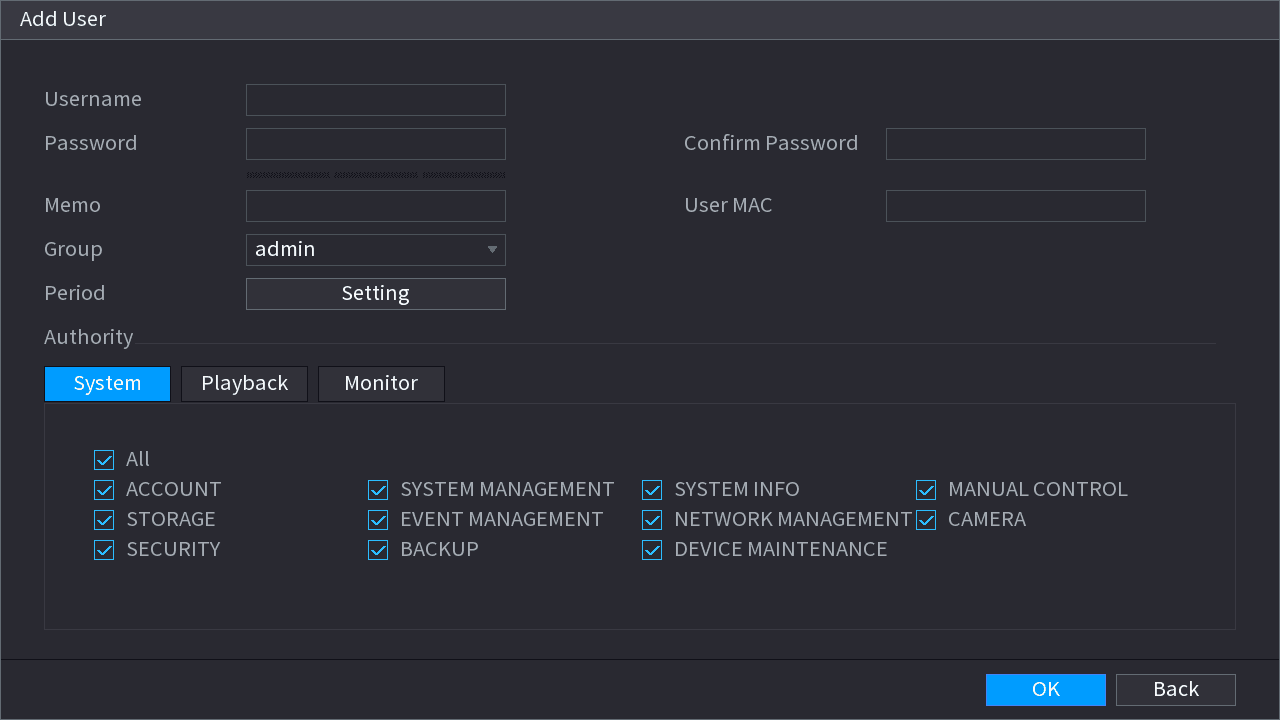
Click Add User button in Figure 4-238. The Add User interface is displayed. See Figure 4-239.
Configure the user
Input the user name, password, select the group it belongs to from the dropdown list. Then you can check the corresponding rights for current user. See Table 4-69.
| Parameter | Description |
|---|---|
| User Name | Enter a user name and password for the account. |
| Password | Enter a user name and password for the account. |
| Confirm Password | Re-enter the password. |
| Memo | Optional. Enter a description of the account. |
| User MAC | Enter user MAC address. |
| Group | Select a group for the account. The user rights must be within the group permission. |
| Period | Click Set to display Set interface. Define a period during which the new account can login the device. The new account cannot login the device during the time beyond the set period. |
| Authority | In the Authority area, select the check boxes in the System tab, Playback tab, and Monitor tab. To manage the user account easily, when defining the user account authority, it is recommended not to give the authority to the common user account higher that the advanced user account. |
Confirm
Click OK button.
Click the Edit icon to modify the corresponding user information, click the Delete icon to delete the user.
Modify Password
Open the Modify User interface
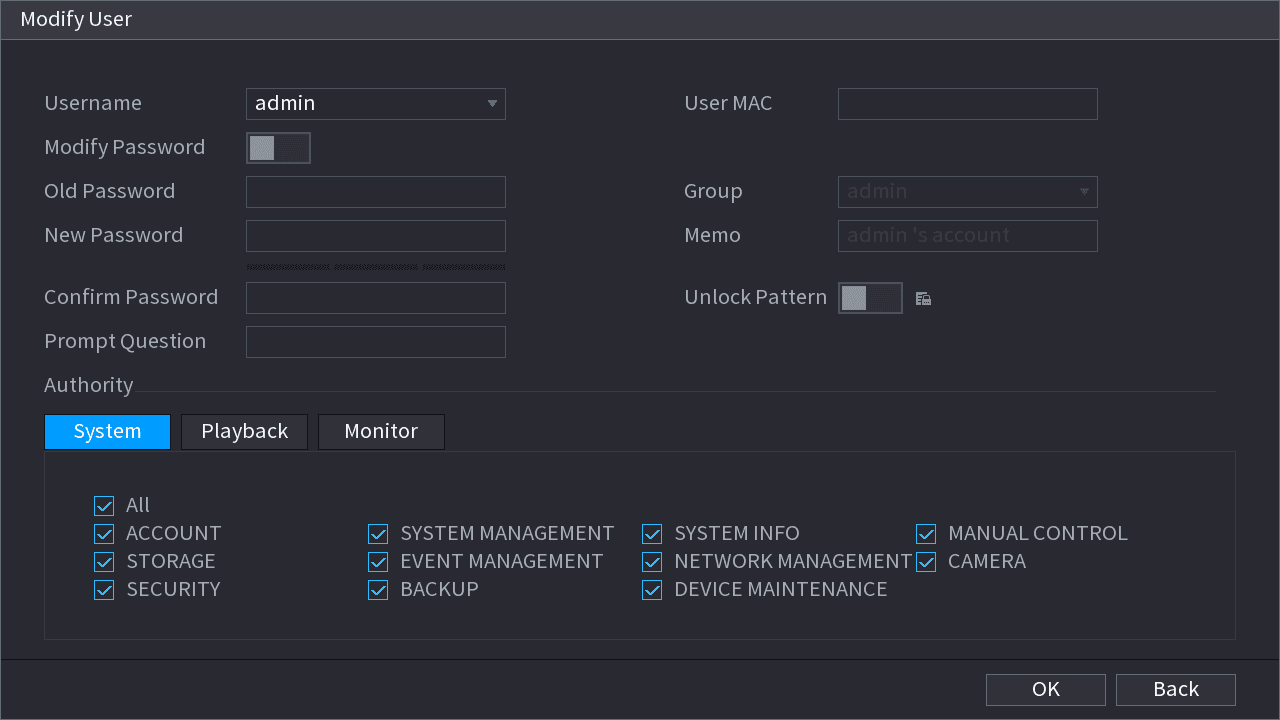
Select Main Menu > ACCOUNT > User, click the Edit icon of the corresponding user. The Modify User interface is displayed. See Figure 4-240.
Enter the new password
Check the box to enable Modify Password function. Enter old password and then enter new password twice.
- Password/confirm password: The password ranges from 8 to 32 digitals. It can contain letters, numbers and special characters (excluding "'", """, ";", ":", "&"). The password shall contain at least two categories. Usually we recommend the strong password.
- For the user of account authority, it can modify the password of other user.
- STRONG PASSWORD RECOMMENDED-For your device own safety, create a strong password of your own choosing. We also recommend you change your password periodically especially in the high security system.
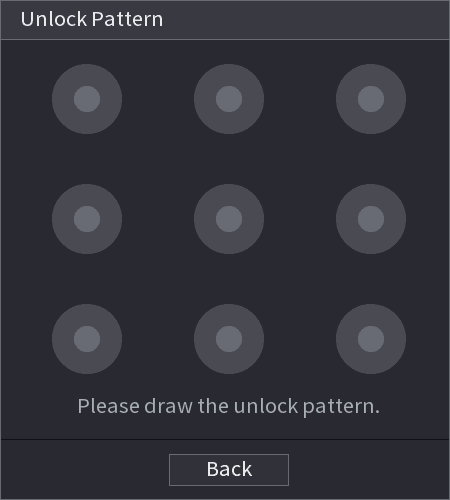
- Check the box to enable Unlock Pattern function, click the pattern icon.
Return
Click Back.
Group
Open the Group interface
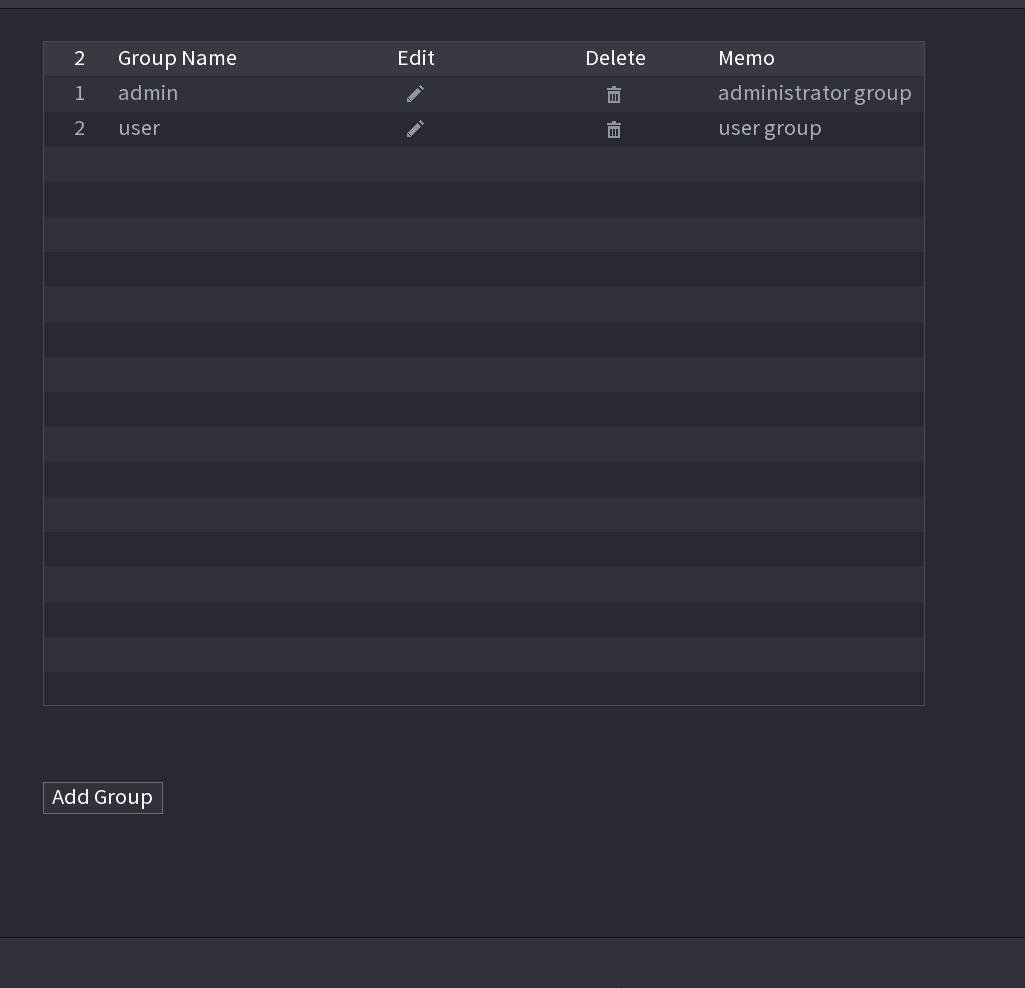
Select Main Menu > ACCOUNT > Group. The Group interface is displayed. See Figure 4-242.
Open the Add Group interface
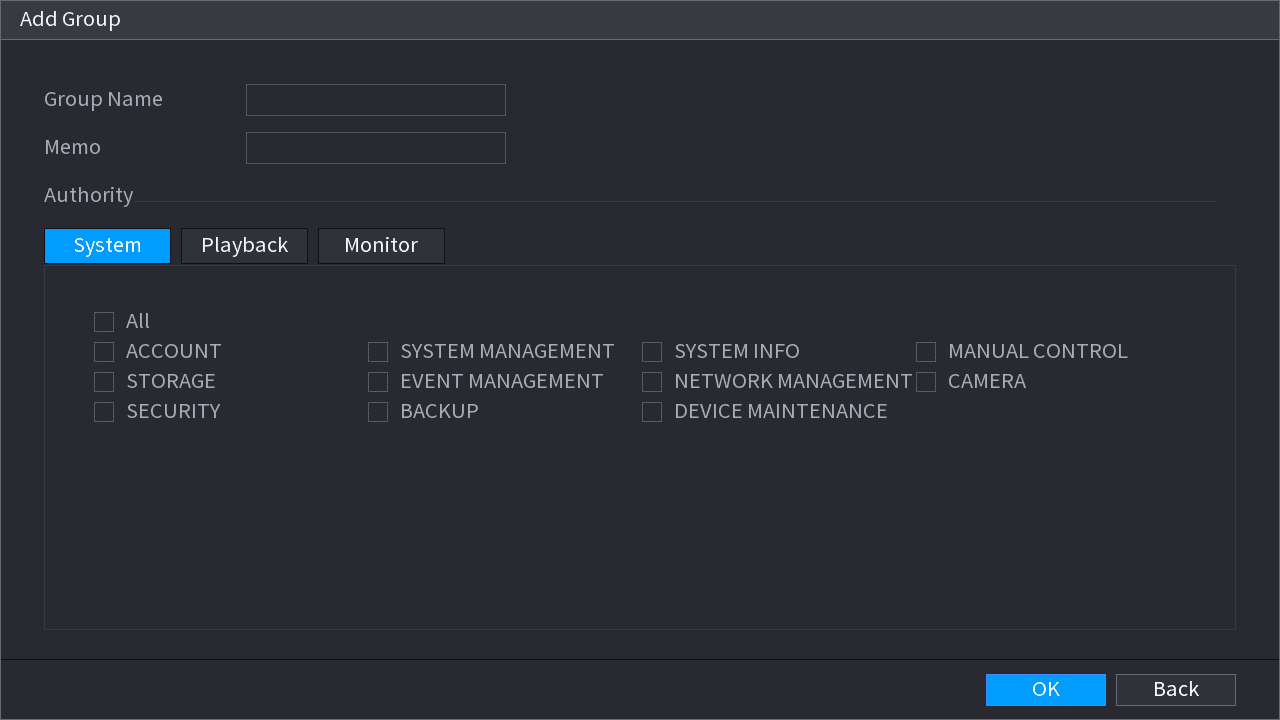
Click Add Group button in Figure 4-242. The Add Group interface is displayed. See Figure 4-243.
Configure the group
Enter group name and then input some memo information if necessary. Check the box to select authorities.
Confirm
Click OK.
Click the Edit icon to modify the corresponding group information, click the Delete icon to delete the group.
Reset Password
You can set security questions and answers. After you successfully answered security questions, you can reset admin account password.
This function is for admin user only.
Open the PASSWORD RESET interface
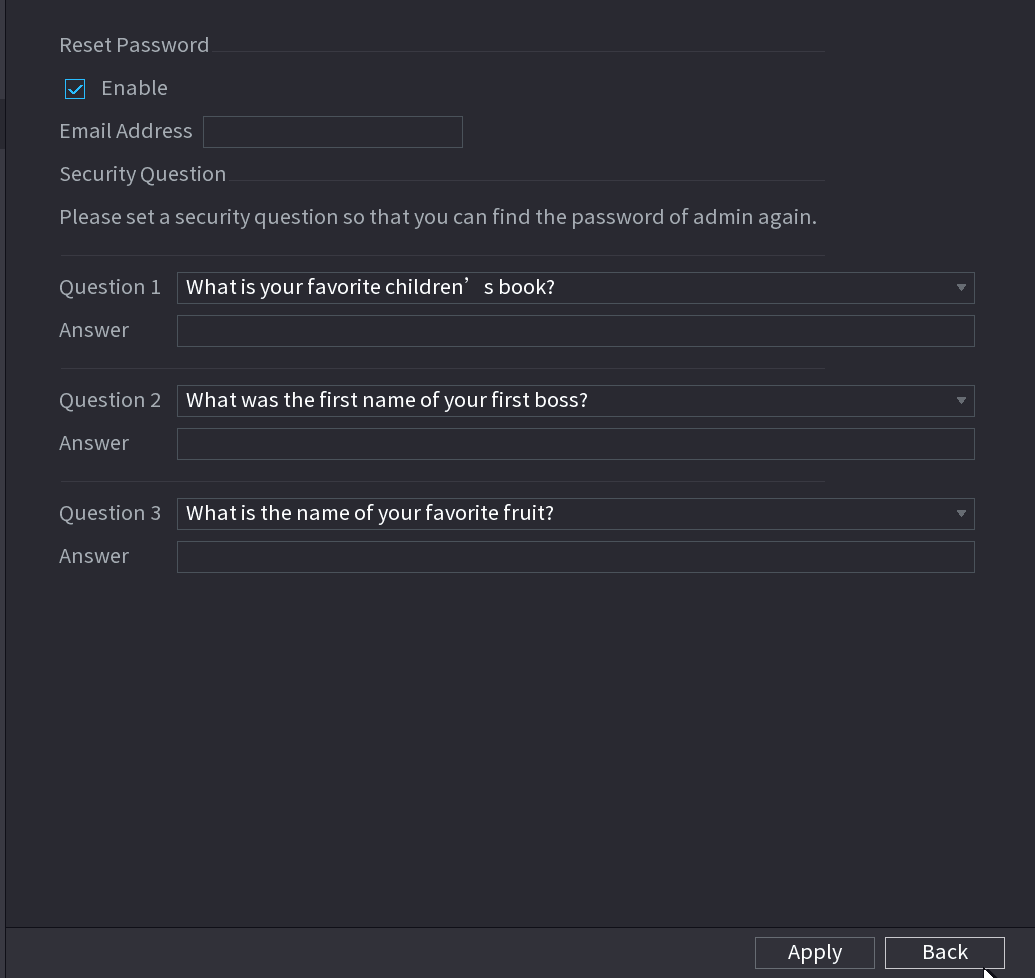
Select Main Menu > ACCOUNT > PASSWORD RESET. The PASSWORD RESET interface is displayed. See Figure 4-244.
Enable Reset password
Check the box to enable Reset password function.
This function is enabled by default.
Set security questions
Input proper security questions and answers.
Confirm
Click OK. After you successfully set security questions, you can answer the security questions to reset admin password.
ONVIF User
When the camera from the third party is connected with the NVR via the ONVIF user, use the verified ONVIF account to connect to the NVR. Here you can add/delete/modify user.
- The default ONVIF user is admin. It is created after you initialize the NVR.
- For some series product, the ONVIF user password is modified when you are initializing the admin password.
Open the ONVIF User interface
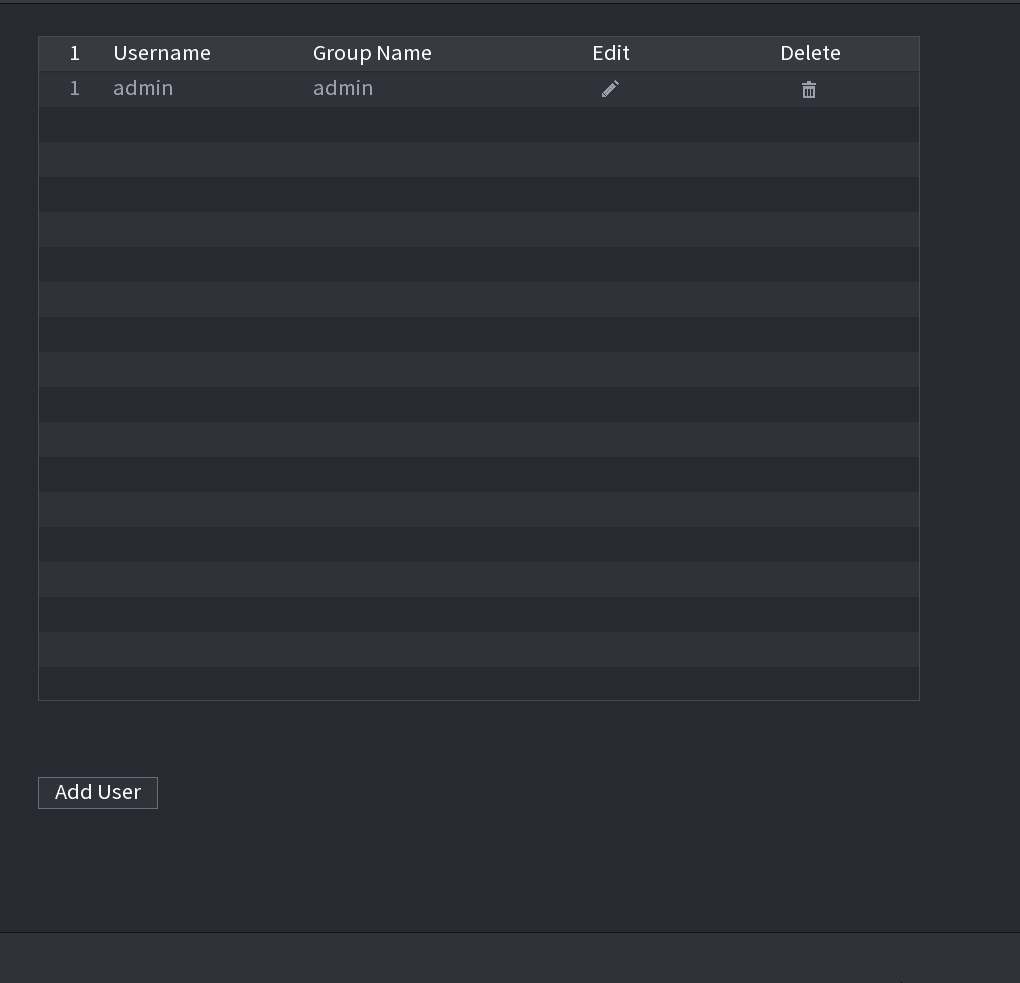
Select Main Menu > ACCOUNT > ONVIF User. The ONVIF User interface is displayed. See Figure 4-245.
Open the Add User interface
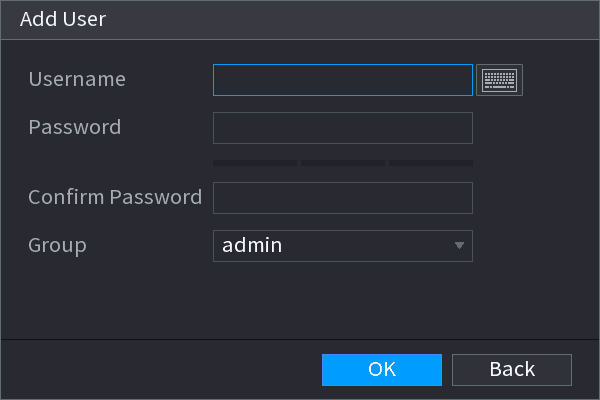
Click Add User button. The Add User interface is displayed. See Figure 4-246.
Configure the ONVIF user
Set user name, password and then select group from the dropdown list.
Confirm
Click OK to complete setup.
Click the Edit icon to modify corresponding user information, click the Delete icon to delete current user.