 Centar za pomoć LTS Connect
Playback and Search
How to search and play back recorded video and pictures on the Sapphire Series NVR, including instant playback, the search interface, playback controls, clip, backup, smart search, mark playback, splice playback, and file list management.
Record File
The Device adopts 24-hour continuous record by default. It supports customized record period and record type. Refer to Schedule for detailed information.
Playback and Search
Instant Playback
You can view the record file of previous 5 to 60 minutes. Refer to Navigation bar for instant playback information.
Search Interface
You can search and playback the record file on the NVR.
Select Main Menu > PLAYBACK, or on the preview interface right click mouse and then select Search, you can go to the following interface. See Figure 4-92.
The following figure for reference only.
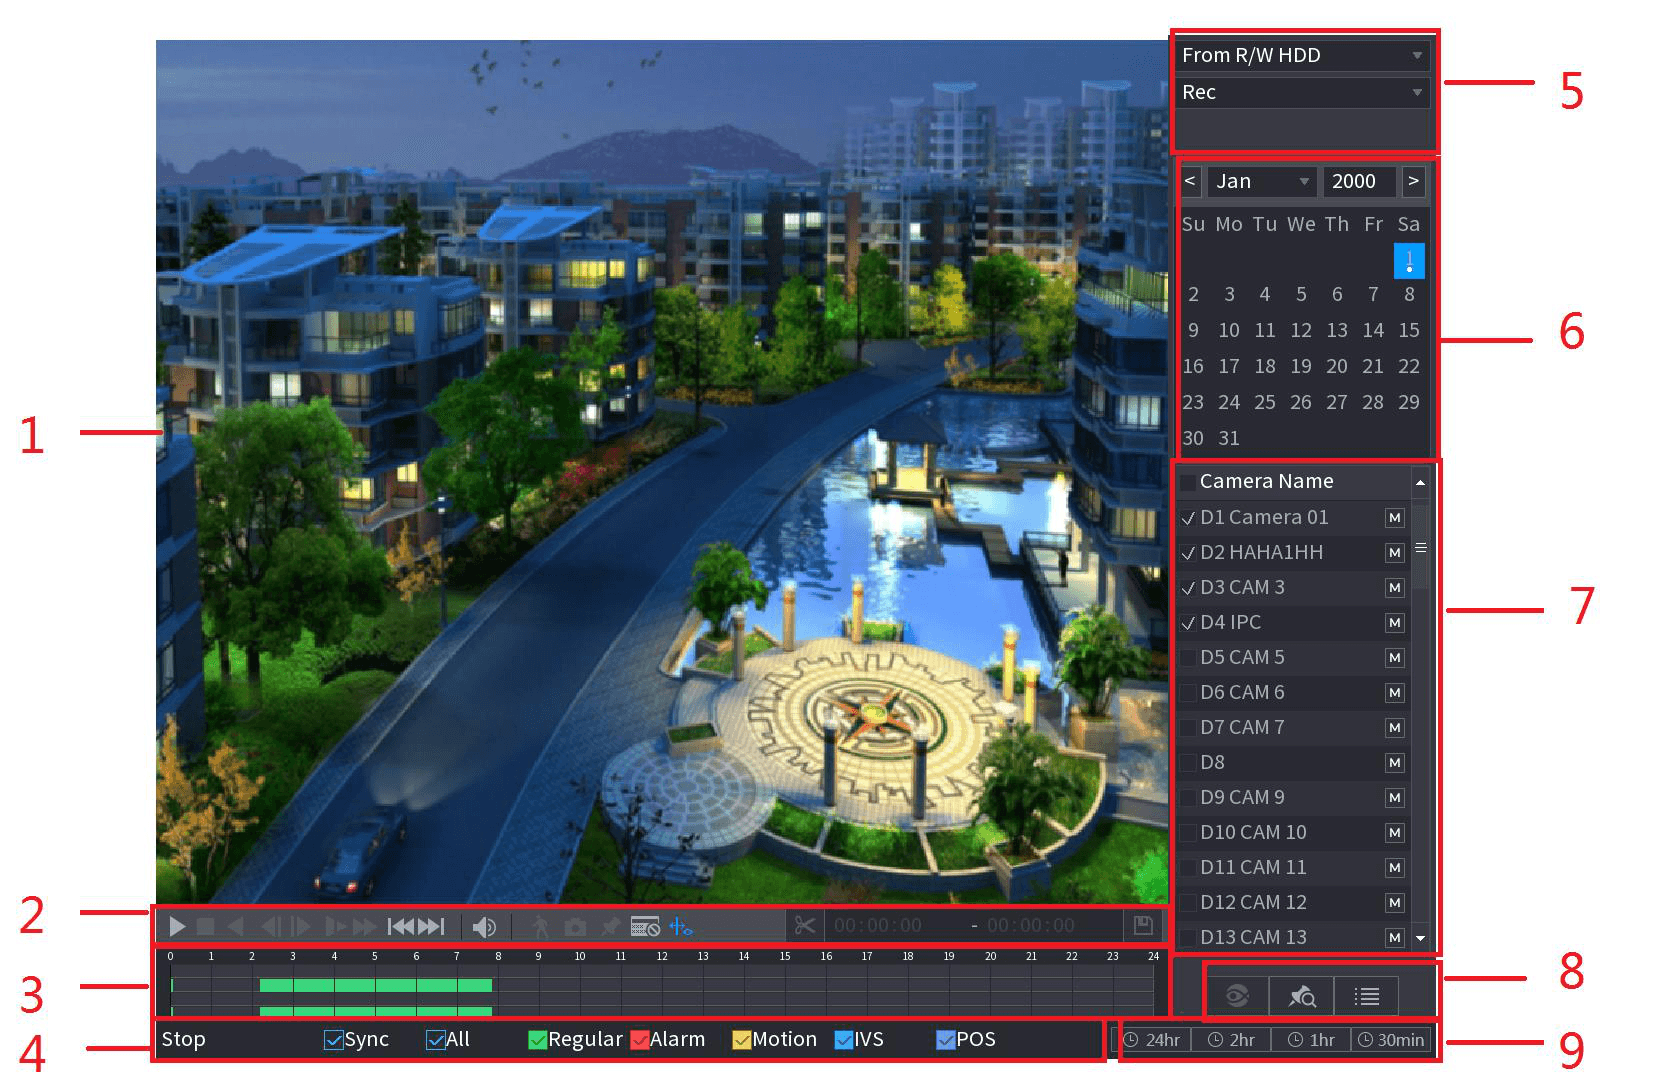
| No. | Function | Description |
|---|---|---|
| 1 | Display Window | Display the searched recorded video or picture. It supports playing in single-channel, 4-channel, 9-channel, and 16-channel simultaneously. When playing back in a single channel mode, hold down the left mouse button to select the area that you want to enlarge. The area is enlarged after the left mouse button is released. To exit the enlarged status, right-click on the image. |
| 2 | Playback Controls Bar | Playback control buttons. Refer to "Playback Control" for detailed information. |
| 2 | Clip | Click the clip icon to edit the record file and then save specified footages. Refer to "Clip" for detailed information. |
| 2 | Backup | Click the backup icon to backup record. Refer to "Record Backup" for detailed information. |
| 3 | Time Bar | Display the type and time period of the current recorded video. ⚫ In the 4-channel layout, there are four time bars are displayed; in the other view layouts, only one time bar is displayed. ⚫ Click on the colored area to start playback from a certain time. ⚫ In the situation when you are configuring the settings, rotate the wheel button on the time bar, the time bar is zooming in from 0. In the situation when playback is ongoing, rotate the wheel button on the time bar, the time bar is zooming from the time point where the playback is located. ⚫ Time bar colors: Green indicates general type; Red indicates external alarm; Yellow indicates motion detection; Blue indicates intelligent events; Purple indicates POS events. ⚫ For some models, when you are clicking on the blank area in the time bar, the system automatically jumps to the next time point where there is a recorded video located. |
| 3 | Play Status | Includes two playback status: Play and Stop. |
| 4 | Sync | Select the Sync check box to simultaneously play recorded videos of different channels in the same period in multi-channel view. |
| 4 | Record type | Select the check box to define the recording type to search for. |
| 5 | Search type | Select the content to play back: Record, PIC, Splice Playback. For details about the selecting search type, refer to "Search Type" for detailed information. |
| 6 | Calendar | Click the date that you want to search, the time bar displays the corresponding record. The dates with record or snapshot have a small solid circle under the date. |
| 7 | View Layout and Channel Selection | ⚫ In the CAM NAME list, select the channel(s) that you want to play back. ⚫ The window split is decided by how you select the channel(s). For example, if you select one channel, the playback is displayed in the single-channel view; if you select two to four channels, the playback is displayed in the four-channel view. The maximum is eight channels. ⚫ Click to switch the streams. One indicates main stream, and the other indicates sub stream. |
| 8 | List Display | This area includes Mark List and File List. Different series products have different functions. The icons displayed may vary. The actual product shall prevail. ⚫ Click the Mark List button, the marked recorded video list is displayed. Double-click the file to start playing. ⚫ Click the File List button, the searched recorded video list is displayed. You can lock/unlock the files. Refer to "File List" for detailed information. ⚫ Fisheye dewarp. It is to display the dewarp fisheye video. Refer to Fish eye de-warp during playback for detailed information. |
| 14 | Time Bar Unit | You can select 24hr, 2hr, 1hr, or 30min as the unit of time bar. The time bar display changes with the setting. |
All the operations here (such as playback speed, channel, time and progress) have relationship with hardware version. Some series NVRs do not support some functions or playback speeds.
Playback Control
The playback control interface is shown as below. See Figure 4-93.

Refer to the following sheet for more information. See Table 4-24.
| Icon | Function |
|---|---|
| Play/Pause | Play/Pause. In slow play mode, click it to switch between play/pause. |
| Stop | Stop. When playing back, click to stop current playback process. |
| Backward play | Backward play. ⚫ In normal play mode, left click the button, the file begins backward play. Click it again to pause current play. ⚫ In backward play mode, click play or stop to restore normal play. |
| Previous frame / Next frame | Display previous frame/next frame. ⚫ When pause the normal playback file, click previous frame or next frame to playback frame by frame. ⚫ In frame by frame playback mode, click play or backward to resume normal playback mode. |
| Slow play | Slow play. In playback mode, click it to realize various slow play modes such as slow play 1, slow play 2, and etc. |
| Fast forward | Fast forward. In playback mode, click to realize various fast play modes such as fast play 1, fast play 2 and etc. |
| Volume | Adjust the volume of the playback. |
| Smart search | Smart search. Refer to "Smart Search Playback" for detailed information. |
| Snapshot | Click the snapshot button in the full-screen mode, the system can snapshot 1 picture. System supports custom snap picture saved path. Connect the peripheral device first, click snap button on the full-screen mode, you can select or create path. Click Start button, the snapshot picture can be saved to the specified path. |
| Mark | Mark button. This function is for some series product only. Make sure there is a mark button in the playback control pane. Refer to "Mark Playback" for detailed information. |
| POS | Display/hide POS information. In 1-channel playback mode, you can click it to display/hide POS information on the video. |
| IVS | In 1-channel playback mode, click it to enable/disable display IVS rule information on the video. This function is for some series only. |
Search Type
You can search the recorded videos, splice, or snapshots from HDD or external storage device.
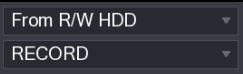
⚫ From R/W HDD: Recorded videos or snapshots playback from HDD of the Device. See Figure 4-94.
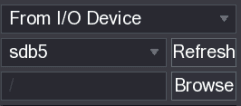
⚫ From I/O Device: Recorded videos playback from external storage device. See Figure 4-95.
Click Browse, select the save path of recorded video file that you want to play. Double-click the video file or click the play icon to start playing.
Clip
This function allows you to clip some footages to a new file and then save it to the USB device. See Figure 4-96. Follow the steps listed below.
Play back a record
Select a record first and then click the play icon to playback.
Start the clip
Select a time at the time bar and then click the clip icon to start clip,
Stop the clip
Select a time at the time bar and then click the clip icon to stop clip,
Save the clip file
Click the save icon, system pops up dialogue box to save the clip file.

⚫ Clip function is for one-channel/multiple-channel.
⚫ Max save 1024 files at the same time.
⚫ This function is not for the file already checked in the file list.
Record Backup
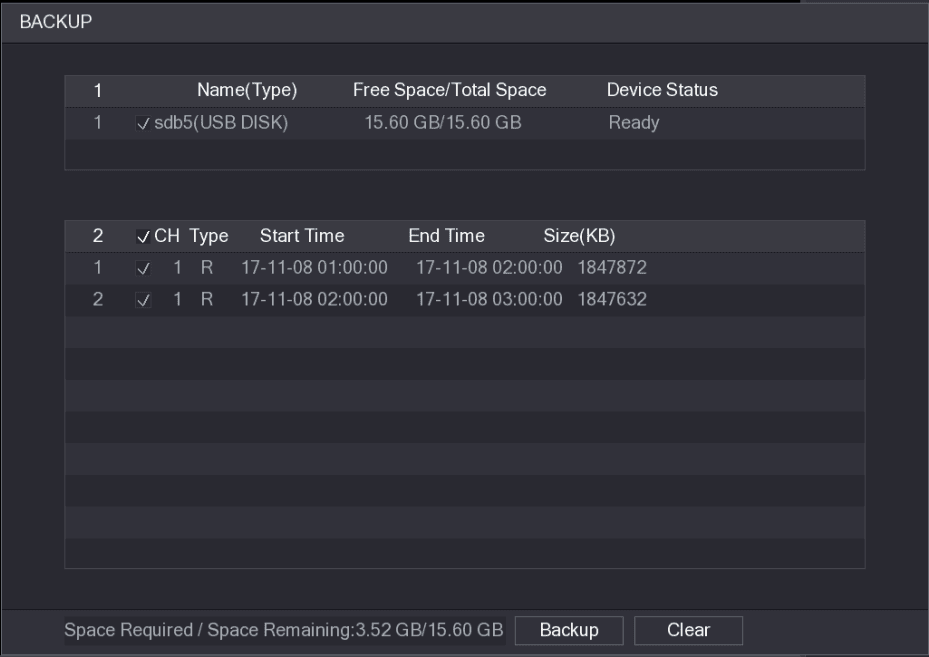
This function is to backup files you checked in the file list, or the file you just clip.
Select the file to back up
Select the recorded video file that you want to back up. You can select the following two types of files:
⚫ Recorded video file: Click the File List icon, the File List area is displayed. Select the file(s) that you want to back up.
⚫ Saves the clip footages as a record file.
Begin backup
Click Backup to begin the process.
Smart Search Playback
This function is for some series product only.
During playback process, it can analyze the motion detect zone in the scene and give the analysis result.
This function is for channel that already enabled motion detect function (Main Menu > ALARM > VIDEO DETECT > Motion Detect).
Enter smart search
Select a channel to playback video and then click the smart search icon. You can view the grids on the playback video.
⚫ This function is for one-channel playback mode.
⚫ If you are in multiple-channel playback mode, double-click a channel first to switch to one-channel playback mode.
Select smart search zones
Left click mouse and then drag to select smart search zones (2218 (PAL), 2215 (NTSC)).
Start smart search playback
Click the smart search icon to go to smart search and playback. System is going to playback all motion detect record footages.
Stop smart search
Click the smart search icon again to stop smart search function.
⚫ The motion detect region cannot be the full screen zone.
⚫ The motion detect region adopts the current whole play pane by default.
⚫ Selects the other file on the list, system begins playing the motion detect footages of other file.
⚫ The time bar unit switch, backward play, frame by frame are null when system is playing motion detect file.
Mark Playback
When you are playback record, you can mark the record when there is important information. After playback, you can use time or the mark key words to search corresponding record and then play. It is very easy for you to get the important video information.
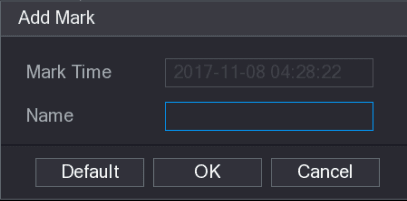
⚫ Add Mark
When system is playback, click Mark button, you can go to the following interface. See Figure 4-98.
⚫ Playback Mark
During 1-window playback mode, click mark file list button in Figure 4-92, you can go to mark file list interface. Double-click one mark file, you can begin playback from the mark time.
⚫ Play before mark time
Here you can set to begin playback from previous N seconds of the mark time.
Usually, system can playbacks previous N seconds record if there is such kind of record file. Otherwise, system playbacks from the previous X seconds when there is such as kind of record.
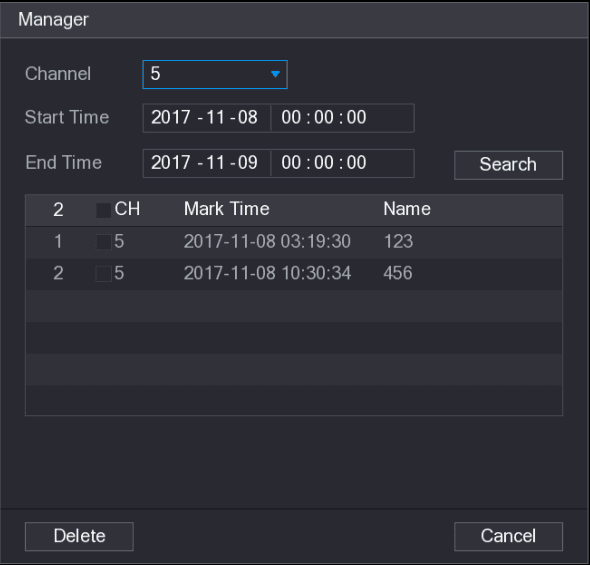
⚫ Mark Manager
Click the mark manager button on the Search interface (Figure 4-92); you can go to Manager interface. See Figure 4-99. System can manage all the record mark information of current channel by default. You can view all mark information of current channel by time.
⚫ Modify
Double-click one mark information item, you can see system pops up a dialogue box for you to change mark information. You can only change mark name here.
⚫ Delete
Here you can check the mark information item you want to delete and then click Delete button, you can remove one mark item.
⚫ After you go to the mark management interface, system needs to pause current playback. System resume playback after you exit mark management interface.
⚫ If the mark file you want to playback has been removed, system begins playback from the first file in the list.
Playback Image
Here you can search and play the image. Follow the steps listed below.
Open the search interface
Select Main Menu > PLAYBACK, or on the preview window right click mouse and then click Search, you can go to the Search interface.
Select image and set the interval
At the top right corner, select image and then input playback interval.
Play
Select date and channel, click the play icon to play.
Splice Playback
You can clip the recorded video files into splices and then play back at the same time to save your time.
This function is for some series products only.
Open the PLAYBACK interface
Select Main Menu > PLAYBACK, the PLAYBACK interface is displayed.
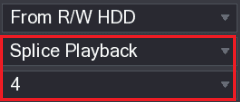
Select Splice Playback and split mode
In the Search Type list, select Splice Playback; In the Split Mode list, select 4, 9, or 16. See Figure 4-100.
Select a date
In the Calendar area, select a date.
Start playing back splices
Start playing back splices. See Figure 4-101.
⚫ Click the play icon, the playback starts from the beginning.
⚫ Double-click anywhere on the time bar, the playback starts from where you click.

File List
Click the File List icon, system displays file list. It displays the first channel of the record. See Figure 4-102.
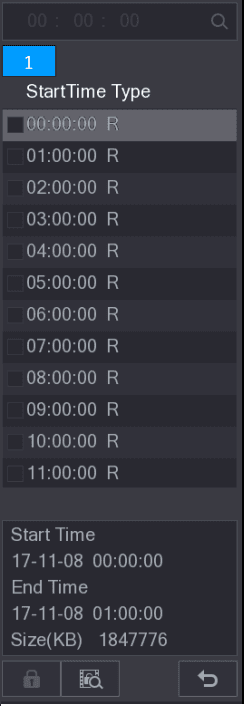
⚫ Check a file name, double-click the file or click the play icon to play.
⚫ Input accurate time at the top column, you can search records of current day.
⚫ System max displays 128 record files in one list.
⚫ Click the back icon to go back to the calendar/channel selection interface.
Lock or Unlock File
⚫ To lock the recorded video, on the File List interface, select the check box of the recorded video, and then click the lock icon. The locked video will not be overwritten.
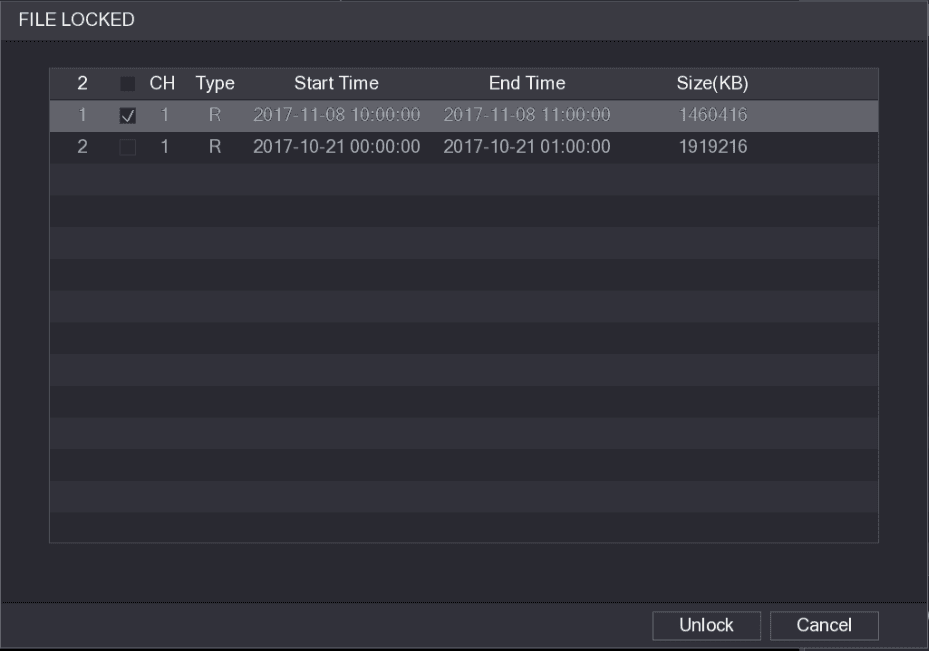
⚫ To view the locked information, click the lock list icon, the FILE LOCKED interface is displayed.
The recorded video that is under writing or overwriting cannot be locked.
⚫ To unlock the recorded video, in the FILE LOCKED interface, select the video, and then click Unlock. See Figure 4-103.
Other Aux Functions
Digital Zoom
In 1-window playback mode, left click mouse to select any zone on the screen, you can zoom in current zone. Right click mouse to exit.
Switch Channel
⚫ During playback mode, select from the dropdown list to switch playback channel.
⚫ The smart search channel does not support this function either.
⚫ When system is playing back the record file, click the number button at the front panel, system begins playing the record file of selected channel dated the same time.
PTZ
Configure and control PTZ cameras on the NVR, including PTZ settings, basic and expanded control panels, and configuring and calling presets, tours, patterns, auto scan, auto pan, and AUX functions.
AI Search
How to use the Sapphire Series NVR AI Search to find and play back recorded files by face, IVS, human body, vehicle, non-motor vehicle, people counting, and heat map rules.