 ศูนย์ช่วยเหลือ LTS Connect
Audio Management
Manage audio files and configure the playing schedule on the Sapphire Series CVI DVR so audio is activated when an alarm event occurs.
Audio management function manages audio files and configures the playing schedule. When there is an alarm event, the audio file can be activated.
Configuring Audio Files
You can add audio files, listen to audio files, rename and delete audio files, and configure the audio volume.
Open the file manager
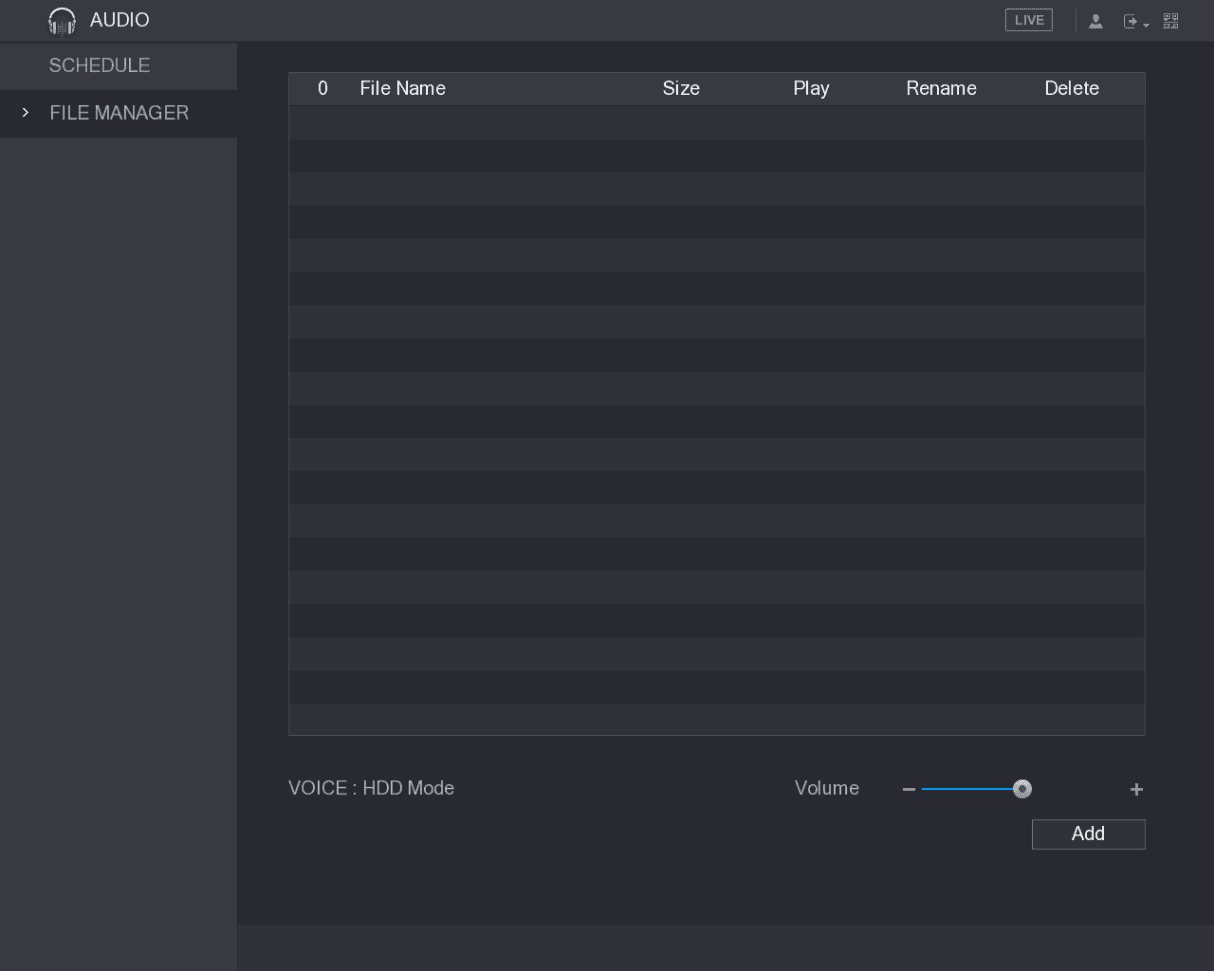
Select Main Menu > AUDIO > FILE MANAGER.
The FILE MANAGER interface is displayed. See Figure 5-232.
Select the audio files
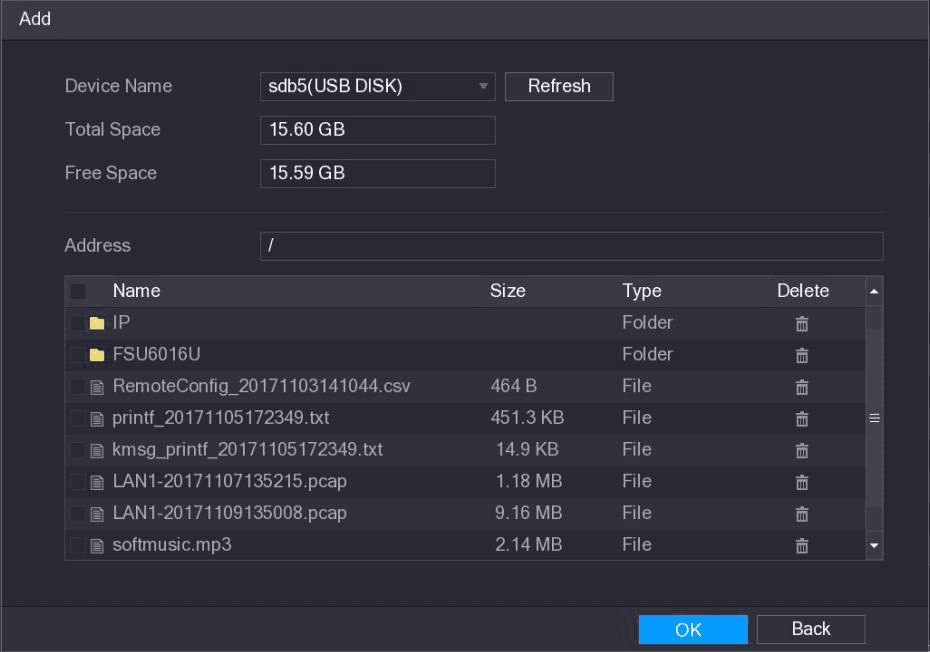
Select the audio files that you want to import.
Import the audio files
Click OK to start importing audio files from the USB storage device.
If the importing is successful, the audio files will display in the FILE MANAGER interface. See Figure 5-234.
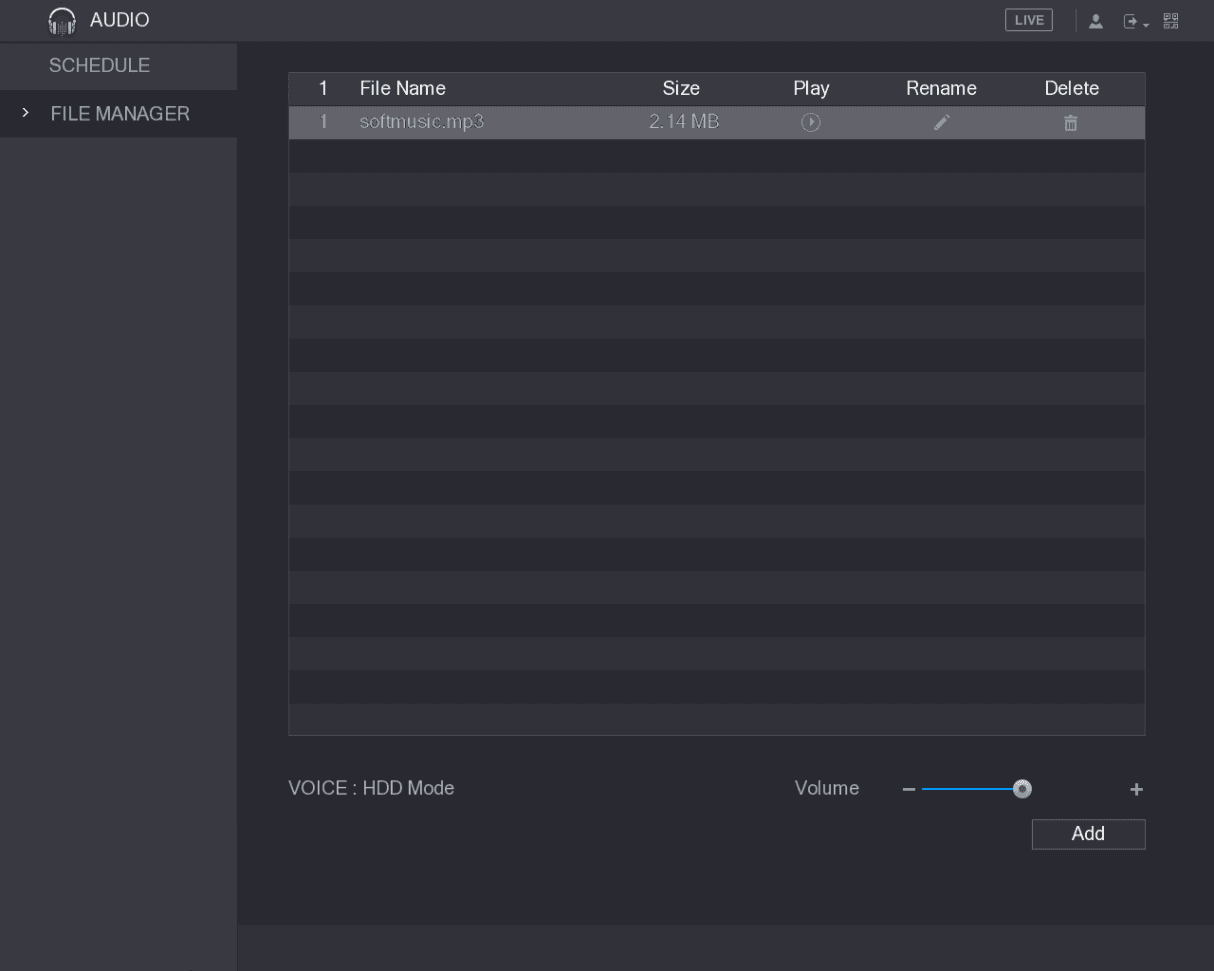
The imported audio files are automatically saved into the HDD, so you do not need to connect to the USB storage device to get the file next time.
- Click the play icon to play the audio file.
- Click the rename icon to rename the audio file.
- Click the delete icon to delete the audio file.
- To decrease or increase the playing volume, move the slider to the left or to the right.
Configuring Playing Schedule for Audio Files
You can configure the settings to play the audio files during the defined time period.
Open the schedule
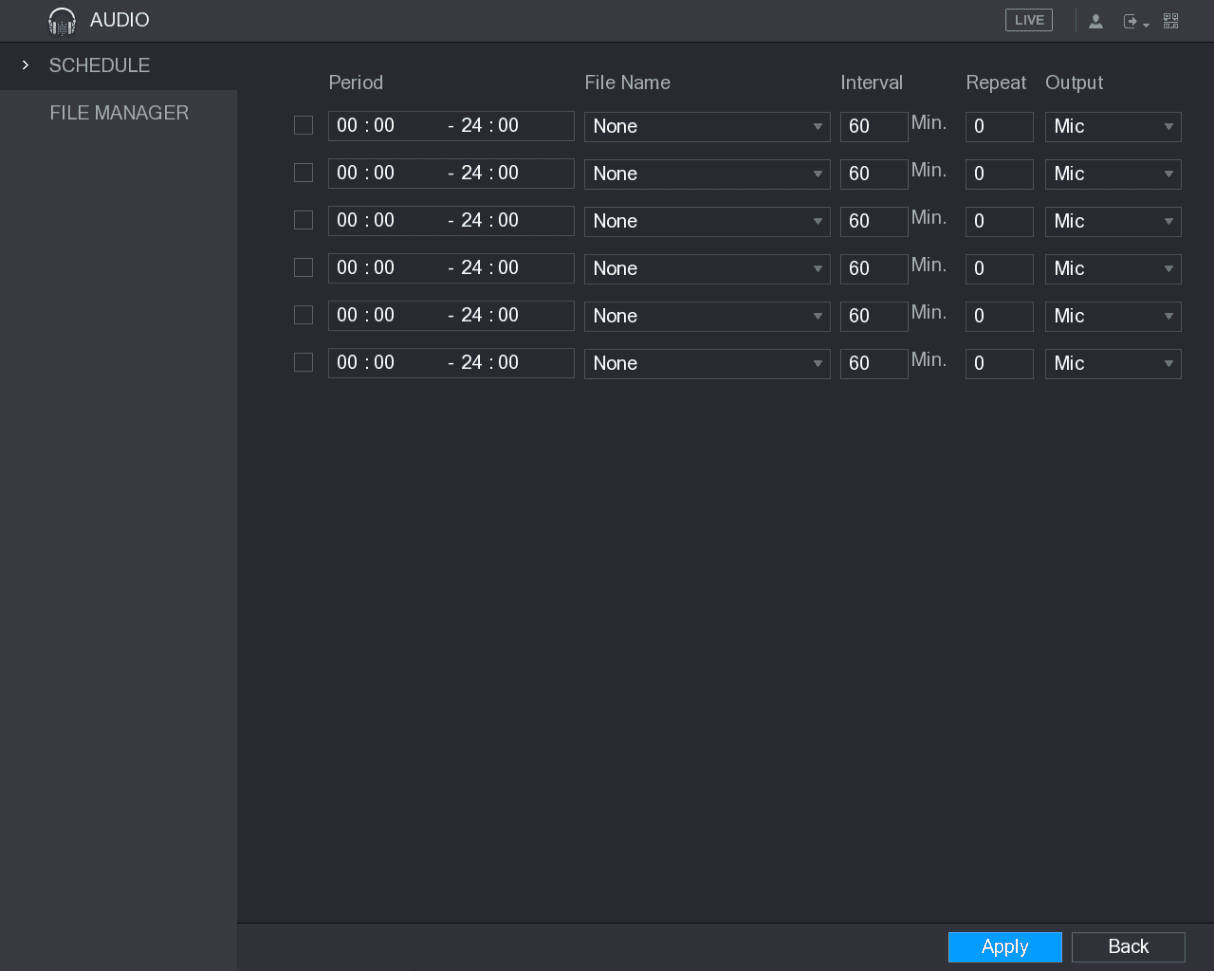
Select Main Menu > AUDIO > SCHEDULE.
The SCHEDULE interface is displayed. See Figure 5-235.
Configure the schedule parameters
Configure the settings for the schedule parameters. See Table 5-72.
| Parameter | Description |
|---|---|
| Period | In the Period box, enter the time. Select the check box to enable the settings. You can configure up to six periods. |
| File Name | In the File Name list, select the audio file that you want to play for this configured period. |
| Interval | In the Interval box, enter the time in minutes for how often you want to repeat the playing. |
| Repeat | Configure how many times you want to repeat the playing in the defined period. |
| Output | Includes two options: MIC and Audio. It is MIC by default. The MIC function shares the same port with talkback function and the latter has the priority. |
- The finish time for audio playing is decided by audio file size and the configured interval.
- Playing priority: Alarm event > Talkback > Trial listening > Audio file.
Apply the settings
Click Apply to complete the settings.
Account Settings
Add, modify, and delete user accounts, group accounts, and ONVIF users, and set security questions for the admin account on the Sapphire Series CVI DVR.
Storage Management
Configure storage resources on the Sapphire CVI DVR, including basic settings, record and snapshot schedules, HDD manager, advance HDD groups, quota, HDD detecting, record estimate, and FTP storage.