 LTS Connect yordam markazi
Getting Started
First-time setup guide covering device activation, security questions, unlock pattern, login methods, the setup wizard, the main menu, and basic system operations for the Turbo HD DVR GUI 4.0.
Start up the Device
Purpose: Proper startup and shutdown procedures are crucial to expanding the life of the device.
Before you start: Check that the voltage of the extra power supply is the same with the device's requirement, and the ground connection is working properly.
Connect the device power supply interface and electrical socket with delivered power cable. It is HIGHLY recommended that an Uninterruptible Power Supply (UPS) be used in conjunction with the device. The Power button on the front panel should be red, indicating the device is receiving the power.
Activate the Device
Purpose: For the first-time access, you need to activate the device by setting an admin password. No operation is allowed before activation. You can also activate the device via Web Browser, SADP or Client Software.
Input the same password in the text field of Create New Password and Confirm New Password.
You can click the eye icon to show the characters input.
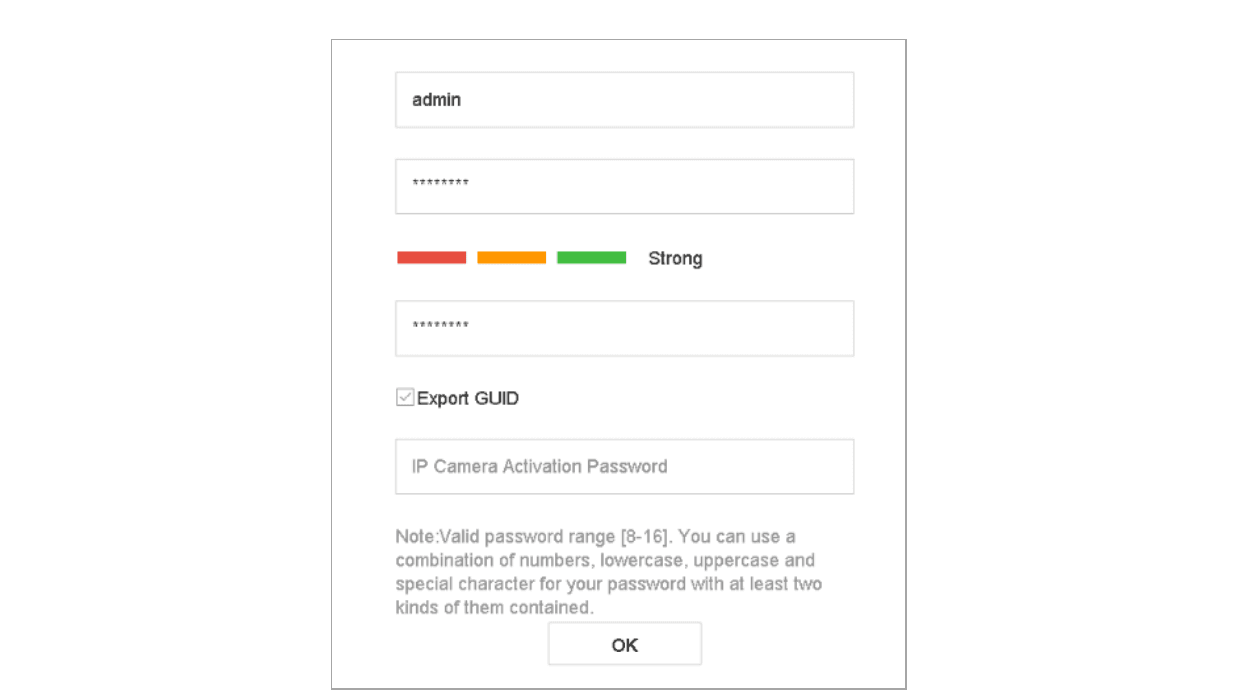
Figure 2-1 Setting Admin Password
We highly recommend you create a strong password of your own choosing (Using a minimum of 8 characters, including at least three of the following categories: upper case letters, lower case letters, numbers, and special characters.) in order to increase the security of your product. And we recommend you reset your password regularly, especially in the high security system, resetting the password monthly or weekly can better protect your product.
In the IP Camera Activation text field, enter the password to activate the IP camera(s) connected to the device.
Optionally, check the Export GUID to export the GUID for future password resetting.
Click OK to save the password and activate the device.
- After the device is activated, you should properly keep the password.
- When you have enabled the Export GUID, continue to export the GUID file to the USB flash driver for the future password resetting.
- You can duplicate the password to the IP cameras that are connected with default protocol.
Configure Security Question for Password Resetting
If you configure three security questions, you can reset the password for the device by entering answers to these questions.
Choose questions
Choose questions from the dropdown lists for Question 1, Question 2, and Question 3.
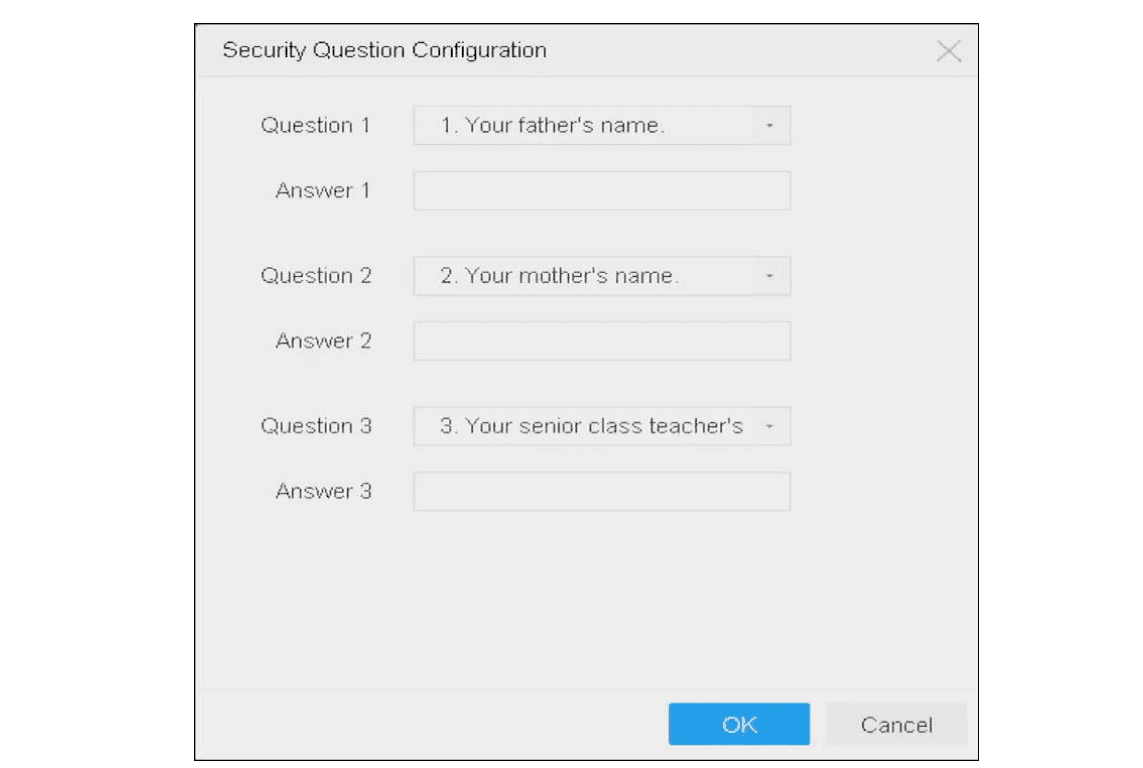
Figure 2-2 Security Question
Enter your answers
Enter your answer for each question and remember it.
Confirm
Click OK.
If you don't want to configure these questions, you can click Cancel.
Configure Unlock Pattern for Login
For the admin user, you can configure the unlock pattern for device login.
Enter the unlock pattern interface
After the device is activated, you can enter the following interface to configure the device unlock pattern.
Draw the pattern
Use the mouse to draw a pattern among the 9 dots on the screen. Release the mouse when the pattern is done.
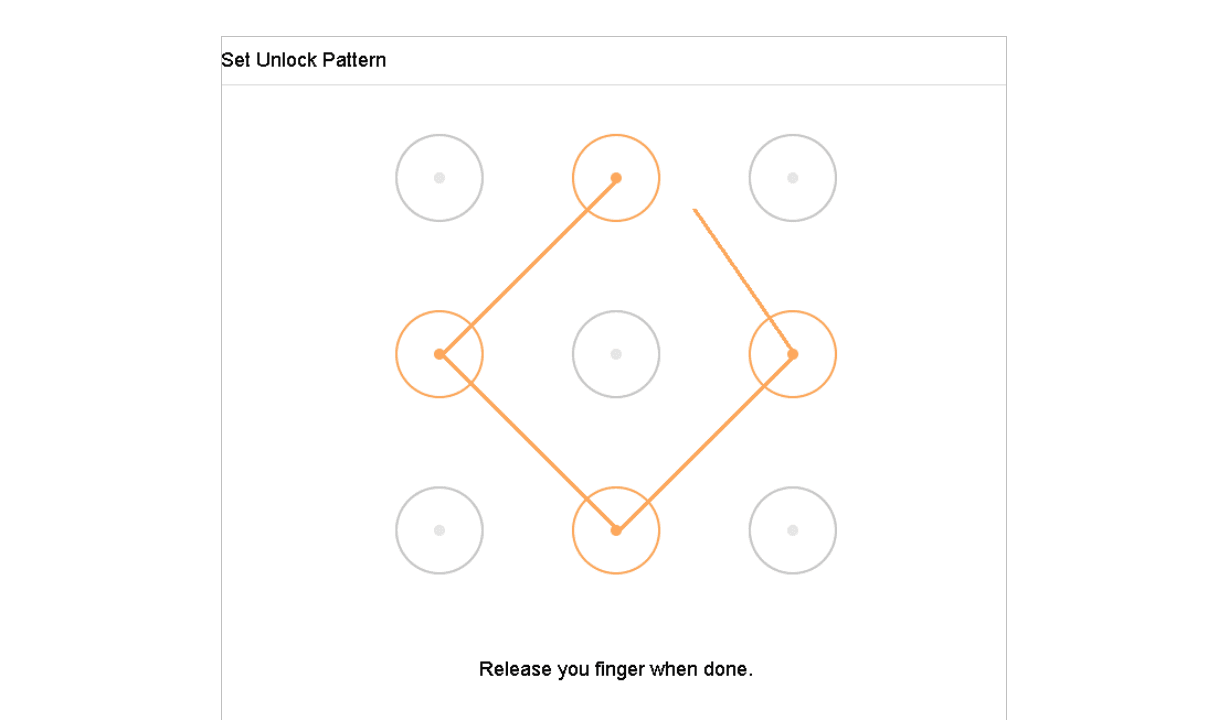
Figure 2-3 Draw the Pattern
- Connect at least 4 dots to draw the pattern.
- Each dot can be connected for once only.
Confirm the pattern
Draw the same pattern again to confirm it. When the two patterns match, the pattern is configured successfully.
If the two patterns are different, you must set the pattern again.
Login to the Device
Log in via Unlock Pattern
- Only the admin user has the permission to unlock the device.
- Please configure the pattern first before unlocking. Please refer to Configure Unlock Pattern for Login.
Enter the unlock interface
Right click the mouse on the screen and select the menu to enter the interface.
Draw the pre-defined pattern
Draw the pre-defined pattern to unlock to enter the menu operation.
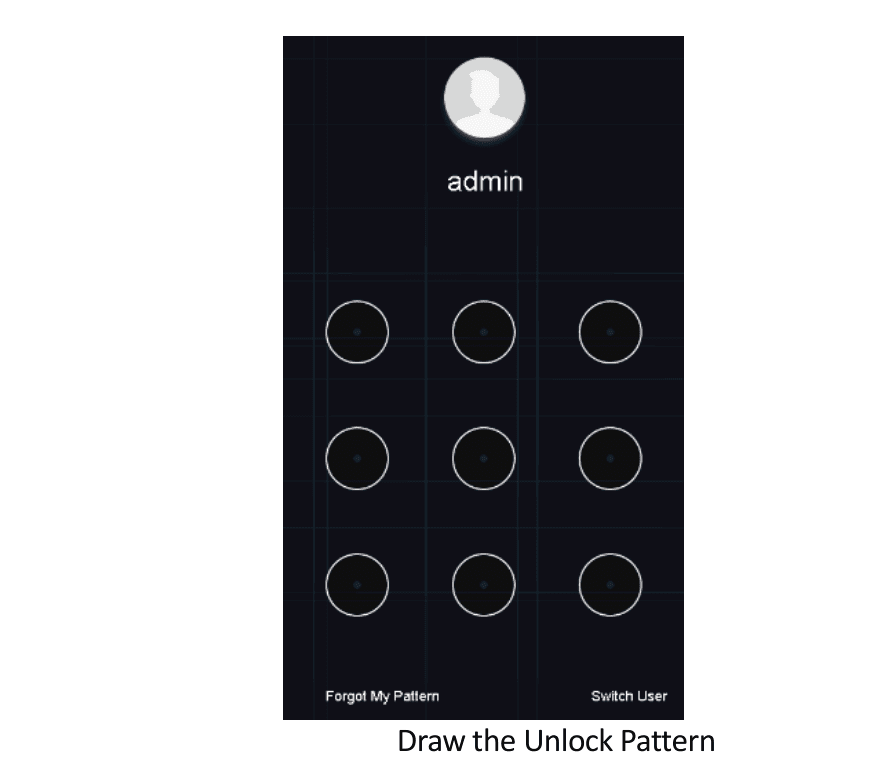
Figure 2-4 Draw the Unlock Pattern
- If you have forgotten your pattern, you can select the Forgot My Pattern or Switch User option to enter the normal login dialog box.
- When the pattern you draw is different from the pattern you have configured, you should try again.
- If you have drawn the wrong pattern for more than 5 times, the system will switch to the normal login mode automatically.
Log in via Password
Purpose: If device has logged out, you must login the device before operating the menu and other functions.
Select user
Select the User Name in the dropdown list.
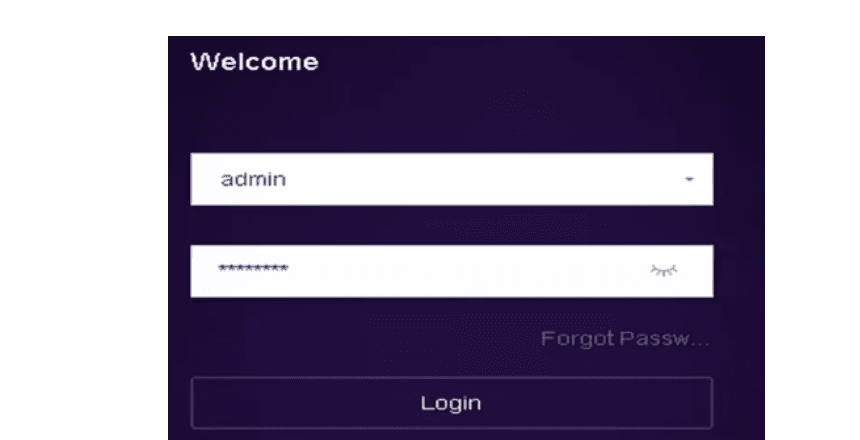
Figure 2-5 Login Interface
Enter password
Input password.
Log in
Click OK to log in.
- When you forget the password of the admin, you can click Forgot Password to reset the password.
- In the Login dialog box, if you enter the wrong password 7 times, the current user account will be locked for 60 seconds.
Enter Wizard to Configure Quick Basic Settings
By default, the Setup Wizard starts once the device has loaded.
The Setup Wizard can walk you through some important settings of the device. If you don't want to use the Setup Wizard at that moment, click the Exit button.
Configure date and time
Configure the date and time on the Date and Time Setup interface.
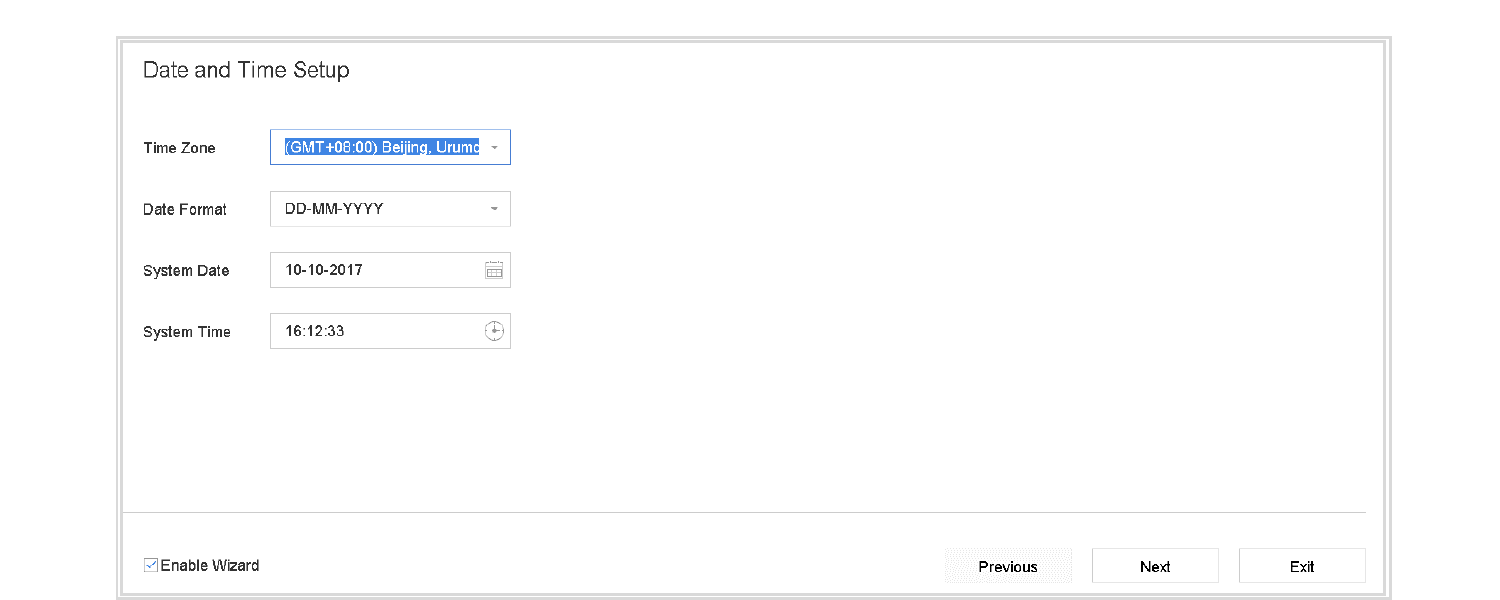
Figure 2-6 Date and Time Settings
Configure network settings
After the time settings, click Next to enter the Network Setup Wizard window, as shown in the following figure.
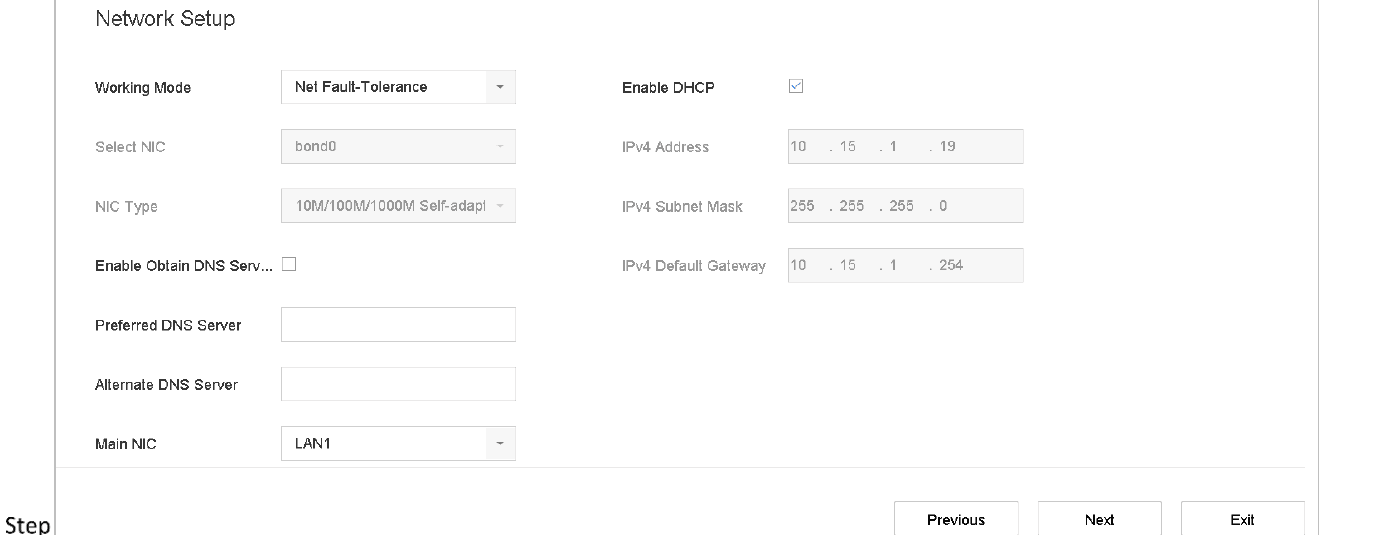
Figure 2-7 Network Settings
Click Next after you configured the network parameters, which takes you to the HDD Management window.
Initialize HDDs
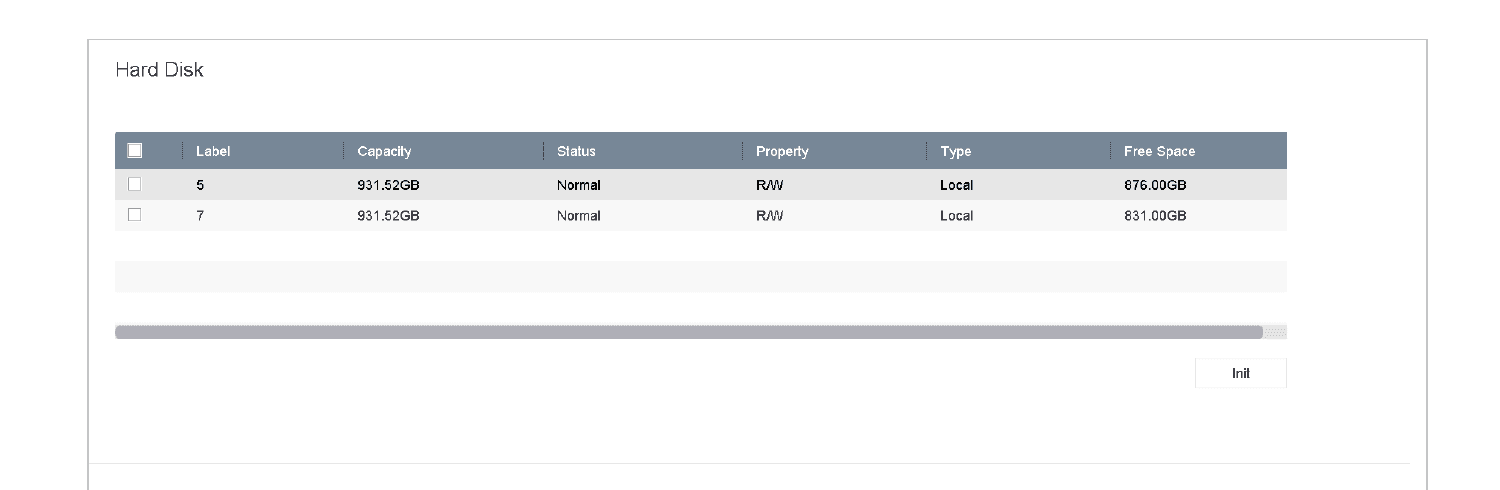
Figure 2-8 HDD Management
To initialize the HDD, click the Init button. Initialization removes all the data saved in the HDD.
Add IP cameras
Click Next. You enter the Camera Setup interface to add the IP cameras.
- Click Search to search the online IP Camera. Before adding the camera, make sure the IP camera to be added is in active status.
- Click the Add to add the camera.
If the camera is in inactive status, you can select the camera from the list and click Activate to activate the cameras.
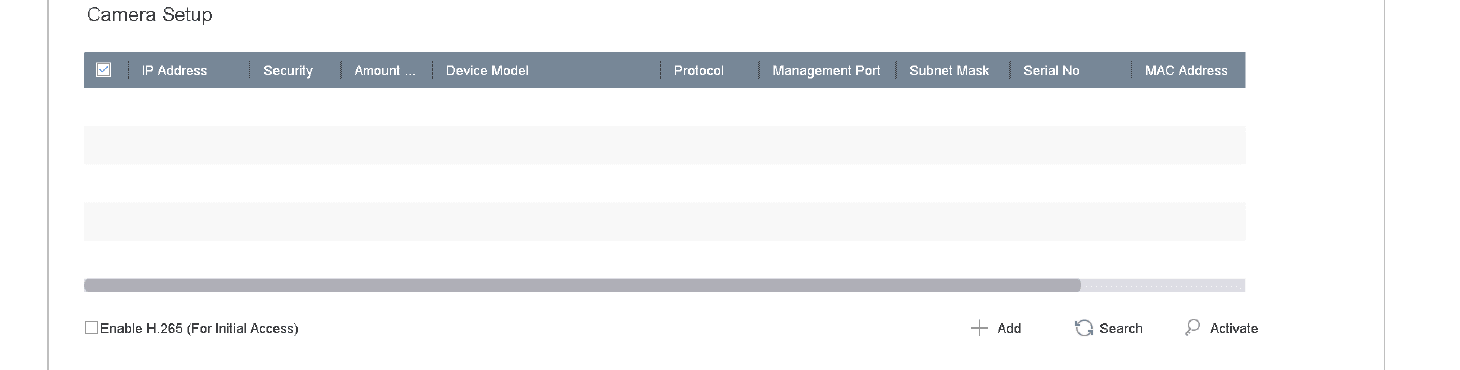
Figure 2-9 Search for IP Cameras
Configure Platform Access
Enter the Platform Access and configure the Guarding Vision settings.
Change password
Click Next to enter the Change Password interface to create the new admin password if required.
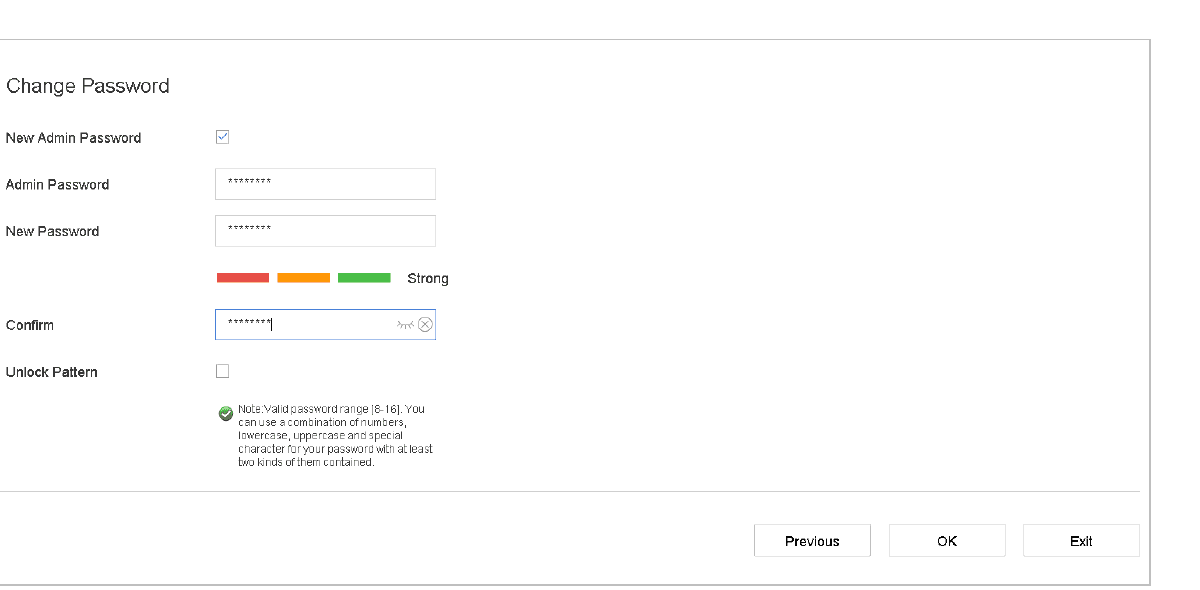
Figure 2-10 Change Password
You can click the eye icon to show the characters input.
- Check the checkbox of New Admin Password.
- Enter the original password in the text field of Admin Password.
- Input the same password in the text field of New Password and Confirm.
- Check the Unlock Pattern to enable the unlock pattern login.
We highly recommend you create a strong password of your own choosing (Using a minimum of 8 characters, including at least three of the following categories: upper case letters, lower case letters, numbers, and special characters.) in order to increase the security of your product. And we recommend you reset your password regularly, especially in the high security system, resetting the password monthly or weekly can better protect your product.
Complete the wizard
Click OK to complete the startup Setup Wizard.
Enter Main Menu
After you have completed the wizard, you can right click on the screen to enter the main menu bar. Refer to the following figure and table for the description of main menu and sub-menus.

Figure 2-11 Main Menu Bar
Table 2-1 Description of Icons
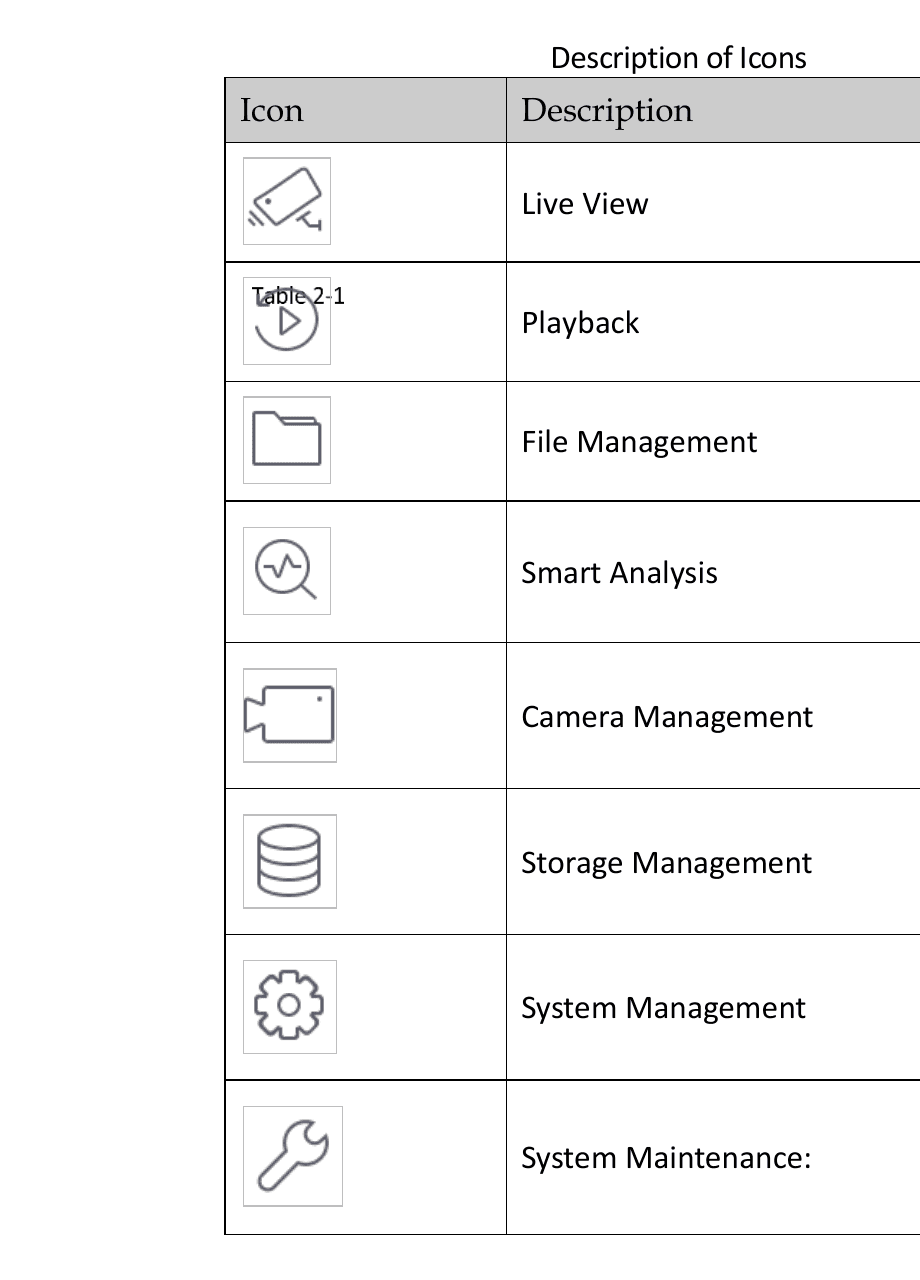
| Icon | Description |
|---|---|
| Live View icon | Live View |
| Playback icon | Playback |
| File Management icon | File Management |
| Smart Analysis icon | Smart Analysis |
| Camera Management icon | Camera Management |
| Storage Management icon | Storage Management |
| System Management icon | System Management |
| System Maintenance icon | System Maintenance |
System Operation
Log out
Purpose: After logging out, the monitor turns to the live view mode and if you want to perform any operations, you need to enter user name and password to log in again.
 on the menu bar.
After you have logged out the system, menu operation on the screen is invalid. It is required to input a user name and password to unlock the system.
Shut Down the Device
Do not conduct power off operation again when the system is shutting down.
Reboot the Device
From the Shutdown menu, you can also reboot the device.
Introduction
Chapter 1 of the Turbo HD DVR GUI 4.0 user manual — front panel controls, IR remote control operations, USB mouse operation, and rear panel interfaces for all supported model variants.
Camera Management
Add IP cameras manually or via auto-search, connect PoC cameras, configure analog and IP signal input channels, enable 5 MP long distance transmission, enable H.265 auto switch, and remotely upgrade IP cameras on the Turbo HD DVR.