 Trung tâm trợ giúp LTS Connect
AI Database
Configure the AI database on the LTS Sapphire Series NVR — create a face library, add face pictures one by one or in batch for face recognition, and manage vehicle plate black/whitelists.
Database
After you successfully set the face library, the detected human face can compare with the image on the face library. The face library settings include create face library, add human face and human face modeling.
For privacy reason, the human face is pixelated.
Creating Human Face Library
Open the FACE LIBRARY interface
Select Main Menu > AI > DATABASE > FACE LIBRARY.
The FACE LIBRARY interface is displayed. See Figure 4-153.
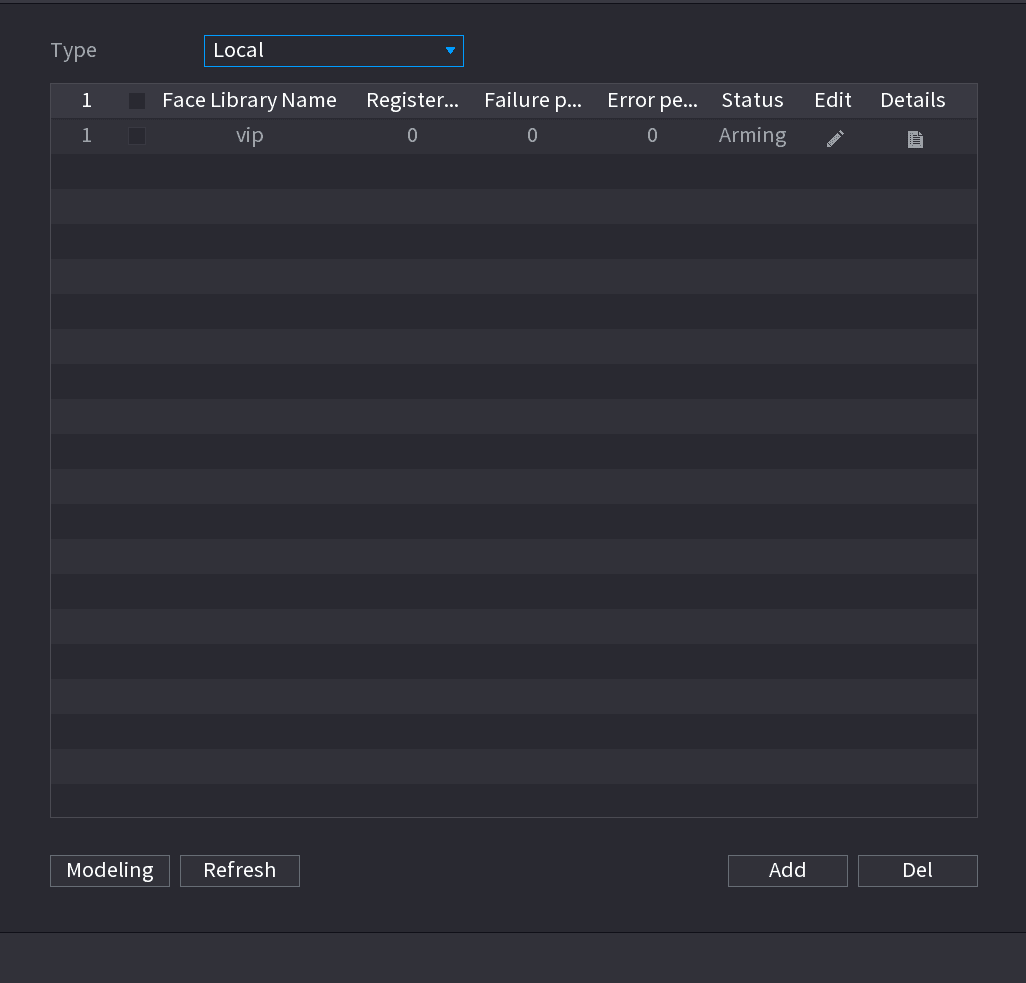
Add a face library
Select a channel and then click Add.
System displays Add interface. See Figure 4-154.
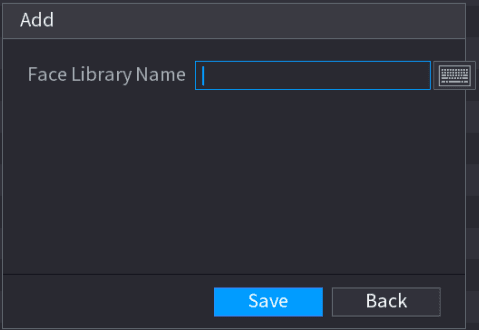
Save the face library
Input human face library name and then click Save.
System successfully saves the face library.
Adding Face Pictures
You can add face pictures to the existing libraries one by one or by batch, or add from the detected faces.
To add face pictures one by one or by batch, you need to get the pictures from the USB storage device. The picture size should be smaller than 256K with resolution between 200×200–6000×5000.
Adding One Face Picture
You can add one face picture to the database. It is for the scenario that the registered human face picture amount is small.
Open the FACE LIBRARY interface
Select Main Menu > AI > DATABASE > FACE LIBRARY.
The FACE LIBRARY interface is displayed.
Open the library details
Click the details icon of the library that you want to configure.
The Details interface is displayed. See Figure 4-155.
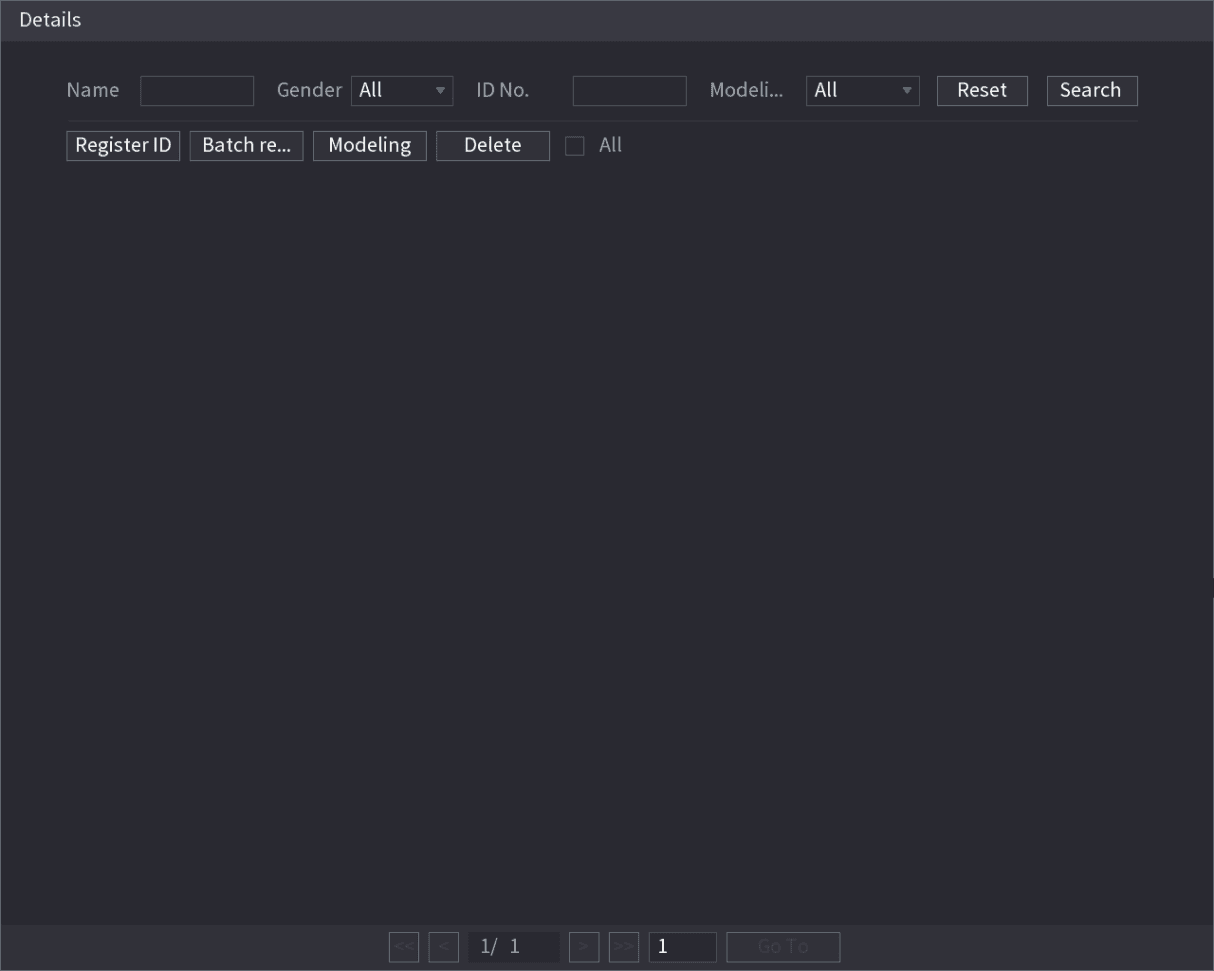
Open the Register ID interface
Click Register ID.
The Register ID interface is displayed. See Figure 4-156.
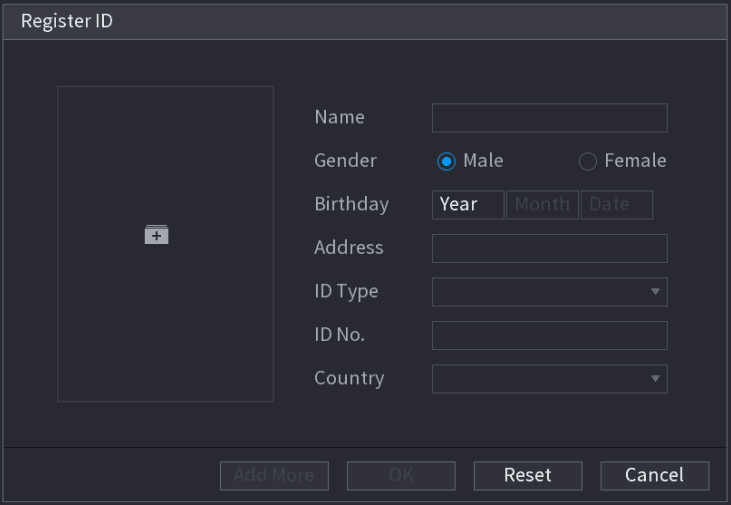
Add a face picture
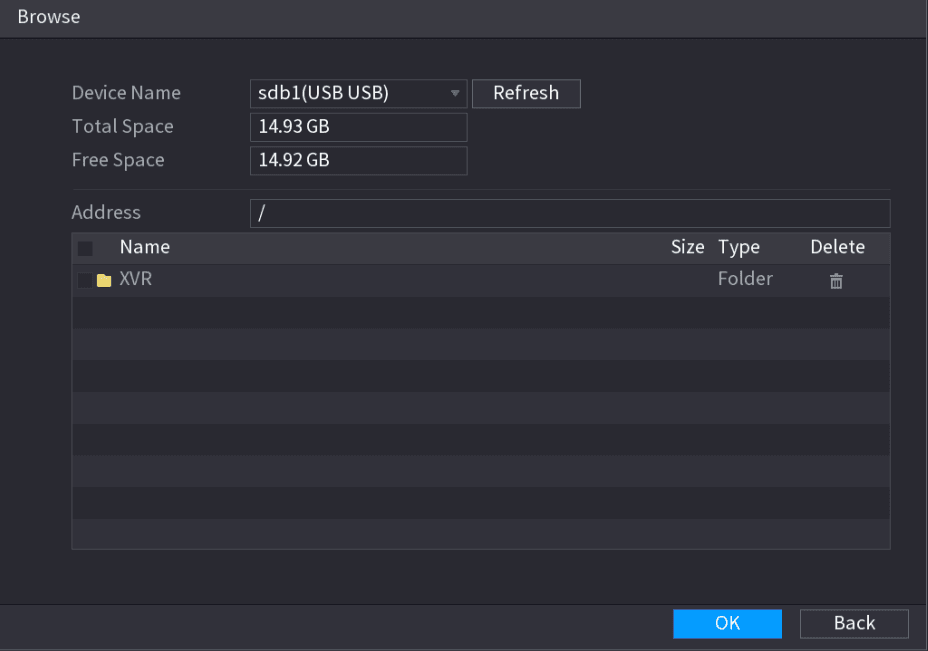
Click the add icon to add a face picture.
The Browse interface is displayed. See Figure 4-157.
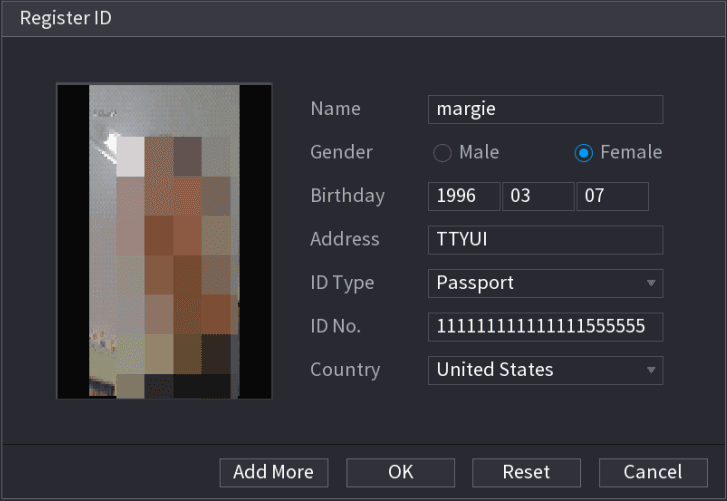
Enter the registration information
Select a face picture and enter the registration information. See Figure 4-158.
Build the face model
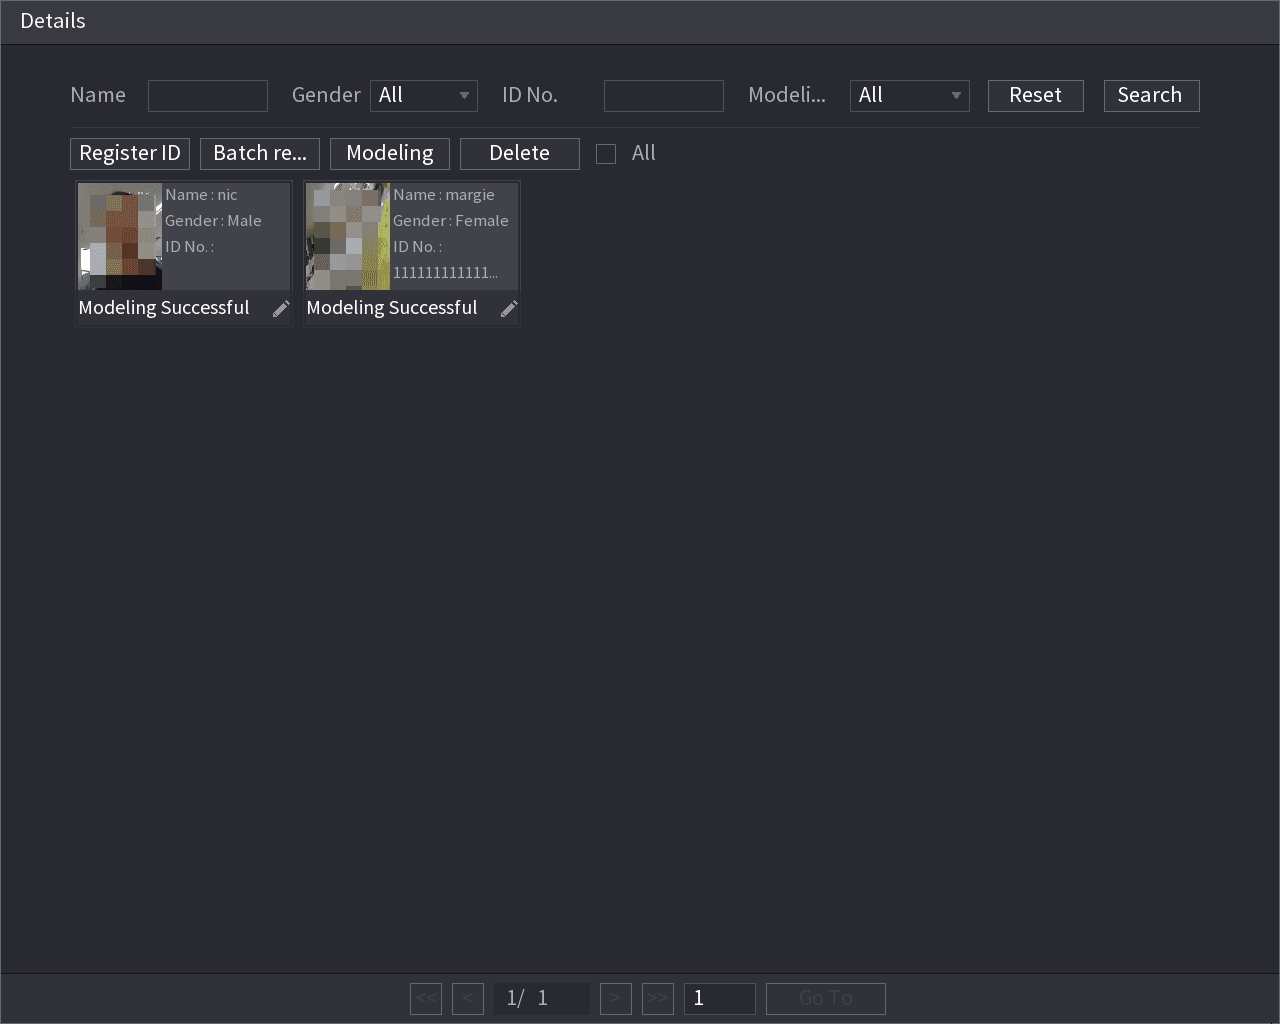
On the Details interface, click Search.
The system prompts modeling is successful. See Figure 4-159.
If the system prompts the message indicating modeling is in process, wait a while and then click Search again. If modeling is failed, the registered face picture cannot be used for face recognition.
Adding Face Pictures in Batch
System supports batch add if you want to import several human face image at the same time.
Name the face pictures
Give a name to the face picture by referring to the following table. See Table 4-43.
| Naming format | Description |
|---|---|
| Name | Enter the name. |
| Gender | Enter 1 or 2. 1 represents male, and 2 represents female. |
| Birthday | Enter numbers in the format of yyyy-mm-dd. |
| Country | Enter the abbreviation of country. For example, CN for China. |
| ID Type | 1 represents ID card; 2 represents passport; 3 represents military officer password. |
| ID No. | Enter the ID number. |
| Address | Enter the address. |
Open the FACE LIBRARY interface
Select Main Menu > AI > DATABASE > FACE LIBRARY.
The FACE LIBRARY interface is displayed.
Open the library details
Click the details icon of the library that you want to configure.
The Details interface is displayed. See Figure 4-155.
Open the Batch register interface
On the Details interface, click Batch register.
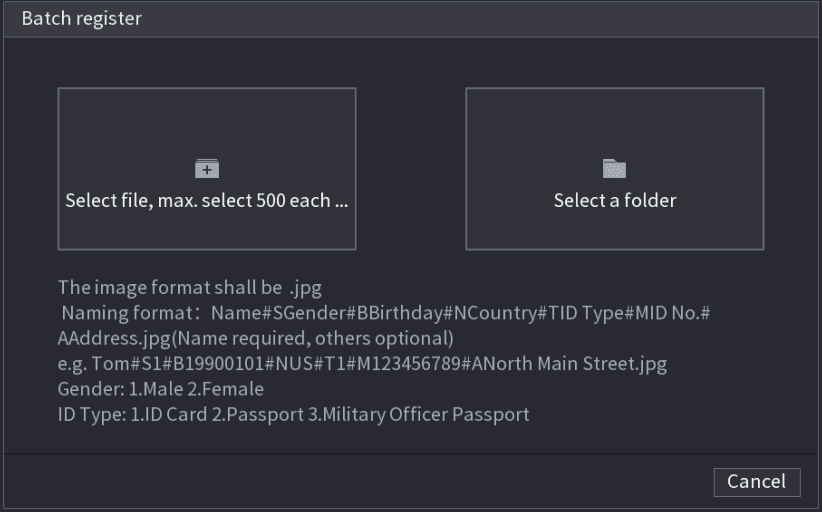
The Batch register interface is displayed. See Figure 4-160.
Import the face pictures
Click Select file, max select 500 each time or Select a folder to import face pictures.
Complete the registration
Click OK to complete batch registration.
Black/whitelist
To manage vehicle management, you can add the corresponding plate number on the blacklist or whitelist. System can compare the detected plate information with the plate on the blacklist/whitelist and then trigger the corresponding alarm linkage.
After enable black/whitelist, on the preview interface, the plate in the blacklist is displayed as red on the plate list, the plate in the whitelist is displayed as green on the plate list. For the plate not in the black/whitelist, the plate is displayed as white.
Adding B/W List
Open the B/W List interface
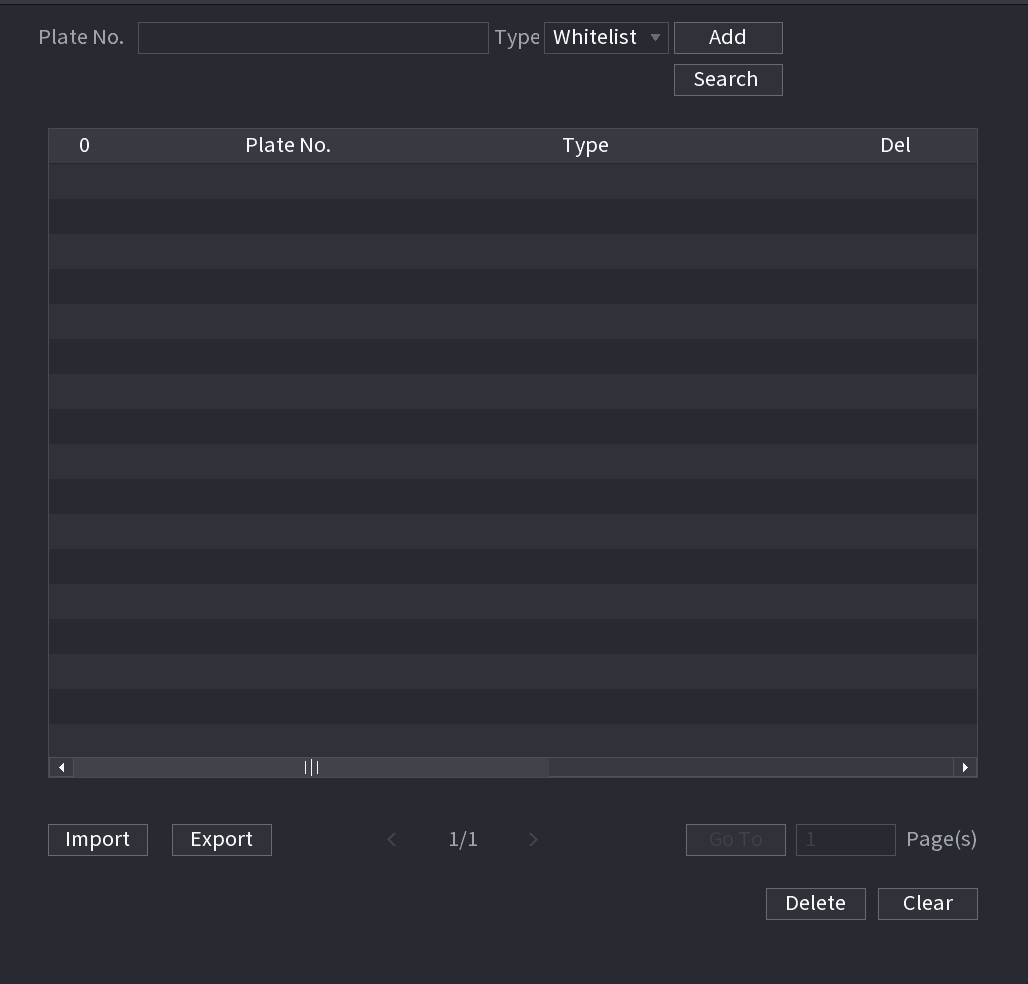
Select Main Menu > AI > DATABASE > B/WLIST.
The B/W List interface is displayed. See Figure 4-161.
Set the plate information
Set plate information and then select Blacklist or Whitelist.
Add the plate
Click Add.
Deleting Black/Whitelist
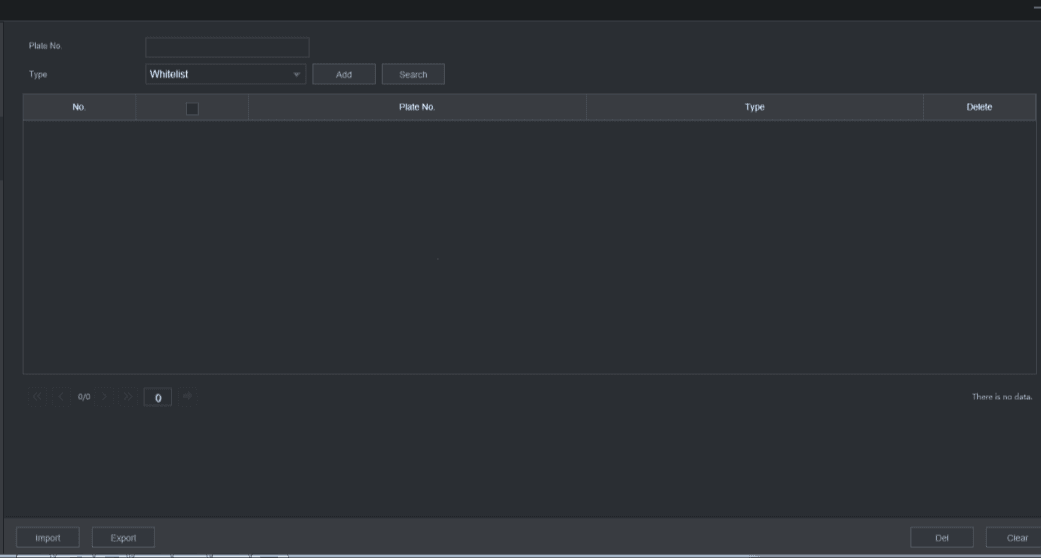
Set type as Whitelist, Blacklist, or All, and then click Search. System displays black/whitelist information. See Figure 4-162.
- On the searched results list, check the box before the plate number and then click Delete, or click the delete icon of the corresponding plate number, you can delete the plate information on the black/whitelist.
- Click Clear to delete all plate information on the black/whitelist.
Import/Export Black/whitelist
System supports export black/whitelist to the USB device, or import black/whitelist from the USB device. System supports .csv or .xlsx file. The export file format is .csv.
- Import black/whitelist: Click Import and then select the corresponding file, click Browse to import the file.
- Export black/whitelist: Click Export and then select the file storage path and then click Save.
AI Parameters
Configure the AI parameters of the Sapphire Series NVR, including smart plan, face detection, face recognition, IVS behavior analytics, video structuring, crowd distribution, people counting, heat map, and ANPR.
Event Manager
Search and back up alarm logs, view alarm status, configure alarm input and output, set up video detection, audio detect, thermal alarm, and abnormality events on the Sapphire Series NVR.