 Centrum nápovědy LTS Connect
Disk Array
Configure software RAID disk arrays on the Turbo HD DVR: create, rebuild, delete arrays, manage hot spare disks, and check firmware.
This chapter is applicable for DS-7300/8100/9000HUHI-K series DVR.
Disk array is a data storage virtualization technology that combines multiple physical disk drive components into a single logical unit. An array stores data over multiple HDDs to provide enough redundancy so that data can be recovered if one disk fails. Data is distributed across the drives in one of several ways called "RAID levels", depending on what level of redundancy and performance is required.
Create Disk Array
Purpose: The device supports the disk array that is realized by software. You can enable the RAID function as required. Two ways are available for creating array: one-touch configuration and manual configuration.
Enable RAID
Purpose: Perform the following steps to enable the disk array function.
Go to Advanced
Go to Storage > Advanced.
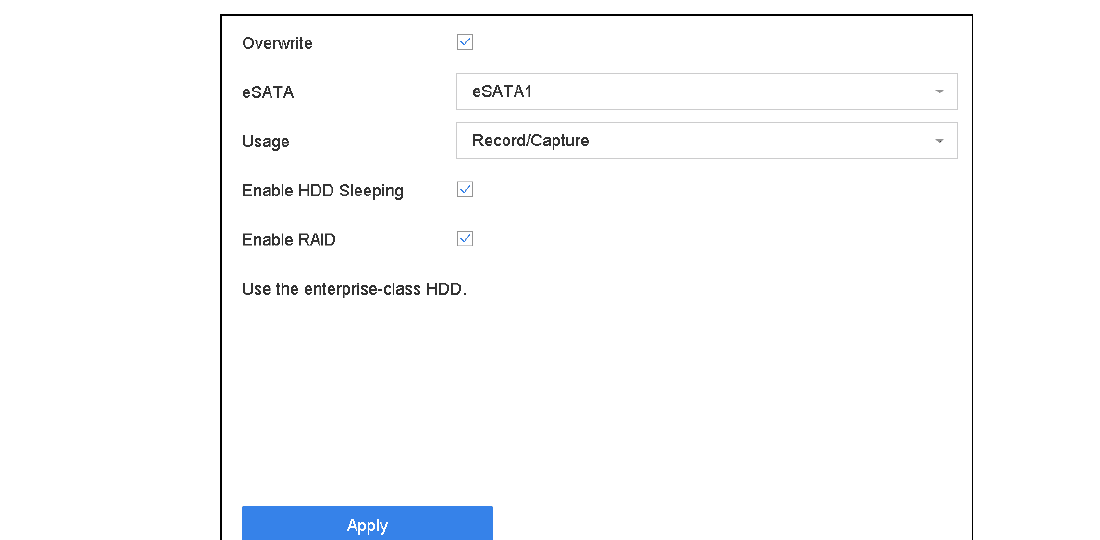
Figure 8-1 Advanced
Enable RAID
Check Enable RAID.
Apply
Click Apply.
Reboot
Reboot the device to take effect the settings.
One-Touch Creation
Purpose: One-touch configuration helps you to quickly create the disk array. By default, the array type created by one-touch configuration is RAID 5.
Before you start:
- Enable RAID function. For details, refer to Enable RAID.
- Install at least 3 HDDs. If more than 10 HDDs are installed, 2 arrays will be created. To maintain reliable and stable running of the HDDs, it is recommended to use enterprise-level HDDs with the same model and capacity.
Go to Physical Disk
Go to Storage > RAID Setup > Physical Disk.
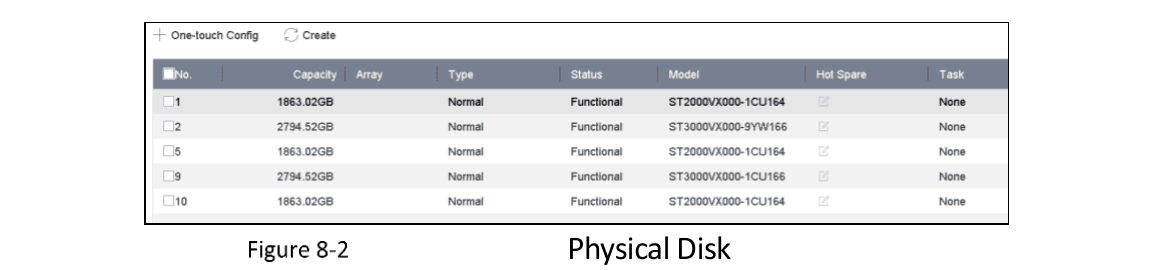
Figure 8-2 Physical Disk
Click One-touch Config
Click One-touch Config.
Set array name
Edit the array name in the Array Name text field and click OK to start configuring.
If you install 4 HDDs or more, a hot spare disk for array rebuilding will be created.
Confirm completion
A message box will pop up when the array creation is completed; click OK on it.
View created array
Optionally, the device will automatically initialize the created array. Go to Storage > RAID Setup > Array to view the information of the created array.
Manual Creation
Purpose: Manually create the array of RAID 0, RAID 1, RAID 5, RAID 6, and RAID 10.
Go to Physical Disk
Go to Storage > RAID Setup > Physical Disk.
Click Create
Click Create.
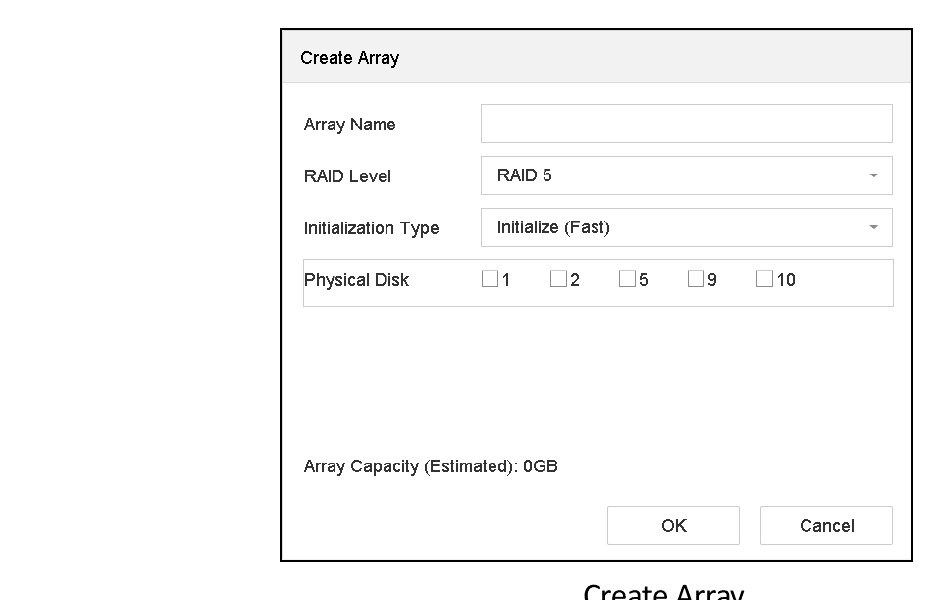
Figure 8-3 Create Array
Enter array name
Enter the array name.
Select RAID level
Select RAID Level as RAID 0, RAID 1, RAID 5, RAID 6, or RAID 10 as required.
Select physical disks
Select the physical disks to constitute the array.
Table 8-1 Required Number of HDD
| RAID Level | Required Number of HDD |
|---|---|
| RAID 0 | At least 2 HDDs. |
| RAID 1 | At least 2 HDDs. |
| RAID 5 | At least 3 HDDs. |
| RAID 6 | At least 4 HDDs. |
| RAID 10 | The number of HDD must be an even number ranging from 4 to 16. |
Click OK
Click OK.
View created array
Optionally, the device will automatically initialize the created array. Go to Storage > RAID Setup > Array to view the information of the created array.
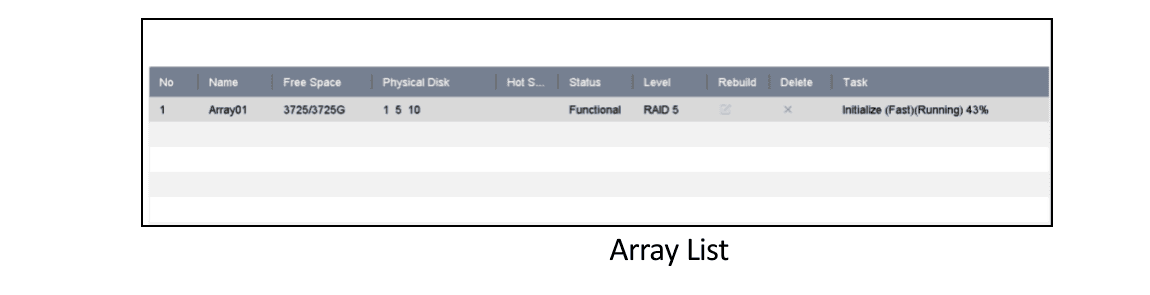
Figure 8-4 Array List
Rebuild Array
Purpose: The status of array includes Functional, Degraded, and Offline. To ensure the high security and reliability of the data stored in array, you should take immediate and proper maintenance of arrays according to their status.
- Functional: No disk loss in the array.
- Offline: The number of lost disks has exceeded the limit.
- Degraded: If an amount of HDDs fail in array, the array degrades. You should recover it to Functional by array rebuilding.
Configure Hot Spare Disk
Purpose: Hot spare disks are required for disk array automatic rebuilding.
Go to Physical Disk
Go to Storage > RAID Setup > Physical Disk.
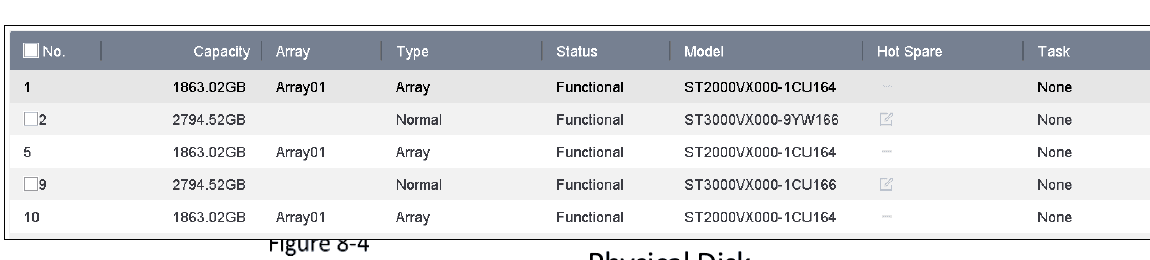
Figure 8-5 Physical Disk
Set hot spare disk
Click  of an available HDD to set it as the hot spare disk.
Automatically Rebuild Array
Purpose: The device can automatically rebuild degraded arrays with the hot spare disks.
Before you start: Create hot spare disks. For details, refer to Configure Hot Spare Disk.
The device will automatically rebuild the degraded arrays with the hot spare disks. Go to Storage > RAID Setup > Array to view the rebuilding progress.
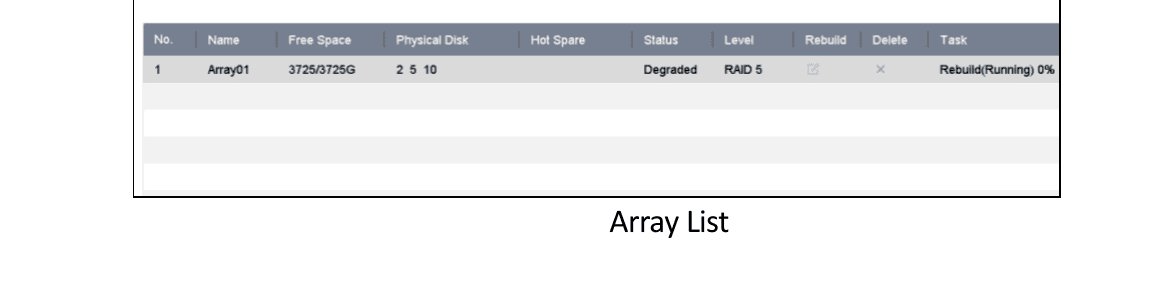
Figure 8-6 Array List
Manually Rebuild Array
Purpose: If no hot spare disks are configured, rebuild the degraded array manually.
Before you start: At least one available physical disk should exist for rebuilding the array.
Go to Array
Go to Storage > RAID Setup > Array.
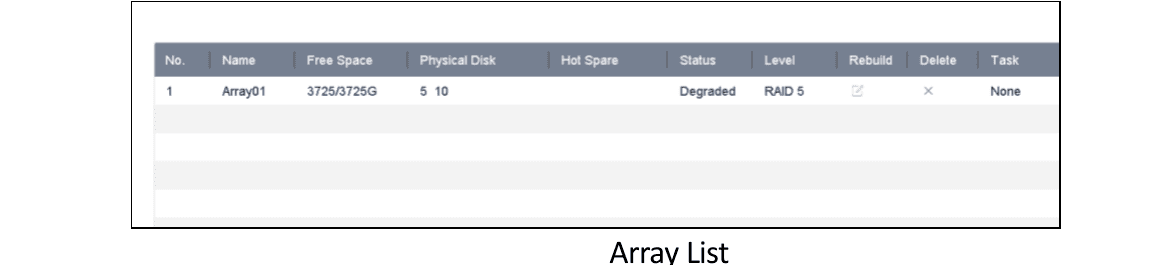
Figure 8-7 Array List
Open Rebuild Array
Click  of the degraded array.
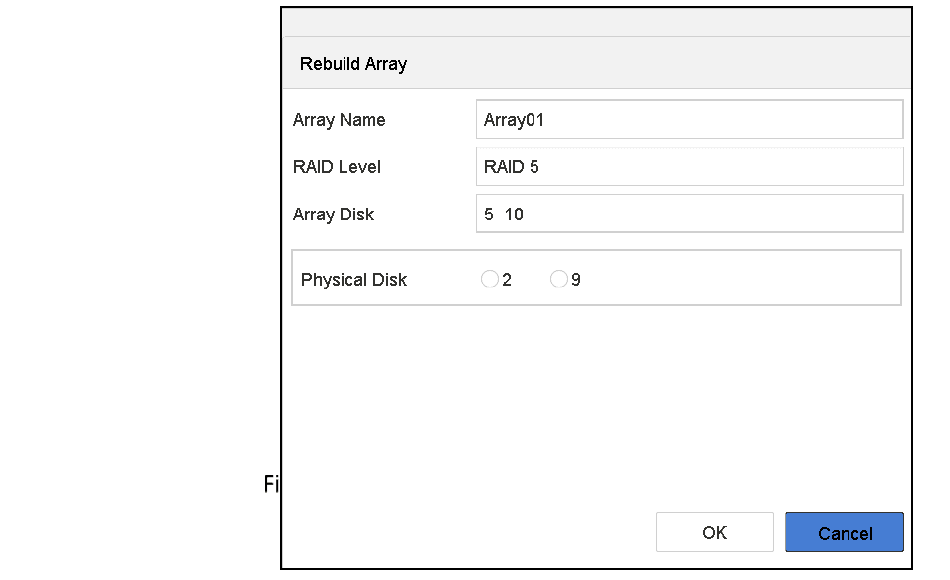
Figure 8-8 Rebuild Array
Select physical disk
Select the available physical disk.
Click OK
Click OK.
Confirm
Click OK on the pop-up message box "Do not unplug the physical disk when it is under rebuilding".
Delete Array
Deleting array will delete all the data saved in it.
Go to Array
Go to Storage > RAID Setup > Array.

Figure 8-9 Array List
Delete array
Click  of the array to delete.
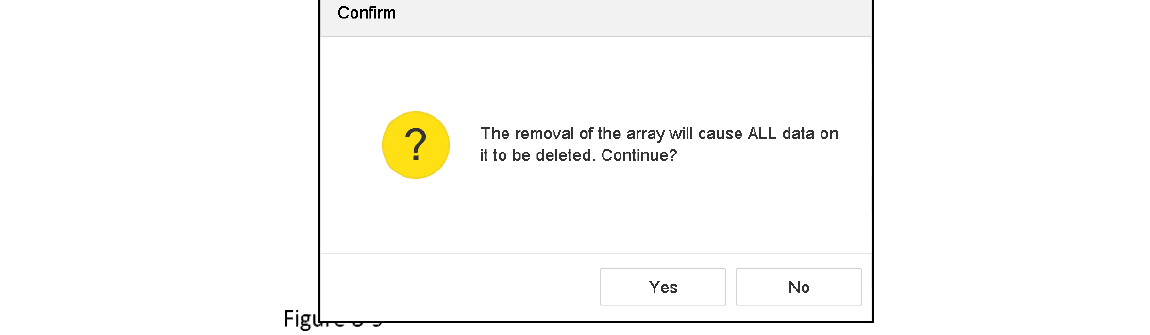
Figure 8-10 Attention
Confirm
Click Yes on the popup message box.
Check and Edit Firmware
Purpose: You can view the information of the firmware and set the background task speed on the Firmware interface.
Go to Firmware
Go to Storage > RAID Setup > Firmware.
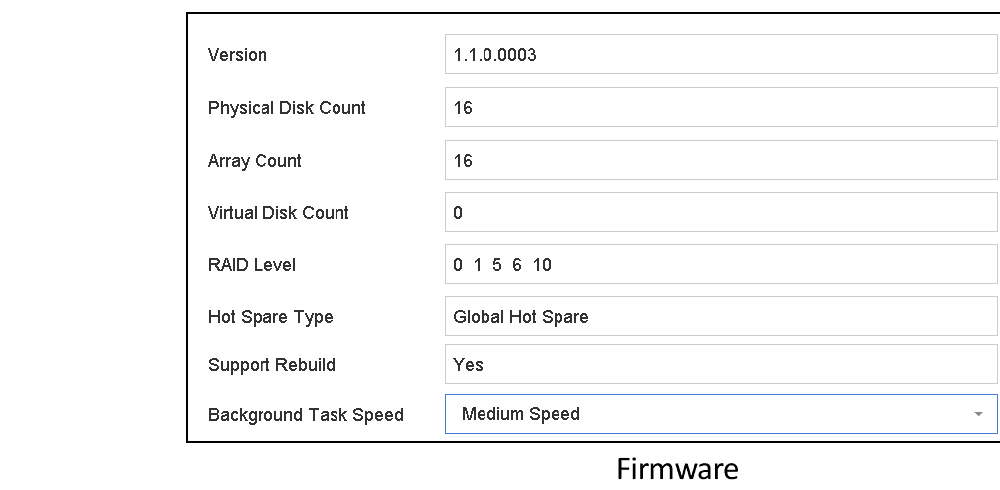
Figure 8-11 Firmware
Set background task speed
Optionally, set the Background Task Speed.
Apply
Click Apply.
Storage
Configure storage devices, HDD groups, quota mode, recording schedules, picture capture, holiday recording, redundant recording, and 1080p Lite mode on the Turbo HD DVR GUI 4.0.
File Management
Search, filter, and export recorded video and picture files by type — All Files, Human Files, and Vehicle Files — and save or recall search conditions for quick access.