 Centro assistenza LTS Connect
Record and Snapshot Settings
Configure manual and automatic recording, record control parameters, and scheduled, event triggered, and face detection triggered snapshots, including backing up snapshots to FTP.
Configuring Record Settings
You can record video manually or automatically and configure the recording settings to main stream and sub stream respectively.
Enabling Record Control
- Manual recording operation requires the user have the permission to access STORAGE settings.
- Check to ensure the HDD installed in the Device has been formatted properly.
To enter the record control interface, do the following:
Open the RECORD interface
Right-click on the live view screen, the shortcut menu is displayed. On the shortcut menu, select Manual > Record Control.
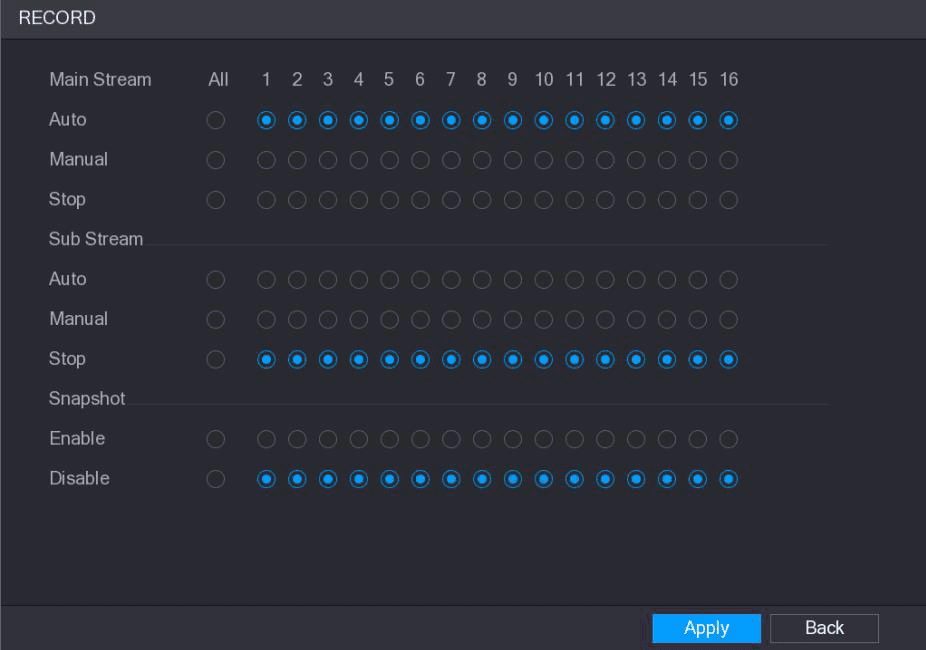
The RECORD interface is displayed, see Figure 5-93.
Configure the record control parameters
Configure the settings for the record control parameters. See Table 5-31.
| Parameter | Description |
|---|---|
| Channel | Displays all the analog channels and the connected digital channels. You can select a single channel or select All. |
| Record status | Auto: Automatically record according to the record type and recording time as configured in the recording schedule. Manual: Keep general recording for 24 hours for the selected channel. Stop: Do not record. |
| Snapshot status | Enable or disable the scheduled snapshot for the corresponding channels. |
Apply the settings
Click Apply.
Configuring Recorded Video Storage Schedule
You need to configure the storage schedule for the recorded video so that the recorded video can be saved. For details, see 5.1.4.9 Configuring Recorded Video Storage Schedule.
Configuring Snapshot Settings
Configuring Snapshot Trigger
The snapshot is divided into scheduled snapshot, event triggered snapshot, and face detection triggered snapshot. When the both are enabled, the event triggered snapshot has the priority.
- If there is no alarm event, the system performs scheduled snapshot.
- If there is any alarm event, the system performs event triggered snapshot.
Configuring Scheduled Snapshot
Enable the snapshot in the RECORD interface
Right-click on the live view screen, the shortcut menu is displayed.
On the shortcut menu, select Manual > Record Control.
The RECORD interface is displayed.
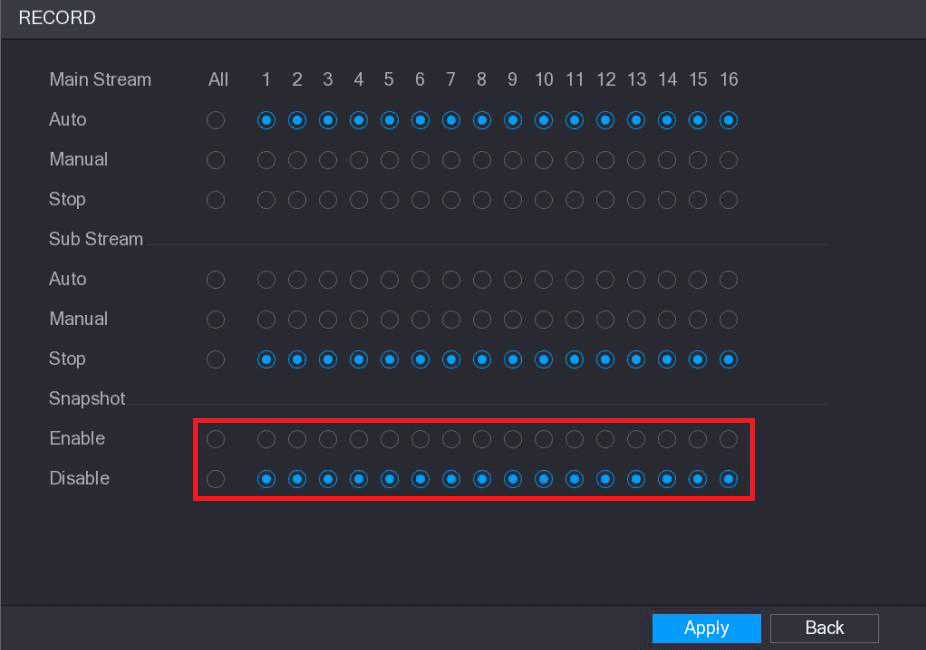
In the Snapshot area, enable the snapshot for the channels if needed. See Figure 5-94.
Configure the General snapshot mode
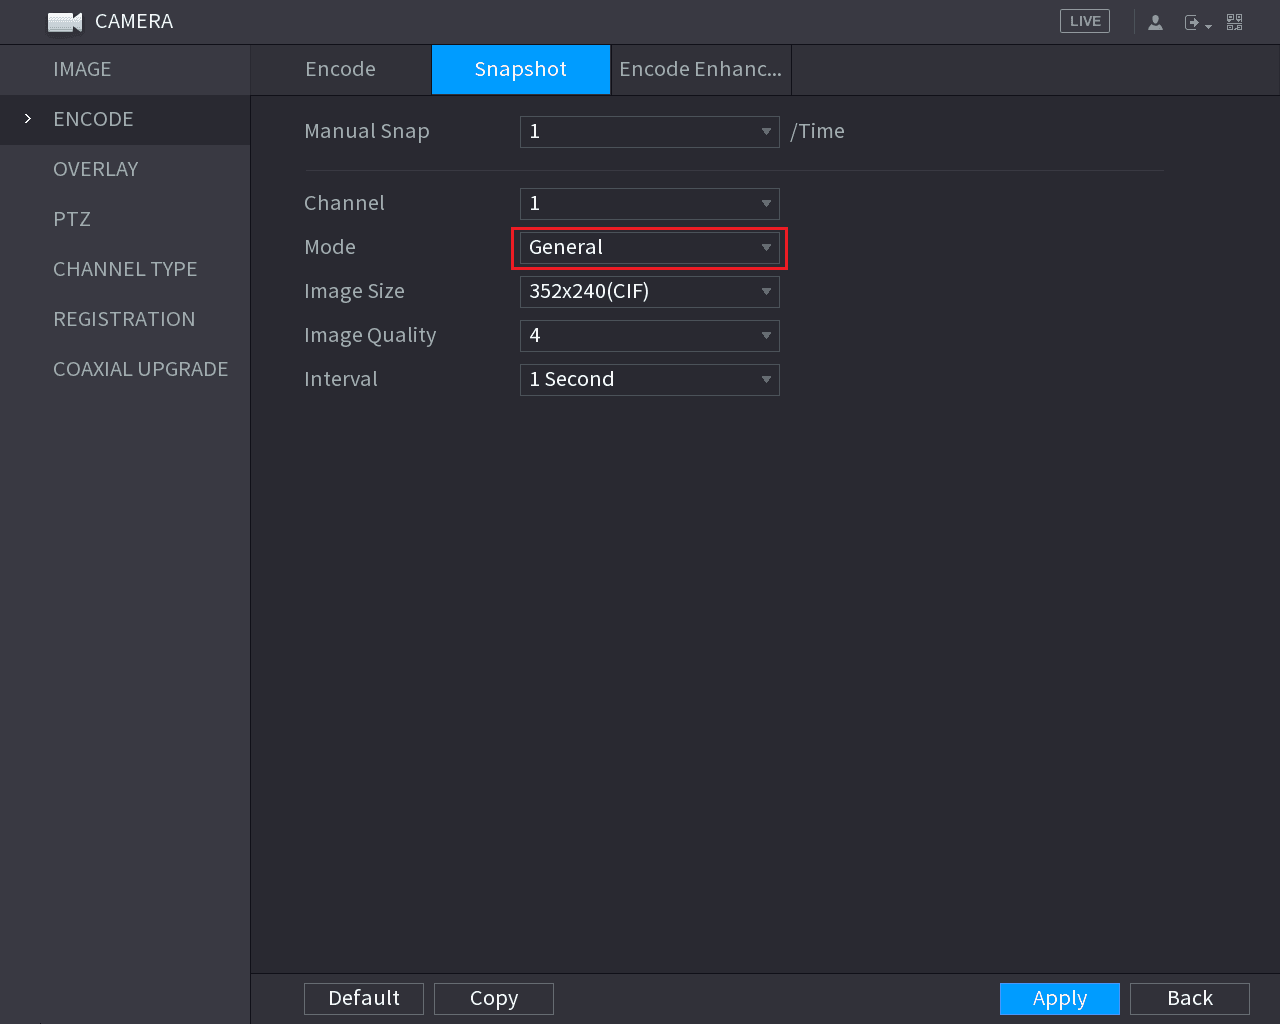
Select Main Menu > CAMERA > ENCODE > Snapshot.
The Snapshot interface is displayed.
In the Mode list, select General, and then configure other parameters. See Figure 5-95.
Save the settings
Click Apply to save the settings.
- If you have configured the snapshot schedule, the configuration has been completed.
- If you have not configured the snapshot schedule, see 5.1.4.10 Configuring Snapshot Storage Schedule.
Configuring Event Triggered Snapshot
Configure the Event snapshot mode
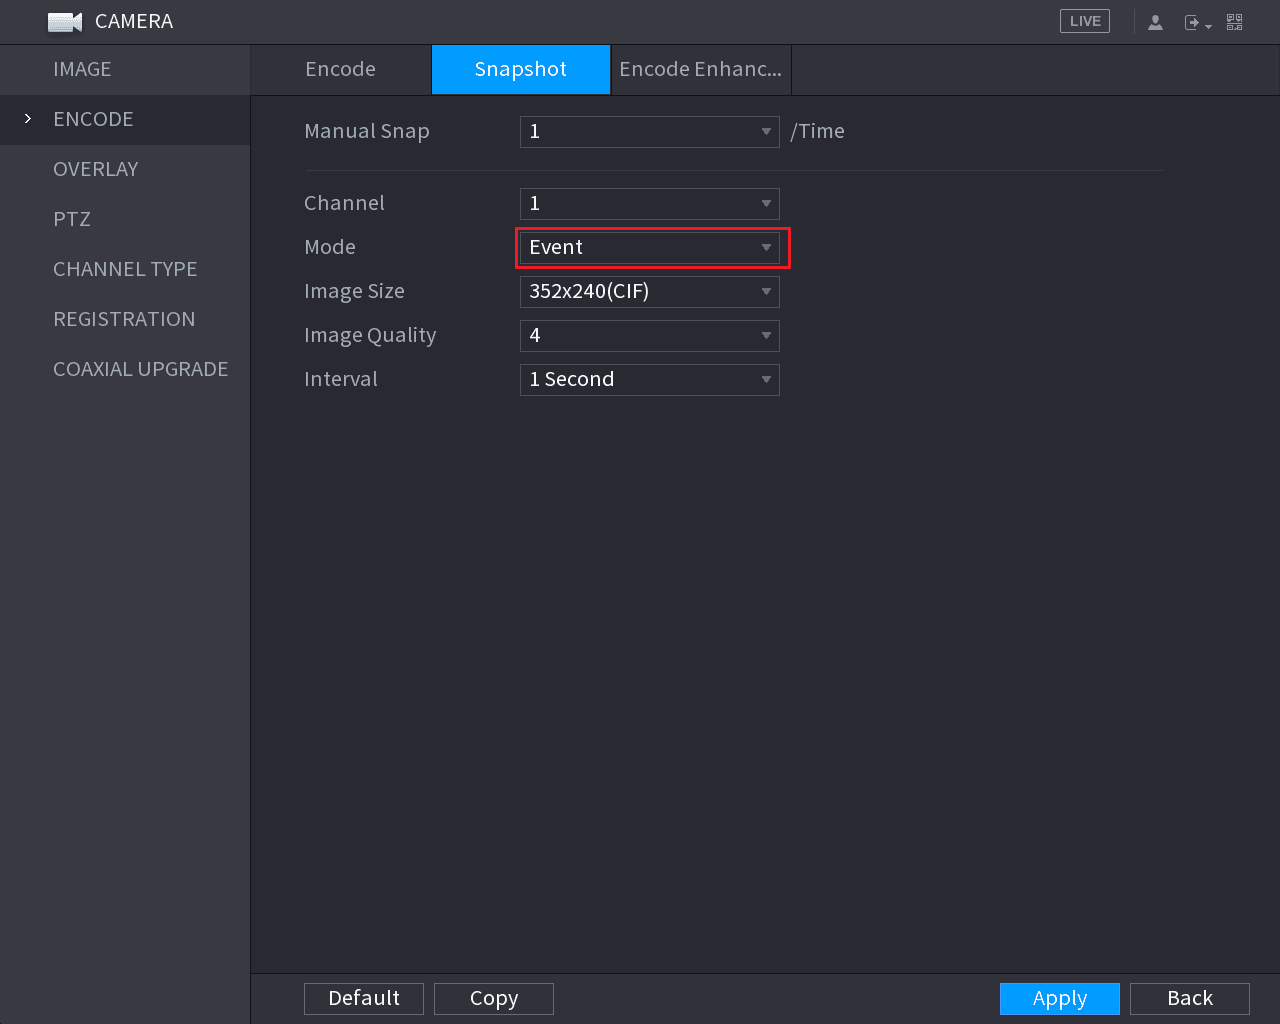
Select Main Menu > CAMERA > ENCODE > Snapshot.
The Snapshot interface is displayed.
In the Mode list, select Event, and then configure other parameters. See Figure 5-96.
Select the event type and enable Snapshot
Select Main Menu > ALARM > VIDEO DETECT, and select the event type to configure, for example, select the Motion Detect tab. See Figure 5-97.
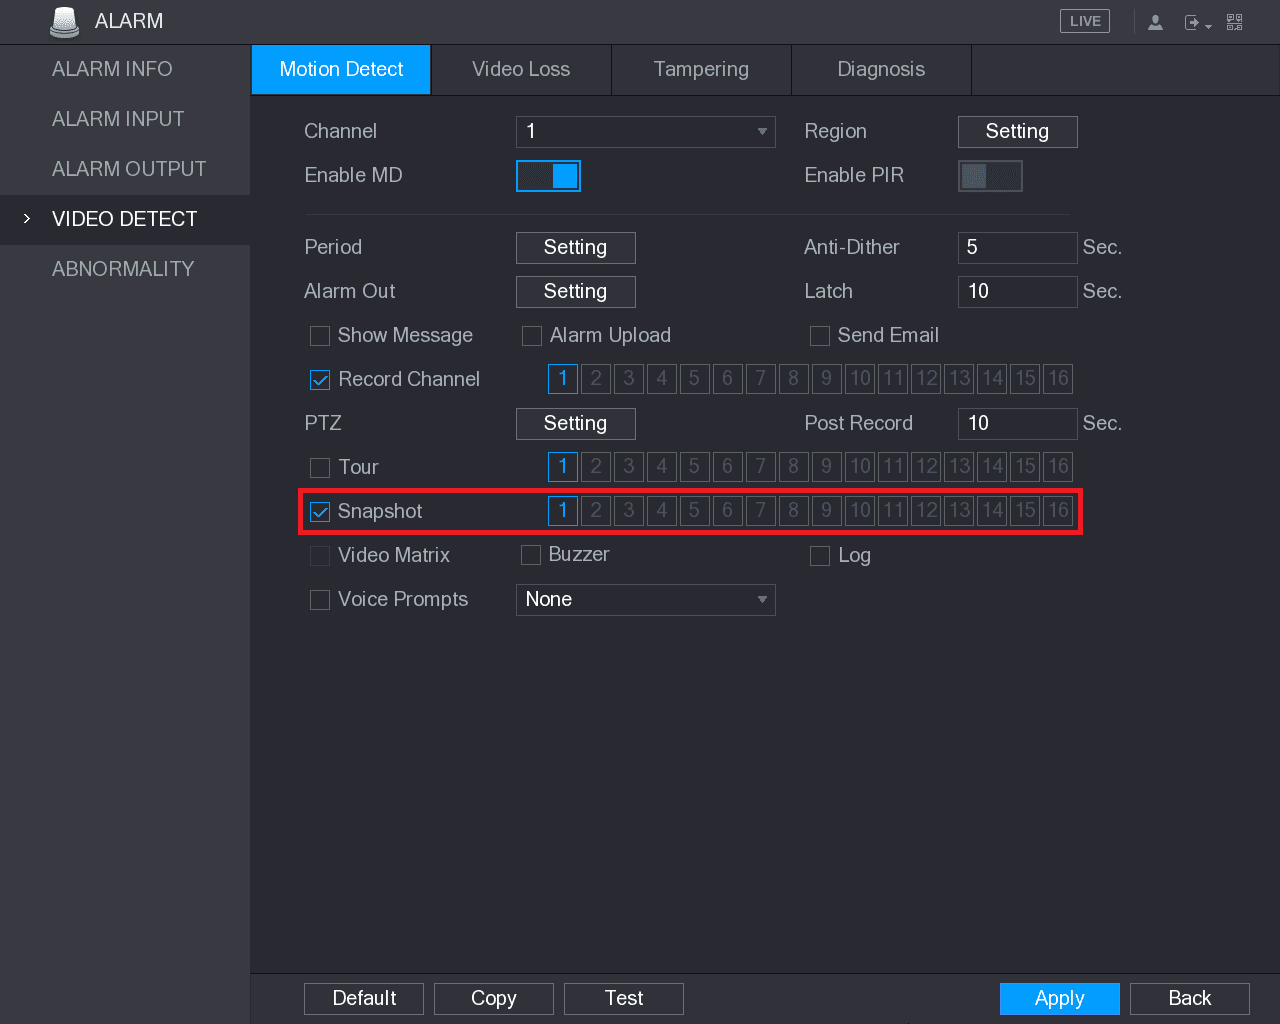
Select the Snapshot check box
Select the Snapshot check box and select the corresponding channel.
Apply the settings
Click Apply.
Configuring Face Detection Triggered Snapshot
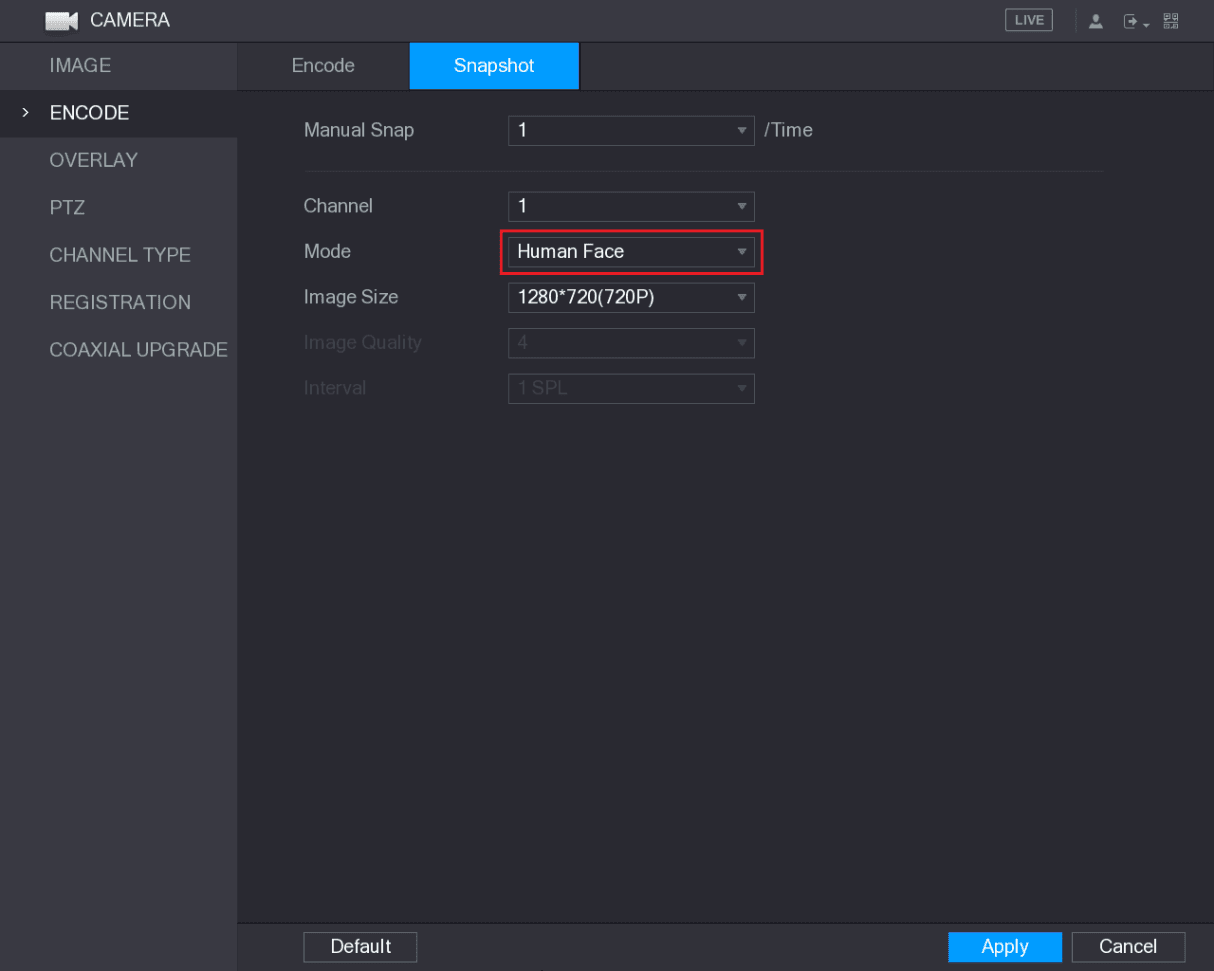
Configure the Human Face snapshot mode
Select Main Menu > CAMERA > ENCODE > Snapshot.
The Snapshot interface is displayed.
In the Mode list, select Human Face, and then configure other parameters. See Figure 5-98.
Open the Human Face interface
Select Main Menu > FACE DETECT > PARAMETERS > Human Face.
The Human Face interface is displayed. See Figure 5-99.
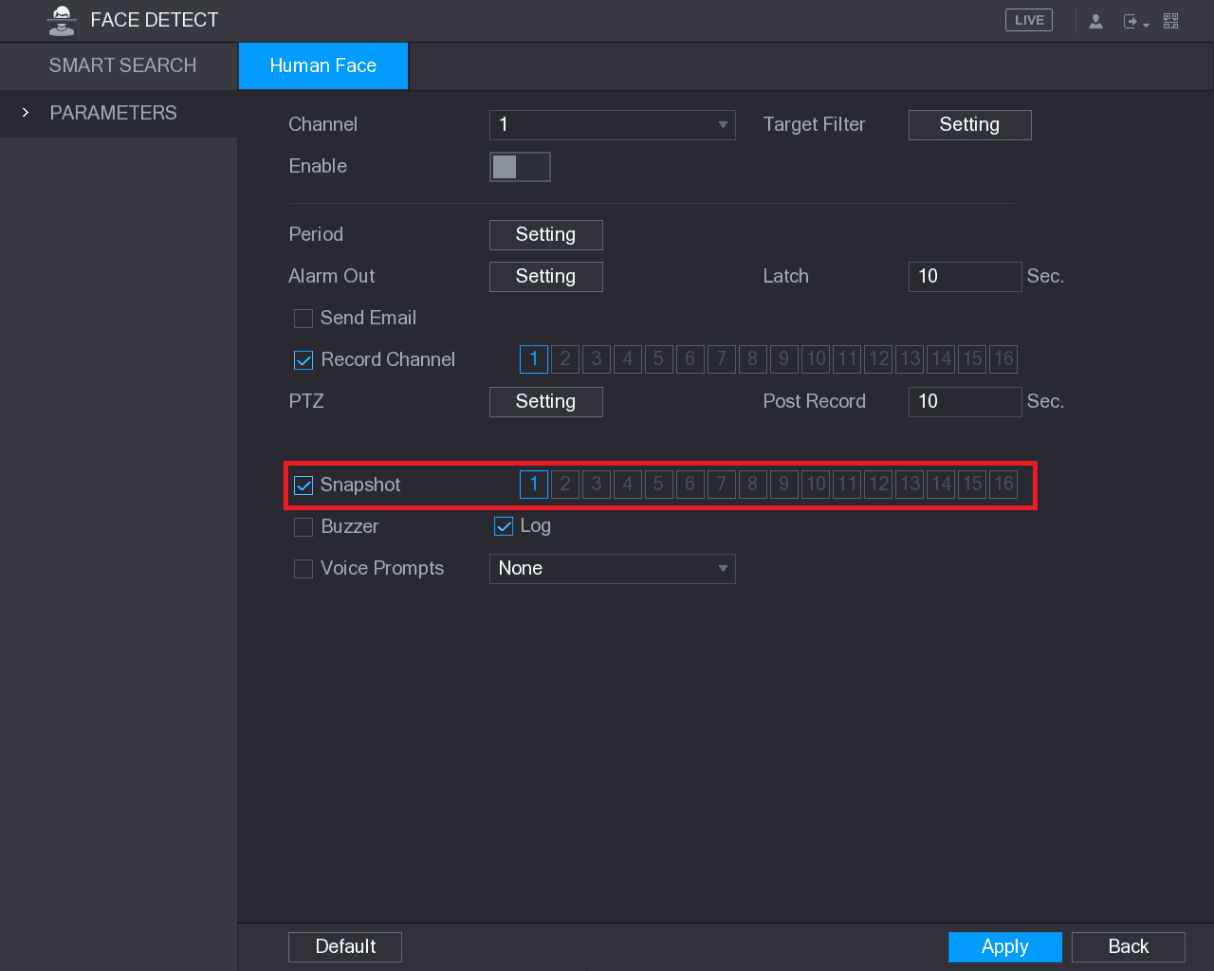
Select the Snapshot check box
Select the Snapshot check box and select the corresponding channel.
Apply the settings
Click Apply.
Configuring Snapshot Storage Schedule
You need to configure the storage schedule for the snapshot so that the snapshot can be saved. For details, see 5.1.4.10 Configuring Snapshot Storage Schedule.
Backing up Snapshots to FTP
Open the FTP interface
Select Main Menu > STORAGE > FTP.
The FTP interface is displayed. See Figure 5-100.
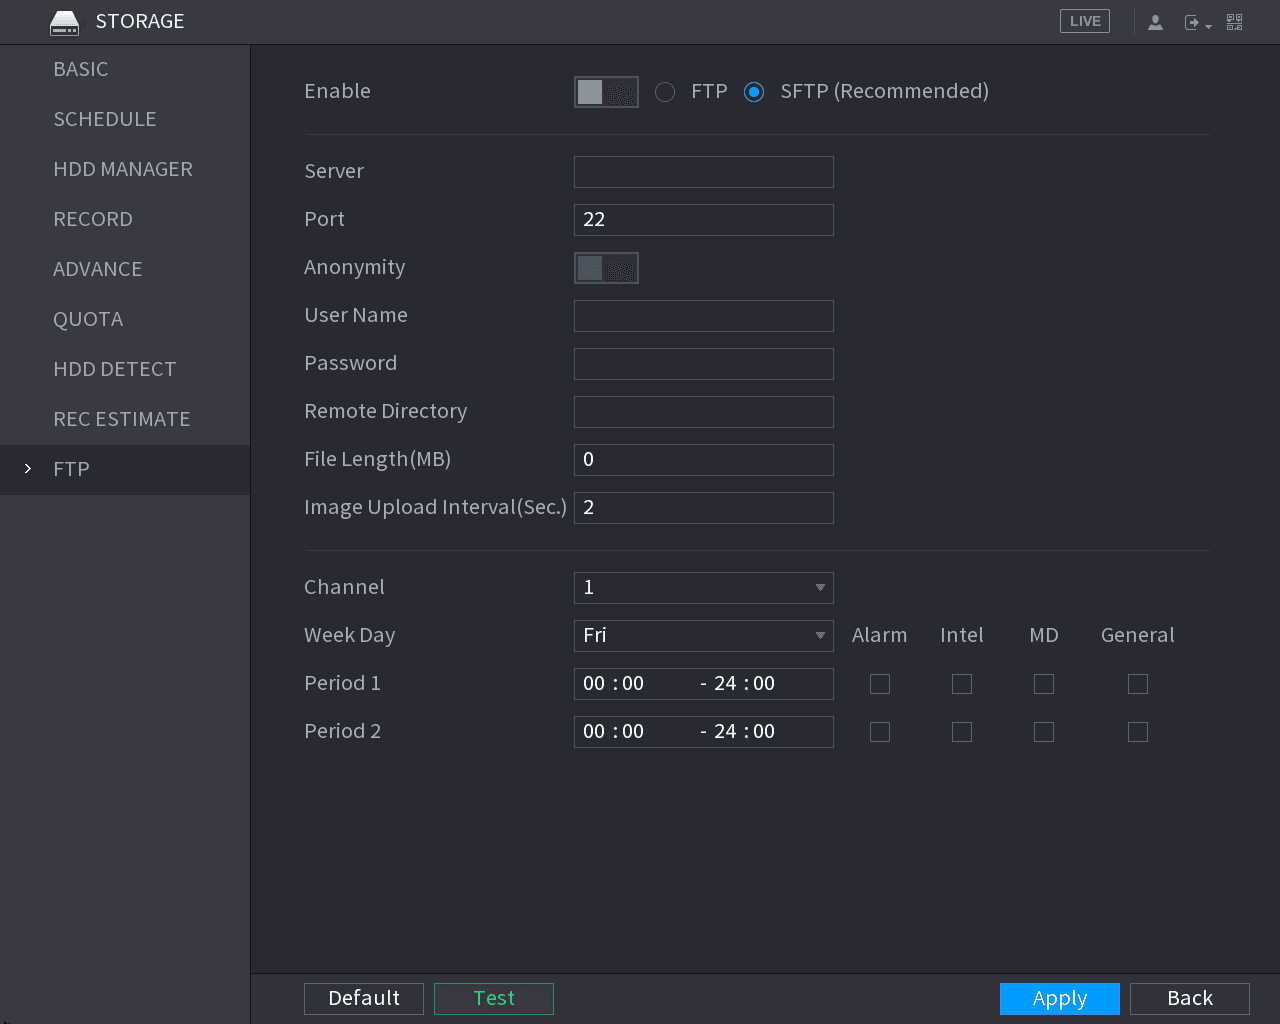
Enable the FTP function
Enable the FTP function and configure the parameters. For details, see 5.18.9 Configuring FTP Storage Settings.
The snapshots will be uploaded to FTP for backup.
Remote Devices
How to add, initialize, modify, import, export, and manage remote IP devices on the Sapphire Series CVI DVR through the Registration interface.
Playing Back Video
Search for and play back recorded video and snapshots on the CVI DVR, including record control, instant playback, smart search, marking, splices, and the file list.