 Center za pomoč LTS Connect
POS
How to connect the NVR to a POS (Point of Sale) machine to receive, search, and overlay transaction information in the live view and playback screens.
You can connect the Device to the POS (Point of Sale) machine and receive the information from it. This function applies to the scenarios such as supermarket POS machine. After connection is established, the Device can access the POS information and display the overlaid text in the channel window.
Playing POS information in the local playback and viewing the POS information in the live view screen support single-channel mode and four-channel mode. Displaying monitoring screen and playing back in the web support multi-channel mode.
Search
The system supports fuzzy search.
Open POS SEARCH
Select Main Menu > POS > POS SEARCH.
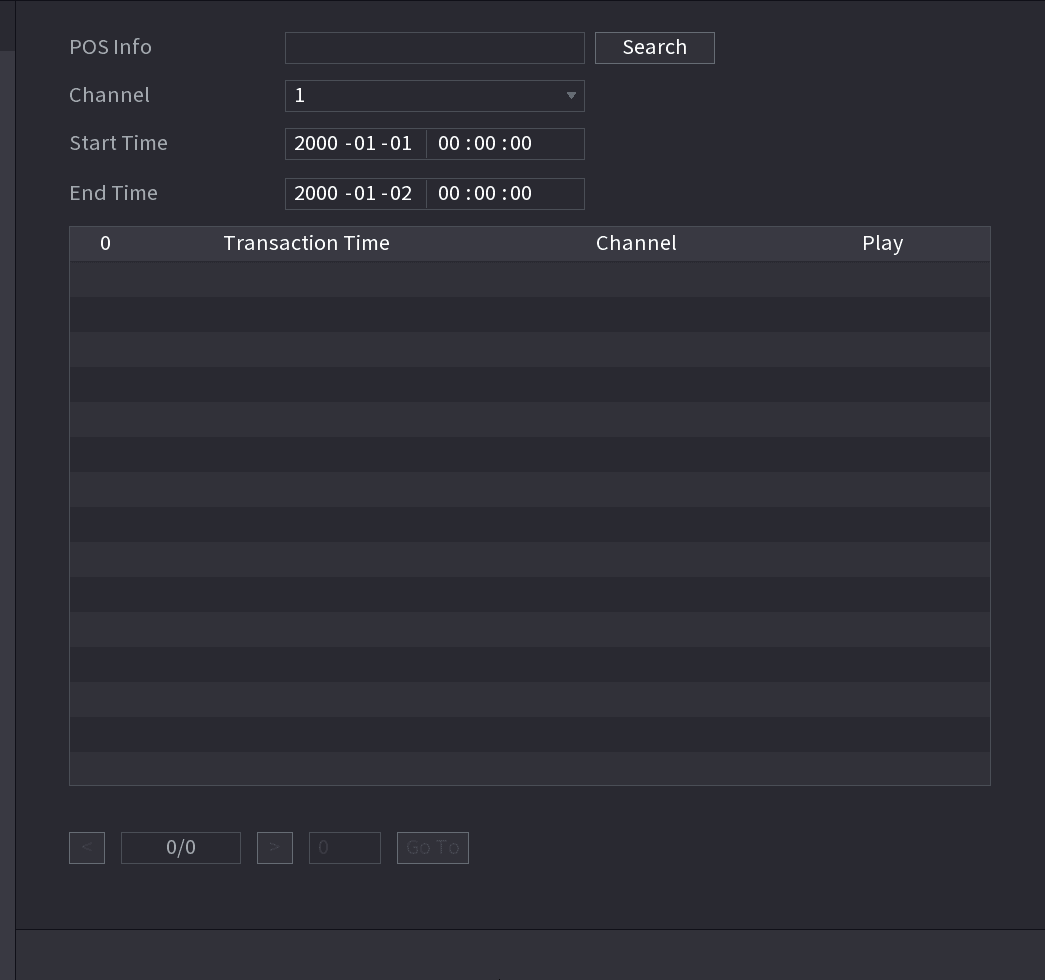
The POS SEARCH interface is displayed. See Figure 4-181.
Enter the search keyword
In the POS SEARCH box, enter the information such as transaction number on your receipt, amount, or product name.
Set the time period
In the Start Time box and End Time box, enter the time period that you want to search the POS transaction information.
Settings
Open POS SETUP
Select Main Menu > POS > POS SETUP.
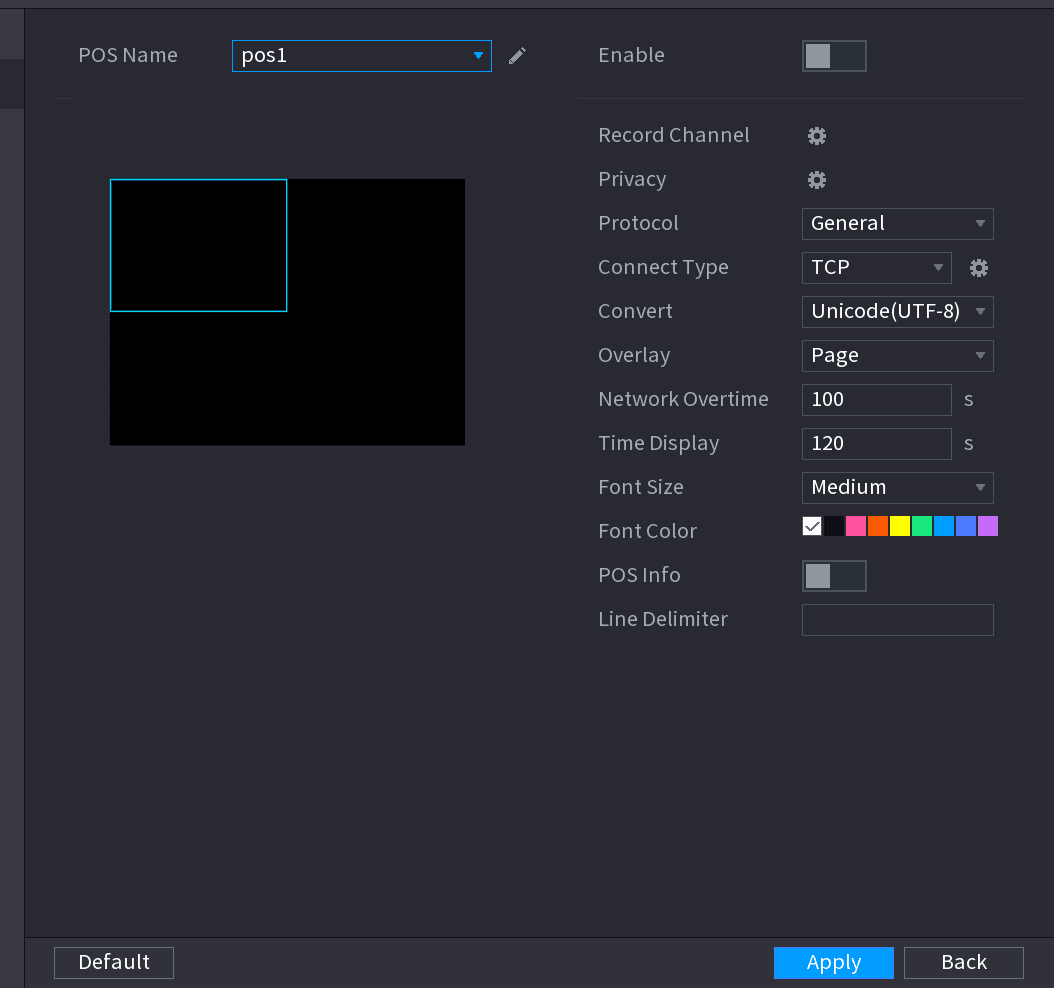
The POS SETUP interface is displayed. See Figure 4-182.
Configure the POS parameters
Configure the settings for the POS parameters. See Table 4-50.
| Parameter | Description |
|---|---|
| POS Name | In the POS Name list, select the POS machine that you want to configure settings for. Click the edit icon to modify the POS name. ⚫ The POS name shall be unique. ⚫ The POS name supports 21 Chinese characters or 63 English characters. |
| Enable | Enable the POS function. |
| Record CH | Click the setup icon to select a channel to record. |
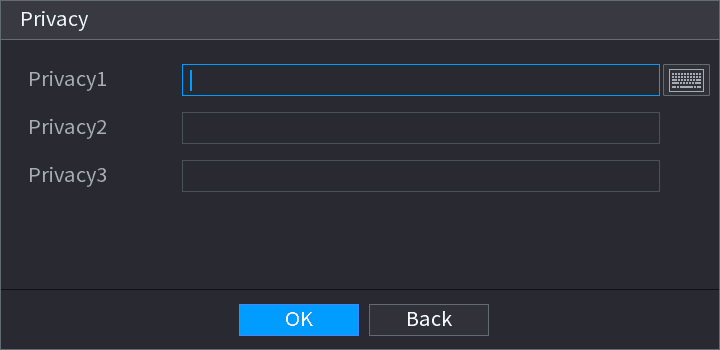
| Privacy Setup | Enter the privacy contents. Refer to "4.9.2.1 Privacy Setup". |
| Protocol Type | Select POS by default. Different machine corresponds to different protocol. |
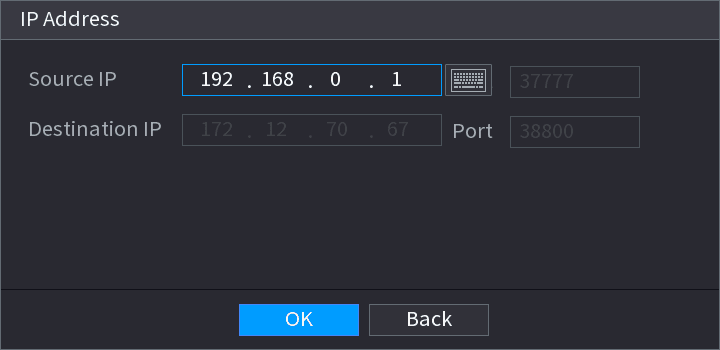
| Connect Type | In the Connect Type list, select the connection protocol type. Click the setup icon, the IP Address interface is displayed. In the Source IP box, enter the IP address (the machine that is connected to the Device) that sends messages. |
| Convert | Select a character encoding mode. |
| Overlay | In the Overlay list, Select Turn or ROLL. ⚫ Turn: Once the information is at 16 lines, system displays the next page. ⚫ ROLL: Once the information is at 16 lines, system rolls one line after another to delete the first line. When the local preview mode is in 4-split, the turn/ROLL function is based on 8 lines. |
| Network time out | When the network is not working correctly and cannot be recovered after the entered timeout limit, the POS information will not display normally. After the network is recovered, the latest POS information will be displayed. |
| Time Display | Enter the time that how long you want to keep the POS information displaying. For example, enter 5, the POS information disappear from the screen after 5 seconds. |
| Font Size | In the Font Size list, select Small, Medium, or Big as the text size of POS information. |
| COLOR | In the color bar, click to select the color for the text size of POS information. |
| POS Info | Enable the POS Info function, the POS information displays in the live view/WEB. |
| Line Delimiter | There is no line delimiter by default. After set the line delimiter (HEX), the overlay information after the delimiter is displayed in the new line. For example, the line delimiter is F and the overlay information is 123156789, NVR displays overlay information on the local preview interface and Web as: 123 6789 |
Apply
Click Apply to complete the settings.
Privacy Setup
Set privacy information
Set privacy information.
Confirm
Click OK button.
Connection type
⚫ Connection type is UDP or TCP.
Select the connect type
Select Connect Type as UDP, TCP_CLINET or TCP.
Open the IP Address interface
Click the setup icon.
The IP Address interface is displayed. See Figure 4-184.
Event Manager
Search and back up alarm logs, view alarm status, configure alarm input and output, set up video detection, audio detect, thermal alarm, and abnormality events on the Sapphire Series NVR.
Operation and Maintenance
How to view and back up logs, check system, HDD, BPS, and network information, run network tests, and maintain or upgrade the NVR through device maintenance, import/export, default, and system update.