 מרכז העזרה של LTS Connect
Camera Management
Add IP cameras manually or via auto-search, connect PoC cameras, configure analog and IP signal input channels, enable 5 MP long distance transmission, enable H.265 auto switch, and remotely upgrade IP cameras on the Turbo HD DVR.
Add the IP Cameras
Add the IP Camera Manually
Purpose: Before you can get live video or record the video files, you should add the network cameras to the connection list of the device.
Before you start: Ensure the network connection is valid and correct, and the IP camera to add has already been activated.
Open Camera Management
Click  on the main menu bar.
Enter the Add IP Camera interface
Click Camera > IP Camera > Custom Add on the title bar or click  in the idle channel window to enter the Add IP Camera interface.
Enter camera information
Enter IP address, protocol, management port, and other information of the IP camera to add.
Enter login credentials
Enter the login user name and password of the IP camera.
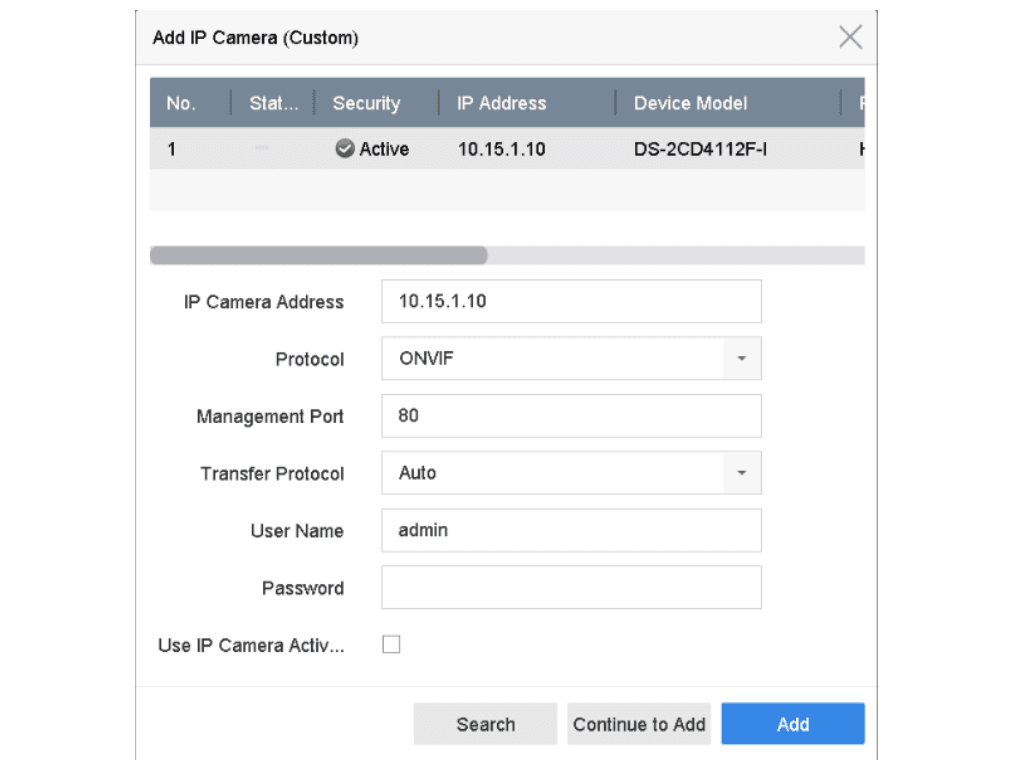
Figure 3-1 Add IP Camera
Add the camera
Click Add to finish the adding of the IP camera.
Continue adding (optional)
(Optional) Click Continue to Add to continue to add other IP cameras.
Add the Automatically Searched Online IP Cameras
Expand the online devices panel
On the IP Camera interface, click the Number of Unadded Online Device to expand the panel.
Select devices
Select the automatically searched online devices.
Add
Click Add.
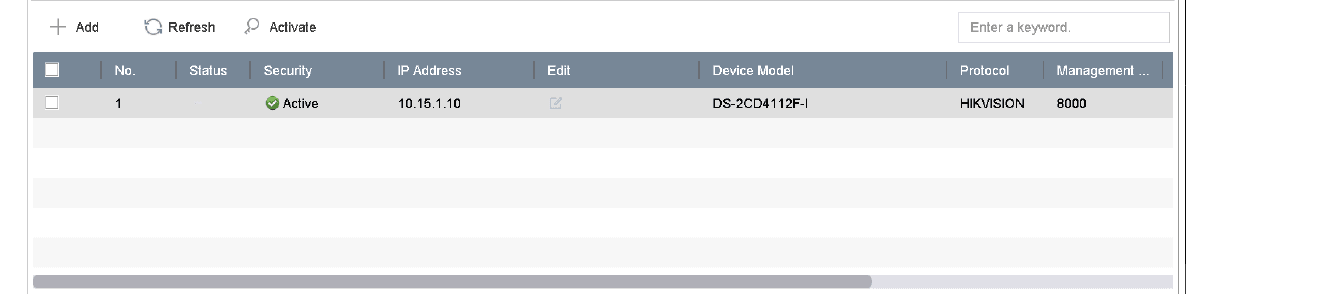
Figure 3-2 Add IP Camera
- If the IP camera to add has not been activated, you can activate it from the IP camera list on the camera management interface.
- For iDS-7200HQHI-K/S and iDS-7200HUHI-K/S series, when IP camera is added, the device will automatically switch the resolution to WD1/D1 and switch the bit rate to 512 Kbps.
Connect PoC Cameras
Purpose: -K/P series DVR support PoC (Power over Coaxitron) cameras connection. DVR will detect the connected PoC cameras automatically, manage the power consumption via the coaxial communication, and provide power to the cameras via coaxitron.
Before you start: Connect the PoC camera to the DVR.
Open PoC Information
Go to Menu > Camera > PoC Information.
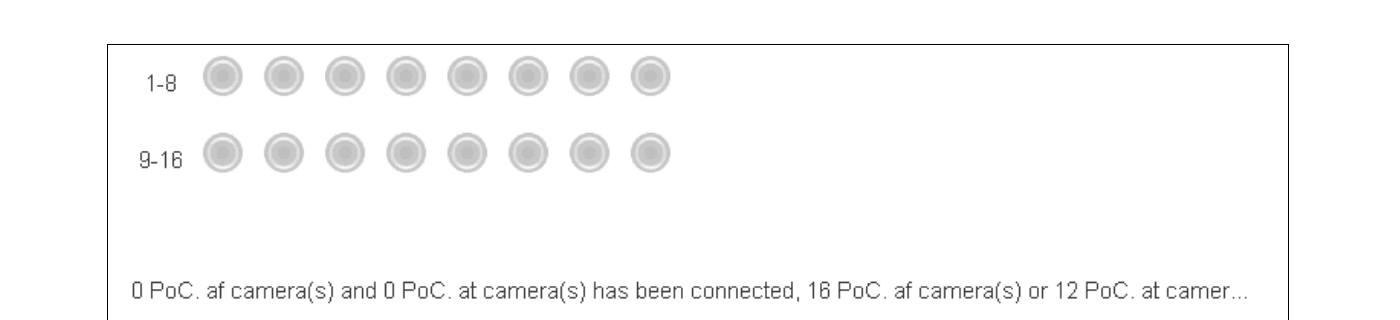
Figure 3-3 PoC Information
Check the status of connected PoC cameras
- If the power consumption of the DVR is lower than that of AF camera, when AF or AT camera is connected, there is no video and "Insufficient Power for PoC" is overlaid on the live view image.
- If the power consumption of the DVR is higher than that of the AF camera and lower than that of the AT camera, when AF camera is connected, it is powered on normally; when AT camera is connected, it is powered on and then powered off, and there is no video and "Insufficient Power for PoC" is overlaid on the live view image.
- If the power consumption of the DVR is higher than that of the AT camera, when AF or AT camera is connected, it is powered on normally.
Check the connectable camera number
Check the connected AF or AT camera number and the connectable camera number.
- Only specified PoC camera is supported.
- The maximum connectable AT/AF camera number varies with different models.
- Do not unplug or plug the PoC camera if it is powered by the external power supply.
Configure Signal Input Channel
Signal input configuration is only applicable to DS-7300/8100/9000HUHI-K, DS-7300/8124/8132HQHI-K, iDS-7200HQHI-K/S and iDS-7200HUHI-K/S series DVR.
Purpose: You can configure the analog and IP signal input types.
Open Camera Management
Click on the main menu bar.
Navigate to Analog
Click Camera > Analog.
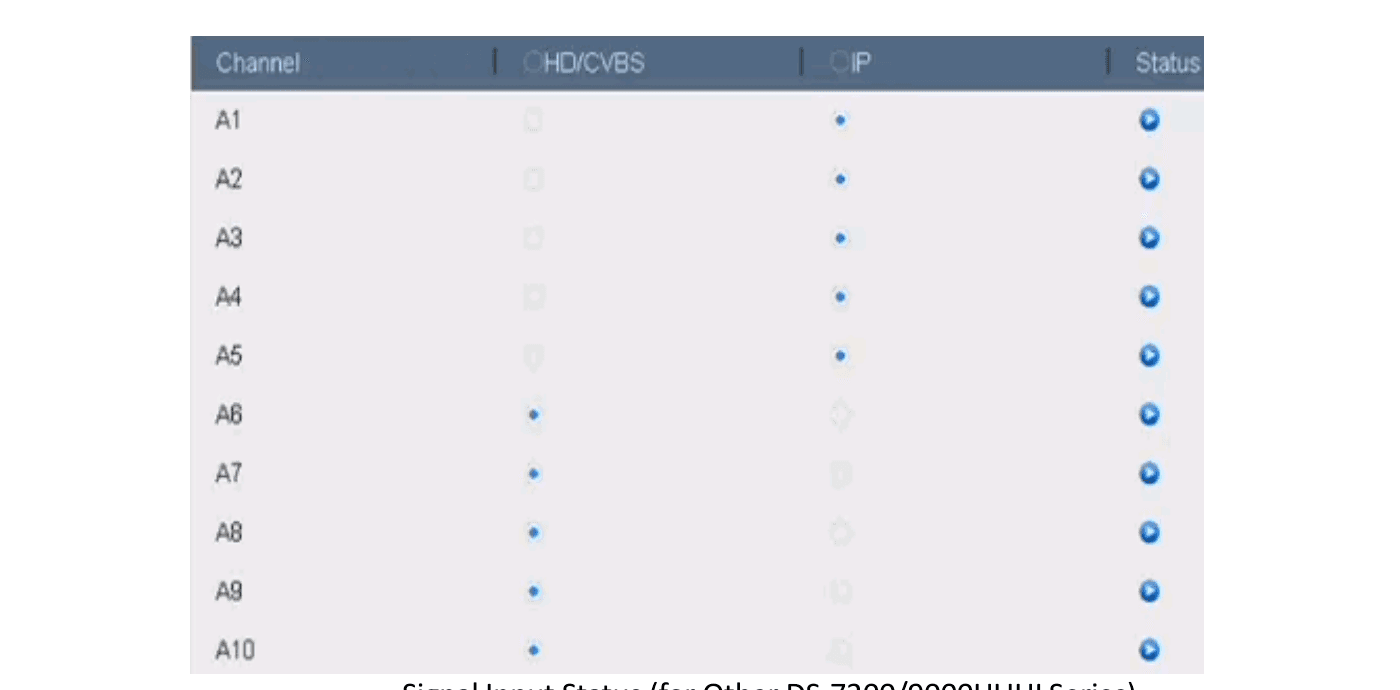
Figure 3-4 Signal Input Status (for Other DS-7300/9000HUHI Series)
Select signal input types
Check the checkbox to select different signal input types: HD/CVBS and IP. If you select HD/CVBS, four types of analog signal inputs including Turbo HD, AHD, HDCVI, and CVBS can be connected randomly for the selected channel. If you select IP, IP camera can be connected for the selected channel.
Save
Click Apply to save the settings.
You can view the max. accessible number of IP cameras in the Max. IP Camera Number text field. Refer to the specifications for the max. accessible IP camera number of different models.
Configuring 5 MP Long Distance Transmission
This chapter is only applicable to HUHI and HTHI series DVR.
Purpose: For HUHI and HTHI series DVR, you can configure 5 MP long distance transmission on the Signal Input Status interface.
Open Camera Management
Click on the main menu bar.
Navigate to Analog
Click Camera > Analog.
Open 5 MP Long Distance Transmission Settings
Click  to enter the 5 MP Long Distance Transmission Settings interface.
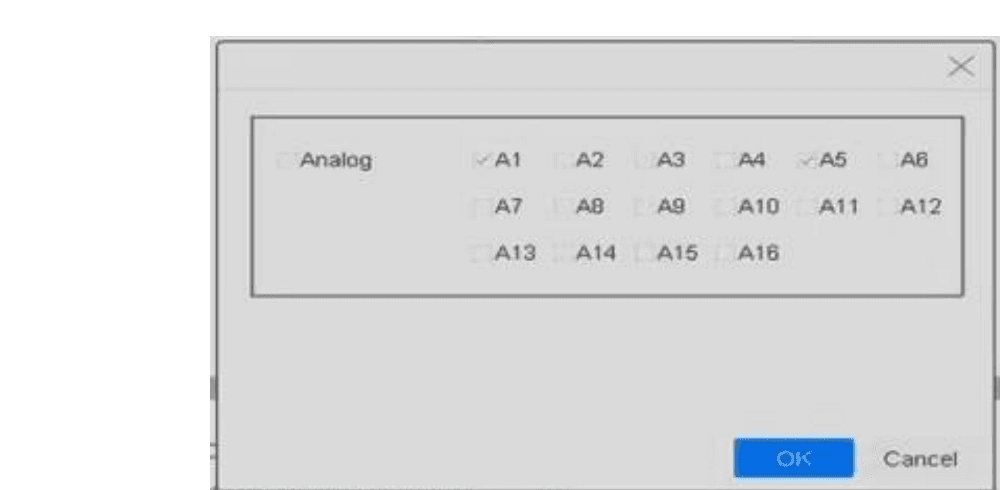
Figure 3-5 5 MP Long Distance Transmission Settings
Select channels
Select channel(s) to enable 5 MP Long Distance Transmission.
Confirm and save
Click OK.
Click Apply to save the settings.
Enable the H.265 Stream Access
The device can automatically switch to the H.265 stream of IP camera (which supports H.265 video format) for the initial access.
Open Camera Management
Click on the main menu bar.
Navigate to H.265 Auto Switch Configuration
Click Camera > IP Camera > More Settings > H.265 Auto Switch Configuration at the top taskbar.
Enable H.265
Check Enable H.265 (For Initial Access).
Confirm
Click OK.
Upgrade the IP Camera
The IP camera can be remotely upgraded through the device.
Before you start: Plug the U-flash drive with the IP camera's firmware upgrade file to the device.
Open Camera Management
Click on the main menu bar.
Select a camera
On the camera management interface, select a camera.
Navigate to Upgrade
Click Camera > IP Camera > More Settings > Upgrade at the top taskbar.
Select the firmware file
Select the firmware upgrade file from the U-flash drive.
Upgrade
Click Upgrade.
Result: The IP camera will reboot automatically after the upgrading completes.
Getting Started
First-time setup guide covering device activation, security questions, unlock pattern, login methods, the setup wizard, the main menu, and basic system operations for the Turbo HD DVR GUI 4.0.
Camera Settings
Configure OSD overlays, privacy masks, video parameters, day/night switch, and advanced camera parameters such as exposure, backlight, and image enhancement on the Turbo HD DVR GUI 4.0.