 مرکز راهنمایی LTS Connect
Operation and Maintenance
How to view and back up logs, check system, HDD, BPS, and network information, run network tests, and maintain or upgrade the NVR through device maintenance, import/export, default, and system update.
Log
You can view and search the log information, or back up the log to the USB device.
Open the LOG interface
Select Main Menu > OPERATION > LOG.
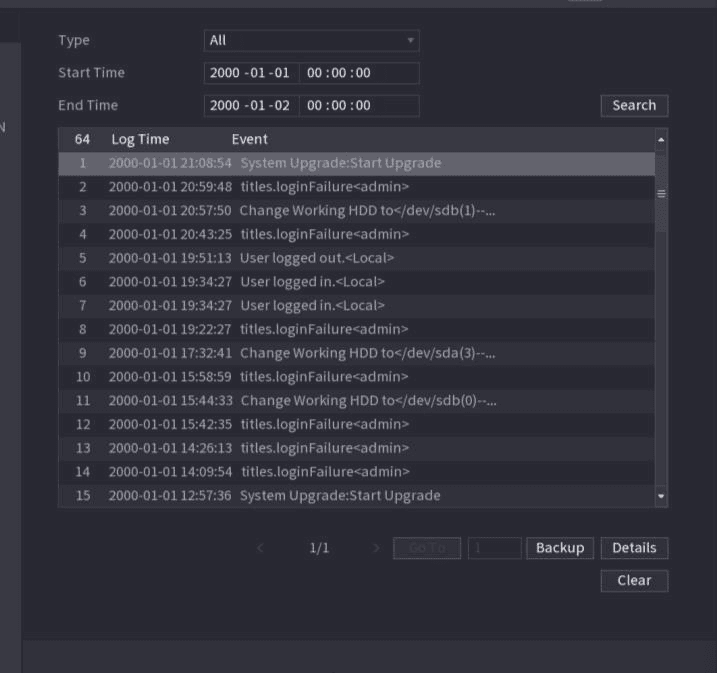
The LOG interface is displayed. See Figure 4-185.
Select the log type
In the Type list, select the log type that you want to view (System, Config, Storage, Record, Account, Clear, Playback, and Connection) or select All to view all logs.
Set the time period and search
In the Start Time box and End Time box, enter the time period to search, and then click Search.
The search results are displayed. See Figure 4-186.
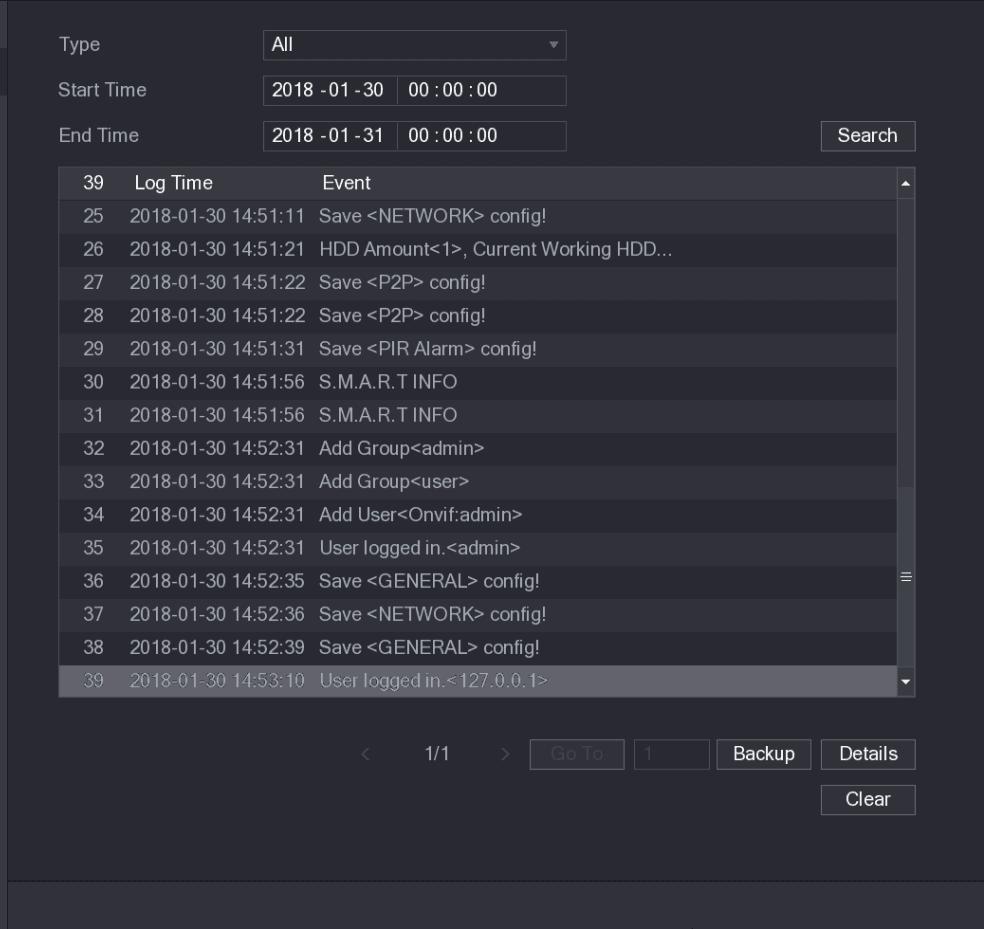
- Click Details or double-click the log that you want to view, the Detailed Information interface is displayed. Click Next or Previous to view more log information.
- Click Backup to back up the logs into the USB storage device.
- Click Clear to remove all logs.
System
Version
Select Main Menu > SYSTEM > VERSION, you can go to VERSION interface.
You can view NVR version information. Slight different may be found on the user interface.
HDD Info
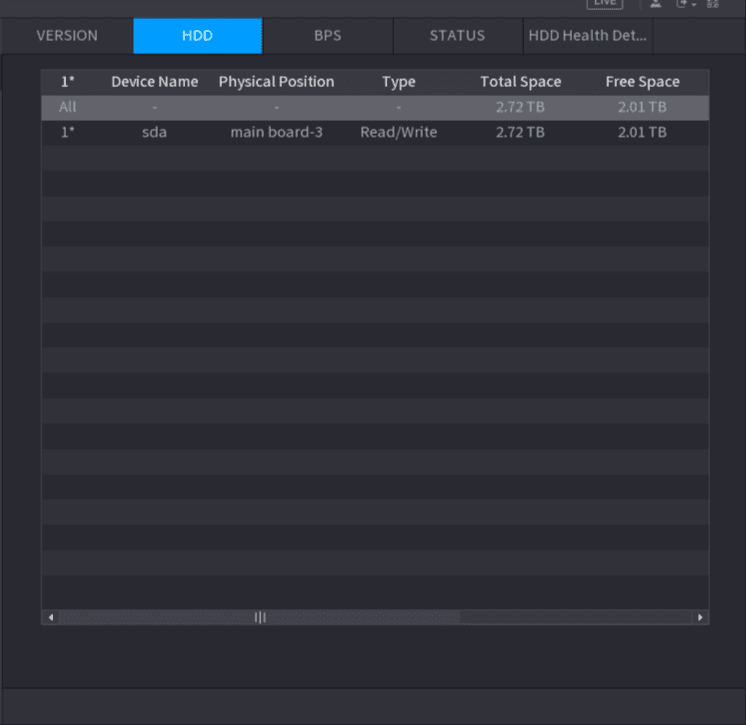
You can view the HDD quantity, HDD type, total space, free space, status, and S.M.A.R.T information.
Select Main Menu > OPERATION > INFOMATION > HDD, the HDD interface is displayed. See Figure 4-187. Refer to Table 4-51 for detailed information.
| Parameter | Description |
|---|---|
| No. | Indicates the number of the currently connected HDD. The asterisk (*) means the current working HDD. |
| Device Name | Indicates name of HDD. |
| Physical Position | Indicates installation position of HDD. |
| Type | Indicates HDD type. |
| Total Space | Indicates the total capacity of HDD. |
| Free Space | Indicates the usable capacity of HDD. |
| Status | Indicates the status of the HDD to show if it is working normally. |
| S.M.A.R.T | View the S.M.A.R.T reports from HDD detecting. |
BPS
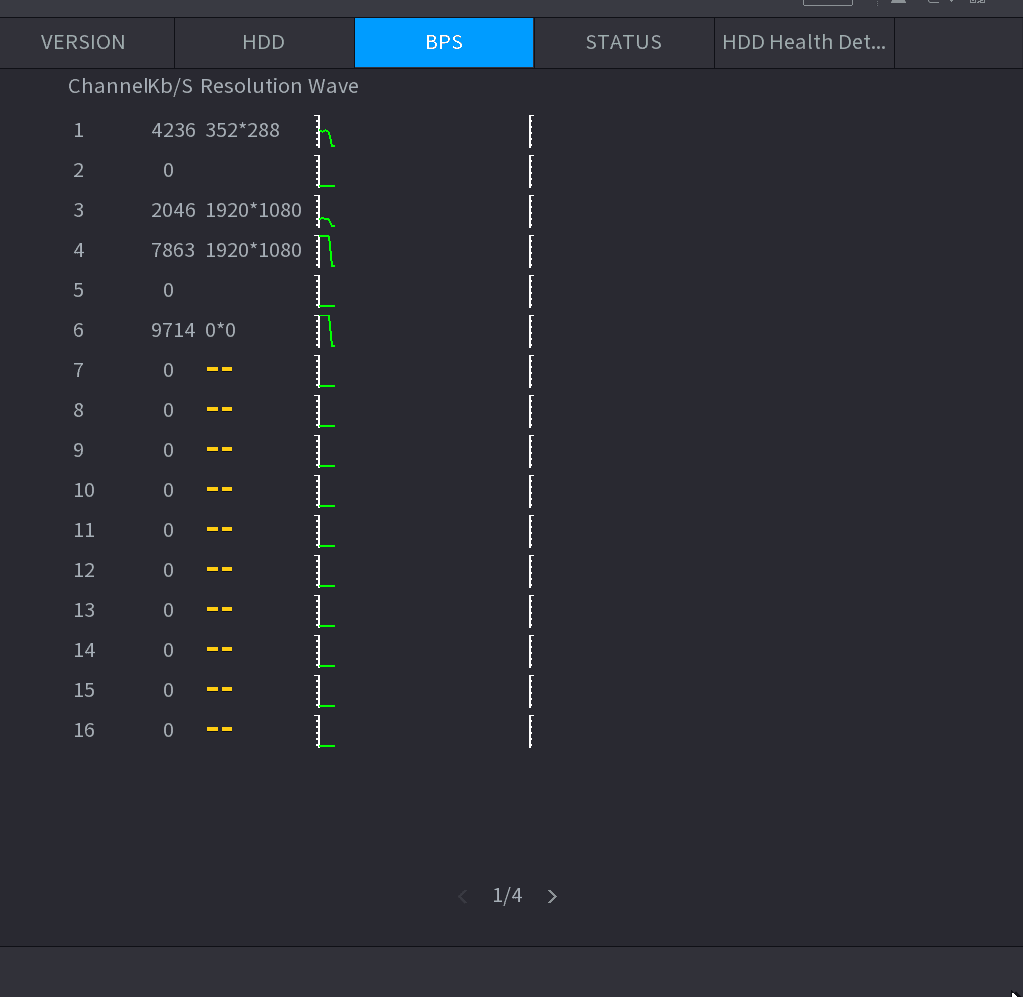
Here is for you to view current video bit rate (kb/s) and resolution.
Select Main Menu > OPERATION > INFOMATION > BPS, the BPS interface is displayed. See Figure 4-188.
Device Status
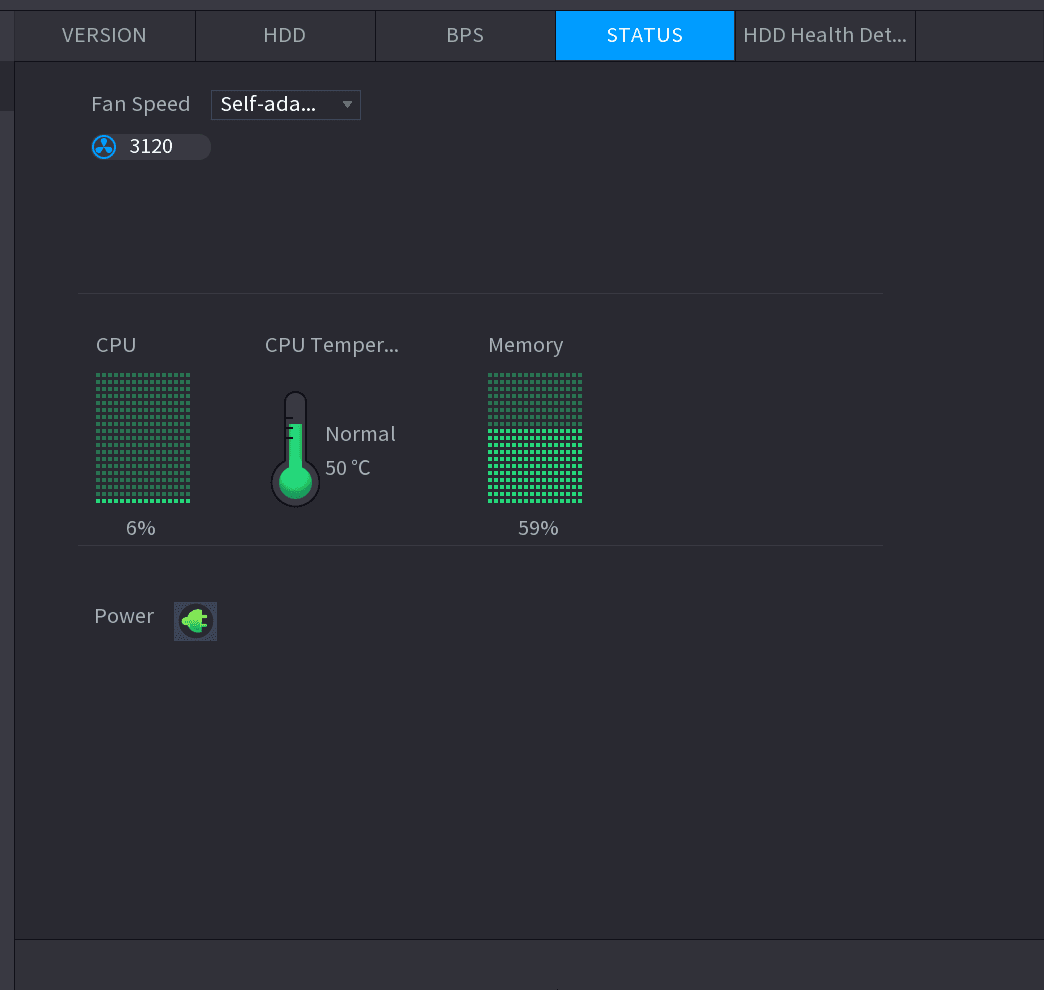
You can view fan running status such as speed, CPU temperature, and memory.
Select Main Menu > OPERATION > INFOMATION > Status, the Status interface is displayed. See Figure 4-189.
HDD Health Detection
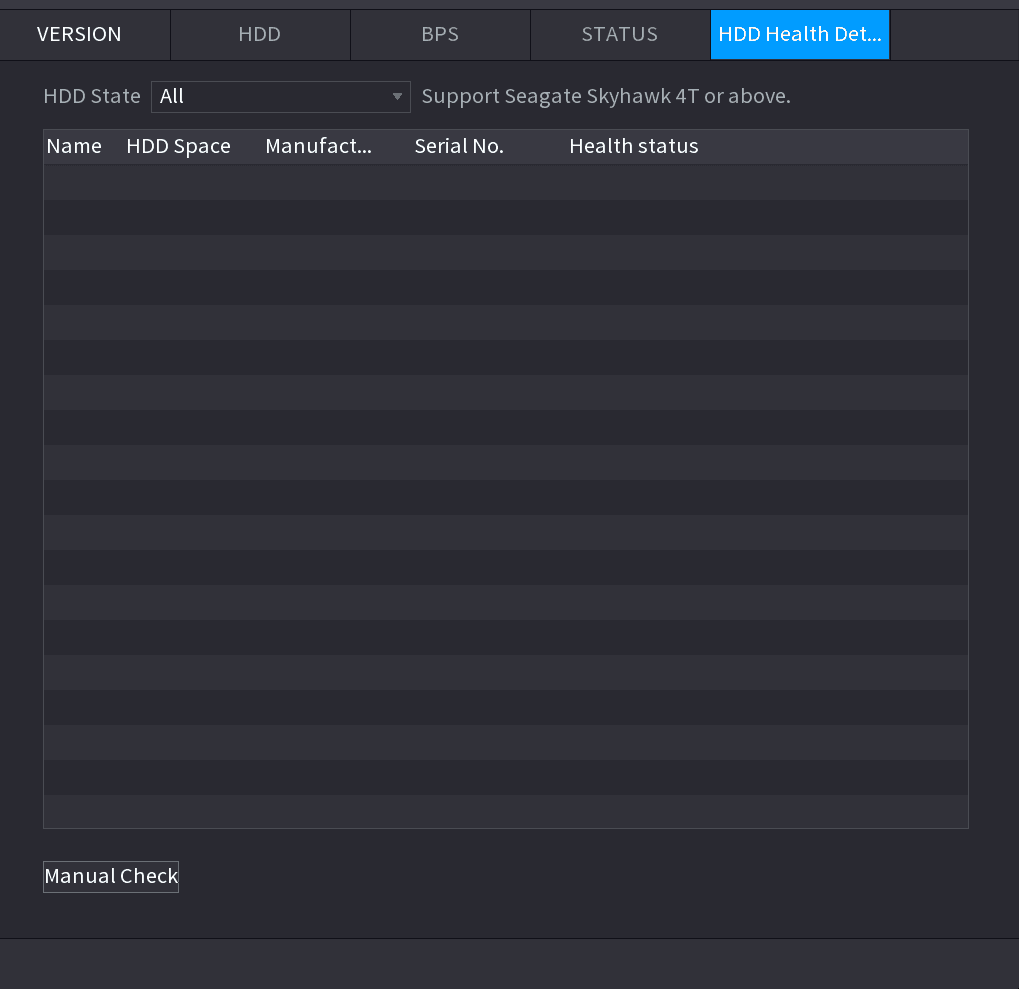
You can view HDD health status. System supports Seagate SKYHAWK series 4T and higher HDD. It displays HDD name, space, manufacturer, Serial No., and health status.
Open the HDD Health Detection interface
Select Main Menu > OPERATION > INFOMATION > HDD Health Detection.
The HDD Health Detection interface is displayed. See Figure 4-190.
View the detection report
Double-click the HDD in the list, system displays the detection report.
Select an item to view its report
Select an item in the list, system displays the corresponding report. System displays the curve report of the recent week by default.
Network
Online User
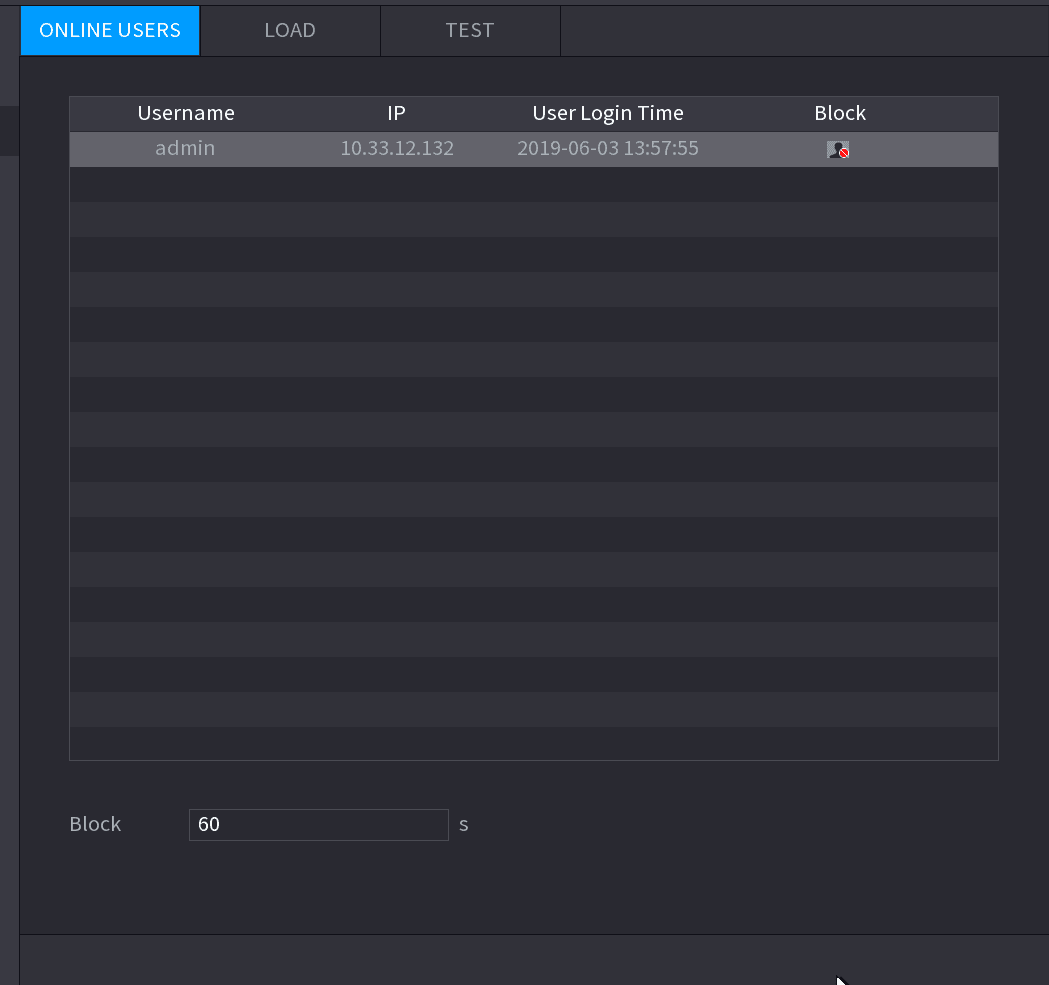
You can view the online user information or block any user for a period of time. To block an online user, click the block icon and then enter the time that you want to block this user. The maximum value you can set is 65535.
The system detects every 5 seconds to check whether there is any user added or deleted, and update the user list timely.
Select Main Menu > OPERATION > NETWORK > ONLINE USERS, the Online Users interface is displayed. See Figure 4-191.
Network Load
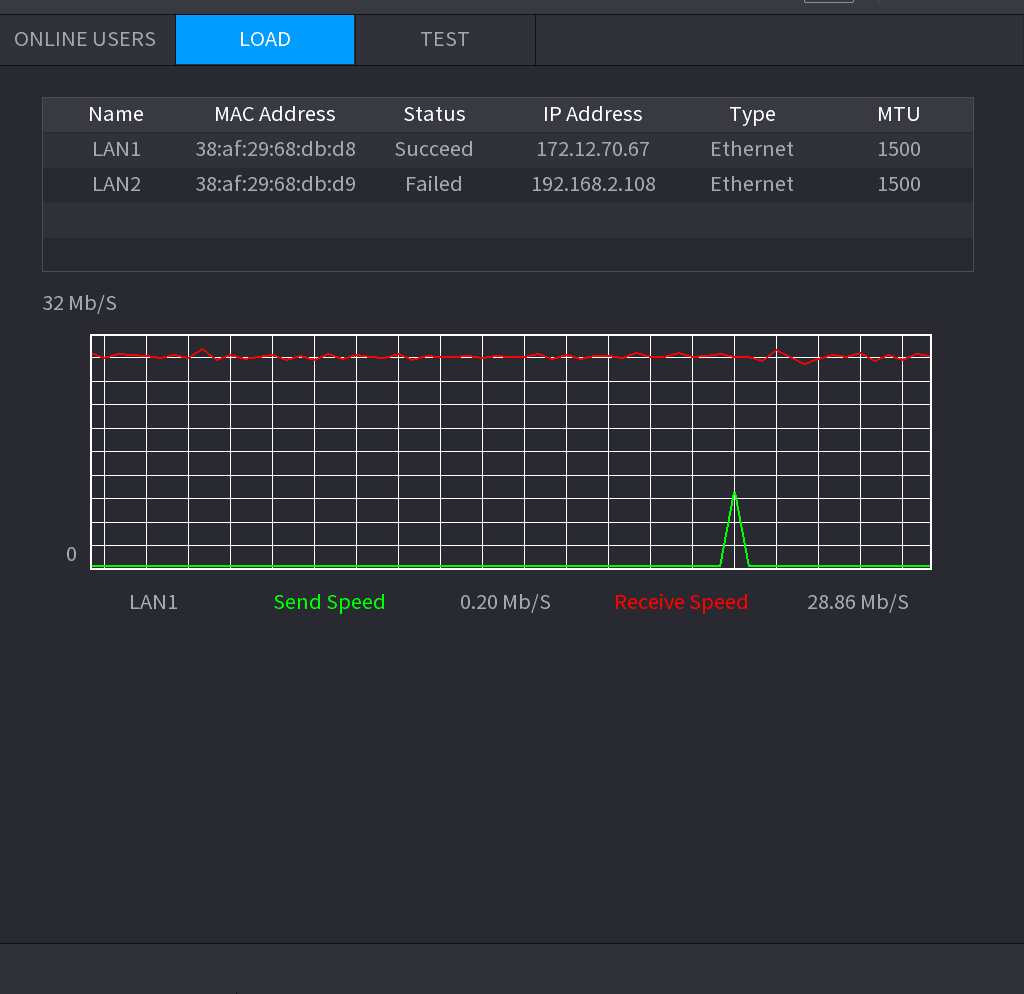
Network load means the data flow which measures the transmission capability. You can view the information such as data receiving speed and sending speed.
Open the LOAD interface
Select Main Menu > INFO > NETWORK > LOAD.
The LOAD interface is displayed. See Figure 4-192.
Select a LAN to view
Click the LAN name that you want to view, for example, LAN1.
The system displays the information of data sending speed and receiving speed.
- System displays LAN1 load by default.
- Only one LAN load can be displayed at one time.
Network Test
You can test the network connection status between the Device and other devices.
Open the TEST interface
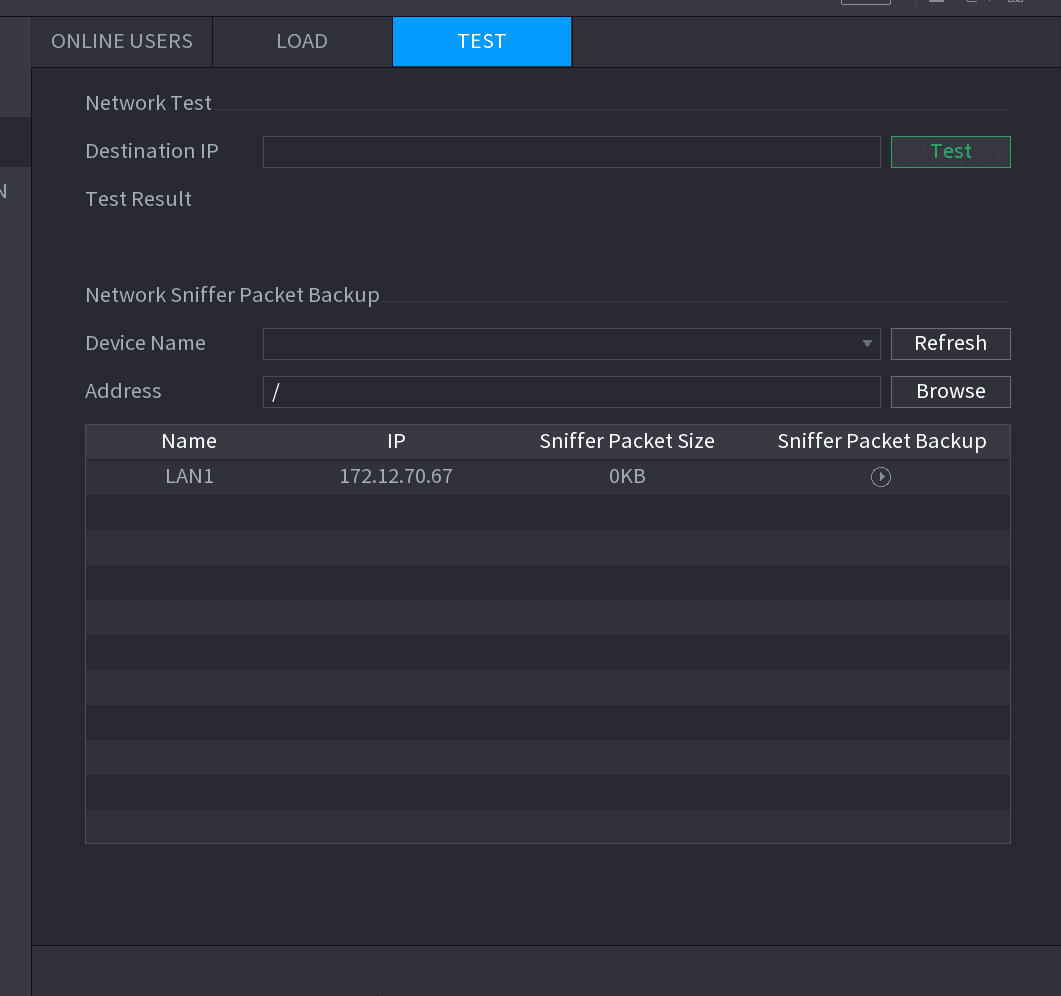
Select Main Menu > INFO > NETWORK > TEST.
The TEST interface is displayed. See Figure 4-193.
Enter the destination IP
In the Destination IP box, enter the IP address.
Run the test
Click Test.
After testing is completed, the test result is displayed. You can check the evaluation for average delay, packet loss, and network status.
Maintenance and Management
Device Maintenance
When the Device has been running for a long time, you can configure the auto reboot when the Device is not working. You can also configure the case fan mode to reduce noise and extend the service life.
Open the AUTO MAINTAIN interface
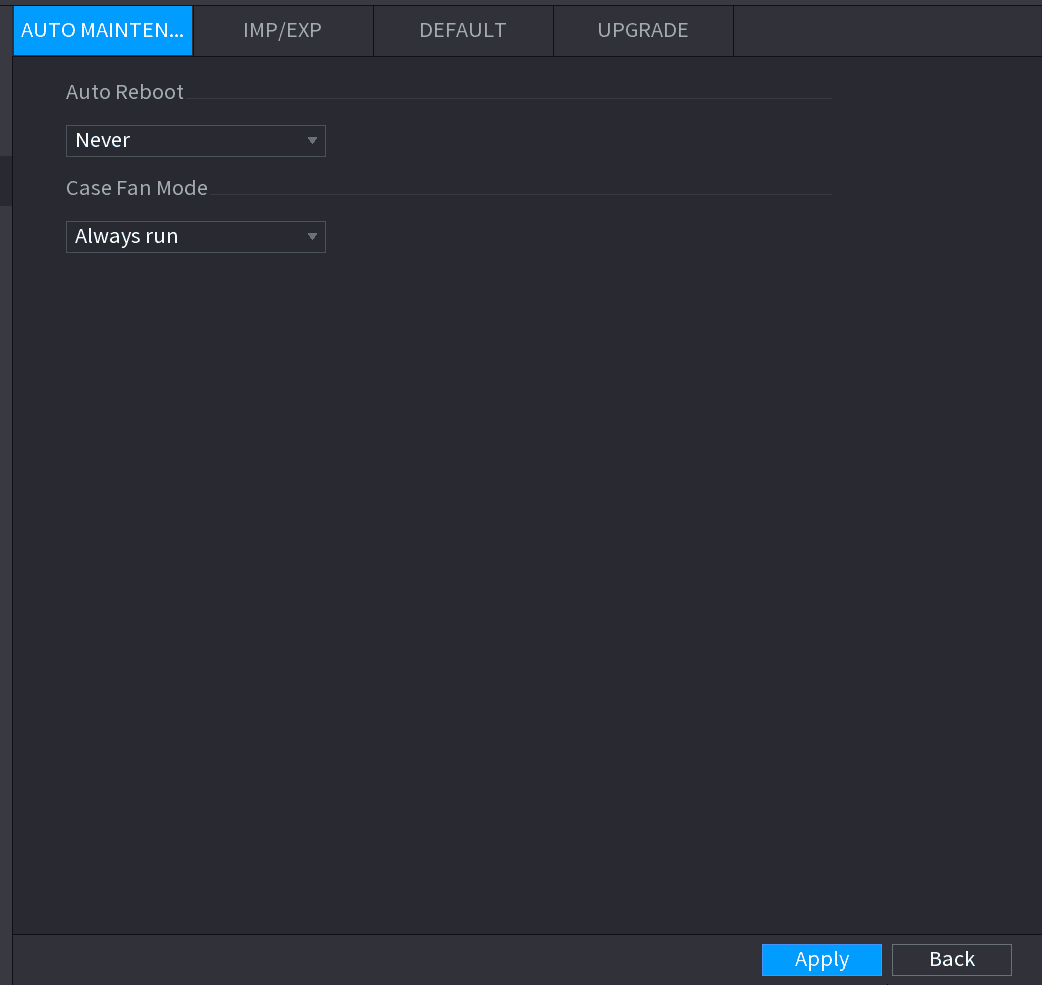
Select Main Menu > OPERATION > SYSTEM MAINTAIN > AUTO MAINTAIN.
The AUTO MAINTAIN interface is displayed. See Figure 4-194.
Configure the maintenance parameters
Configure the settings for the system maintenance parameters. See Table 4-52.
| Parameter | Description |
|---|---|
| Auto Reboot | In the Auto Reboot list, select the reboot time. |
| Case Fan Mode | In the Case Fan Mode list, you can select Always run or Auto. If you select Auto, the case fan will stop or start according to the external conditions such as the Device temperature. This function is for some series products only, and it is only supported on the local configuration interface. |
Apply the settings
Click Apply to complete the settings.
IMP/EXP
You can export or import the Device system settings if there are several Devices that require the same setup.
- The IMP/EXP interface cannot be opened if the backup operation is ongoing on the other interfaces.
- When you open the IMP/EXP interface, the system refreshes the devices and sets the current directory as the first root directory.
- Click Format to format the USB storage device.
Exporting System Settings
Open the IMP/EXP interface
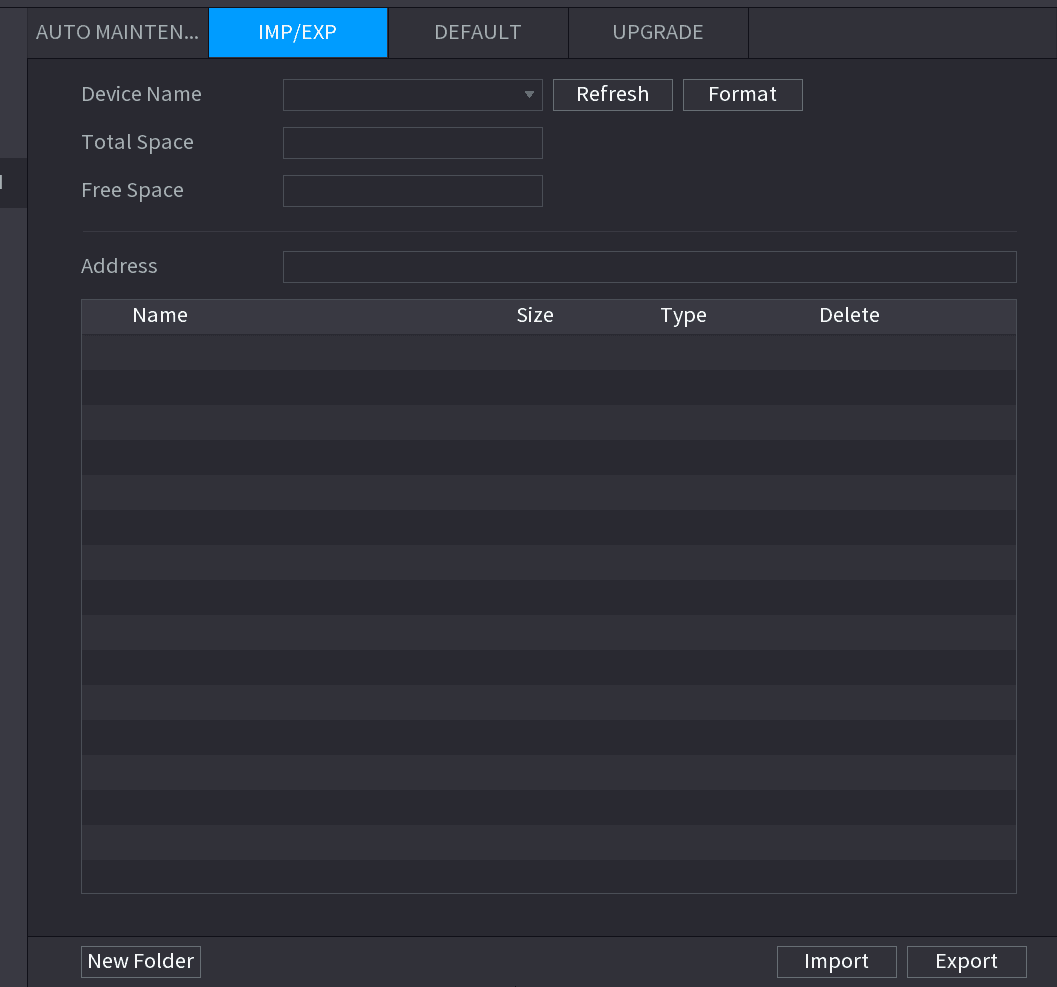
Select Main Menu > OPERATION > SYSTEM MAITAIN > IMP/EXP.
The IMP/EXP interface is displayed. See Figure 4-195.
Insert a USB storage device
Insert a USB storage device into one of the USB ports on the Device.
Refresh the interface
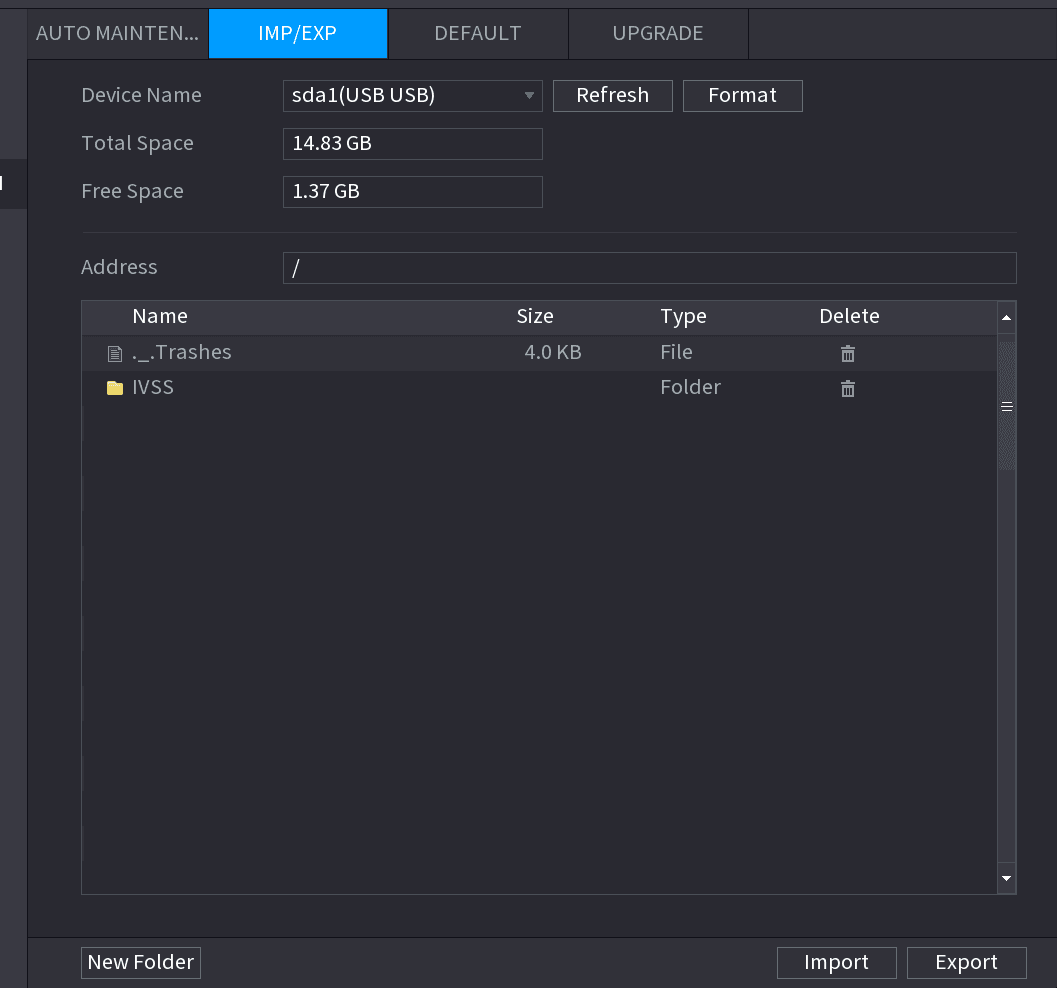
Click Refresh to refresh the interface.
The connected USB storage device is displayed. See Figure 4-196.
Export the settings
Click Export.
There is a folder under the name style of "Config_[YYYYMMDDhhmmss]". Double-click this folder to view the backup files.
Default
This function is for admin account only.
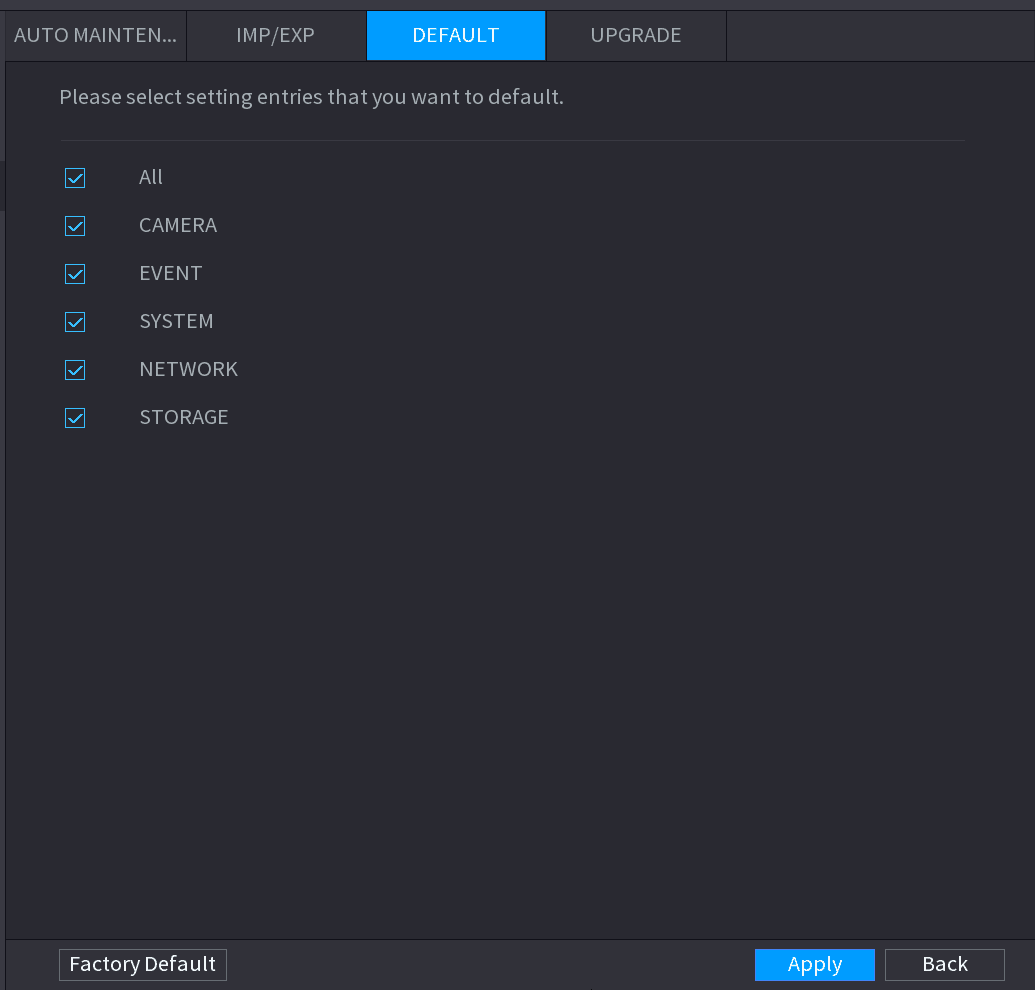
You can select the settings that you want to restore to the factory default.
Open the DEFAULT interface
Select Main Menu > OPERATION > SYSTEM MAITAIN > DEFAULT.
The DEFAULT interface is displayed. See Figure 4-197.
Restore the settings
- Select the settings that you want to restore, and then click Apply. The system starts restoring the selected settings.
- Click Factory Default, and then click OK. The system starts restoring the whole settings.
System Update
Upgrading File
Insert the USB storage device
Insert a USB storage device containing the upgrade files into the USB port of the Device.
Open the UPGRADE interface
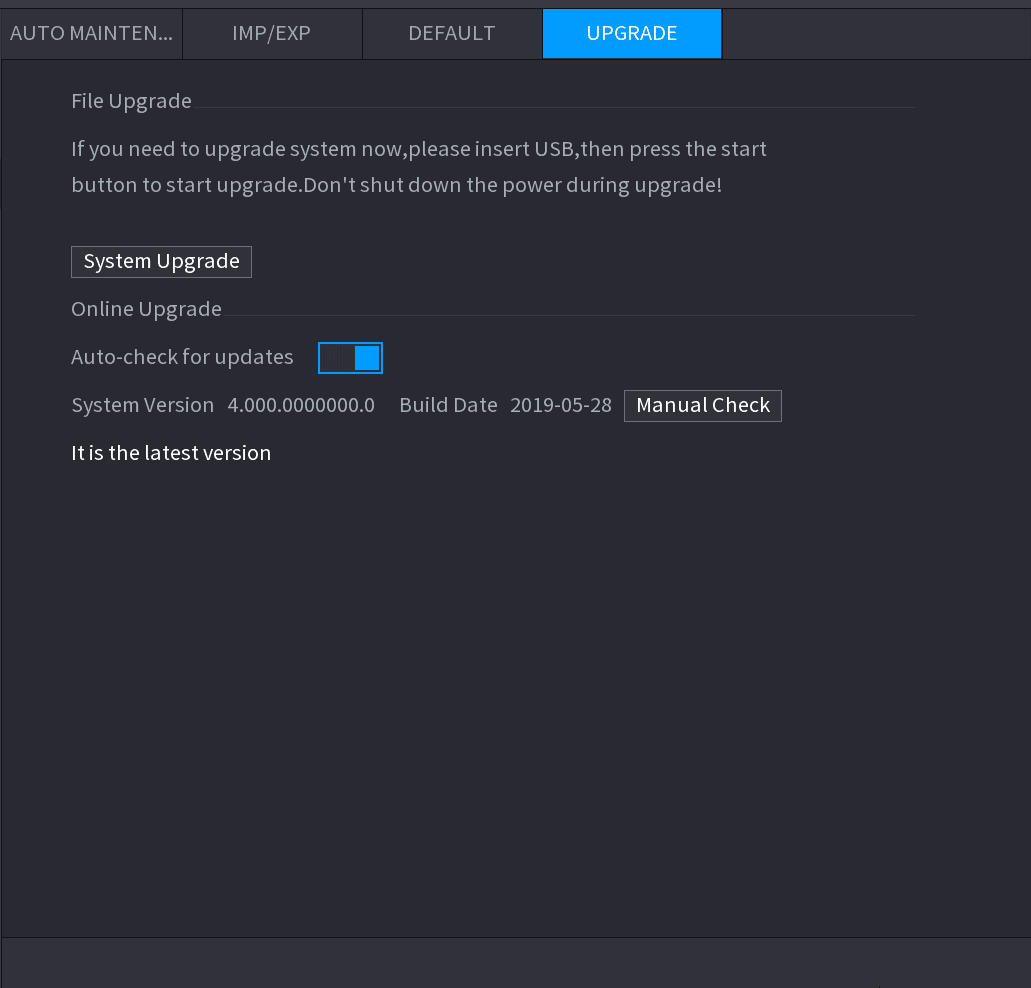
Select Main Menu > OPERATION > SYSTEM MAINTAIN > UPGRADE.
The UPGRADE interface is displayed. See Figure 4-198.
Open the System Upgrade interface
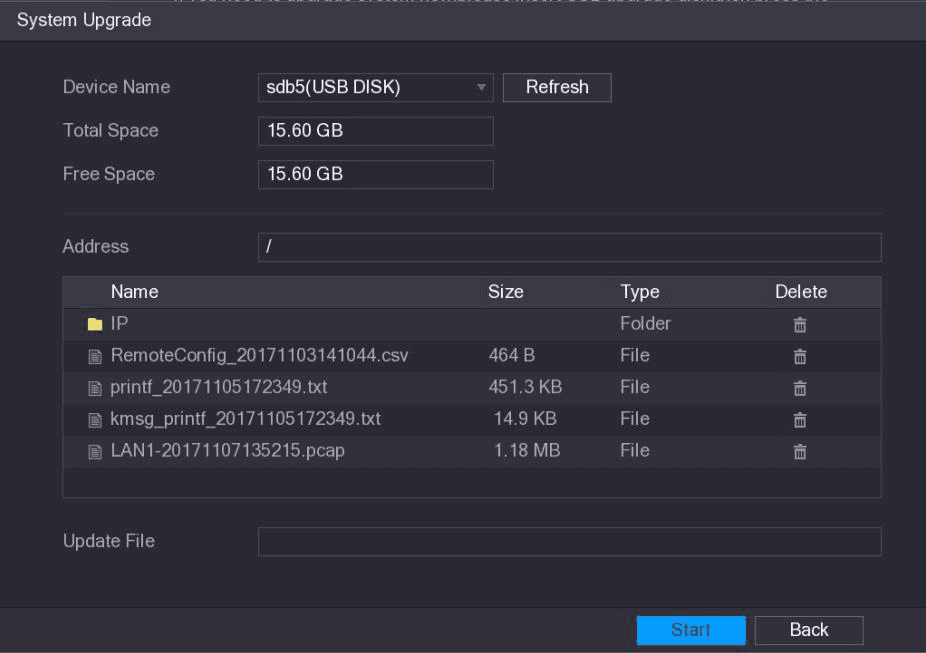
Click System Upgrade.
The System Upgrade interface is displayed. See Figure 4-199.
Select the upgrade file
Click the file that you want to upgrade.
The selected file is displayed in the Update File box.
Start the upgrade
Click Start.
Online Upgrade
When the Device is connected to Internet, you can use online upgrade function to upgrade the system.
Before using this function, you need to check whether there is any new version by auto check or manual check.
- Auto check: The Device checks if there is any new version available at intervals.
- Manual check: Perform real-time check whether there is any new version available.
Ensure the correct power supply and network connection during upgrading; otherwise the upgrading might be failed.
Open the UPGRADE interface
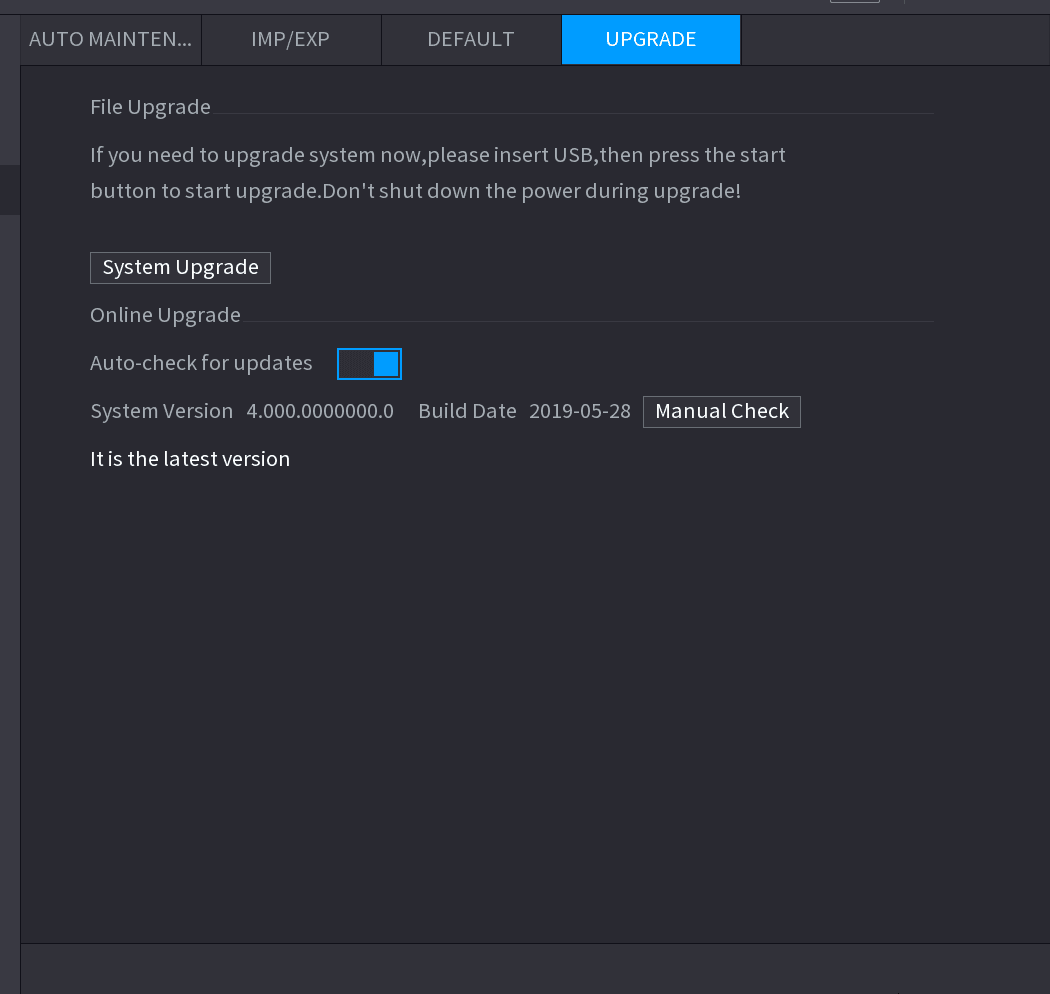
Select Main Menu > OPERATION > SYSTEM MAINTAIN > UPGRADE.
The UPGRADE interface is displayed. See Figure 4-200.
Check for a new version
Check whether there is any new version available.
- Auto-check for updates: Enable Auto-check for updates.
- Manual check: Click Manual Check.
The system starts checking the new versions. After checking is completed, the check result is displayed.
- If the "It is the latest version" text is displayed, you do not need to upgrade.
- If the text indicating there is a new version, go to the step 3.
Upgrade now
Click Upgrade now to update the system.
Uboot Upgrading
- Under the root directory in the USB storage device, there must be "u-boot.bin.img" file and "update.img" file saved, and the USB storage device must be in FAT32 format.
- Make sure the USB storage device is inserted; otherwise the upgrading cannot be performed.
When starting the Device, the system automatically check whether there is a USB storage device connected and if there is any upgrade file, and if yes and the check result of the upgrade file is correct, the system will upgrade automatically. The Uboot upgrade can avoid the situation that you have to upgrade through TFTP when the Device is halted.