 مرکز راهنمایی LTS Connect
Web Operation
How to connect, log in to, reset the password for, and navigate the Sapphire Series NVR web interface from a browser.
- The interfaces in the Manual are used for introducing the operations and only for reference. The actual interface might be different dependent on the model you purchased. If there is inconsistency between the Manual and the actual product, the actual product shall govern.
- The Manual is a general document for introducing the product, so there might be some functions described for the Device in the Manual not apply to the model you purchased.
- Besides Web, you can use our Smart PSS to login the device. For detailed information, refer to Smart PSS user's manual.
Network Connection
- The factory default IP of the Device is 192.168.1.108.
- The Device supports monitoring on different browsers such as Safari, Firefox, Google to perform the functions such as multi-channel monitoring, PTZ control, and device parameters configurations.
Connect the Device to the network
Check to make sure the Device has connected to the network.
Configure IP settings
Configure the IP address, subnet mask and gateway for the PC and the Device. For details about network configuration of the Device, refer to 4.12 Network.
Verify the connection
On your PC, check the network connection of the Device by using "ping ***.***.***.***". Usually the return value of TTL is 255.
Web Login
Open the login dialog box
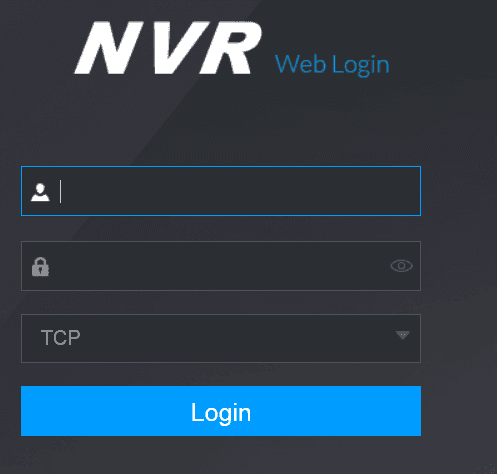
Open the browser, enter the IP address of the Device, and then press Enter. The Login in dialog box is displayed. See Figure 5-1.
Enter your credentials
Enter the user name and password.
- The default administrator account is admin. The password is the one that was configured during initial settings. To security your account, it is recommended to keep the password properly and change it regularly.
- Click the eye icon to display the password.
- If you forget the password, click Forgot Password to reset the password. For details about resetting the password, refer to 5.3 Reset Password.
Log in
Click Login.
Reset Password
You can reset the password by the following methods when you forget the password for admin account.
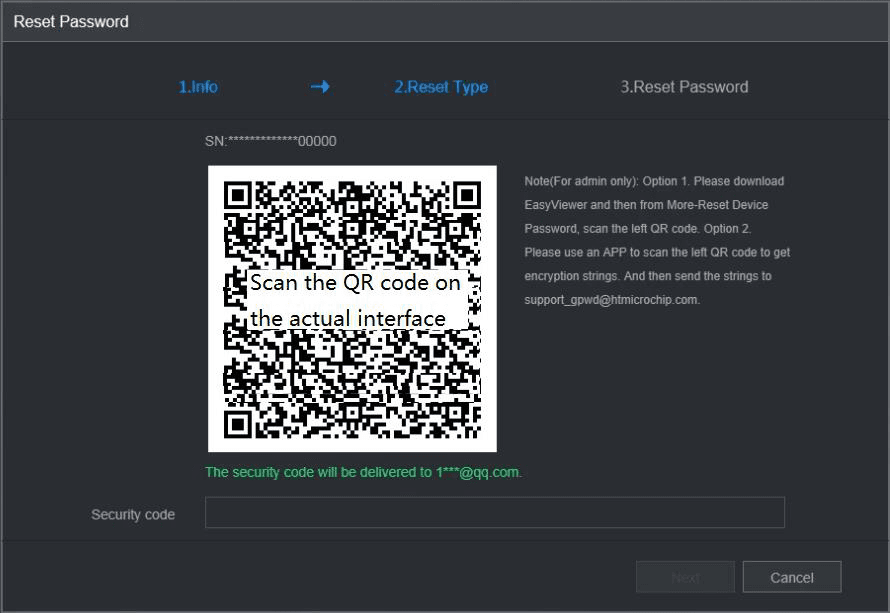
- If the password reset function is enabled, you can use mobile phone to scan the QR code on the local interface or web interface to reset the password.
- If the password reset function is disabled, the system prompts indicating password resetting function is disabled. To reset the password, try either of the following ways:
- Login the web with other user account to enable the password reset function.
- Go to local interface to reset the password. For details, refer to 4.1.3 Reset Password.
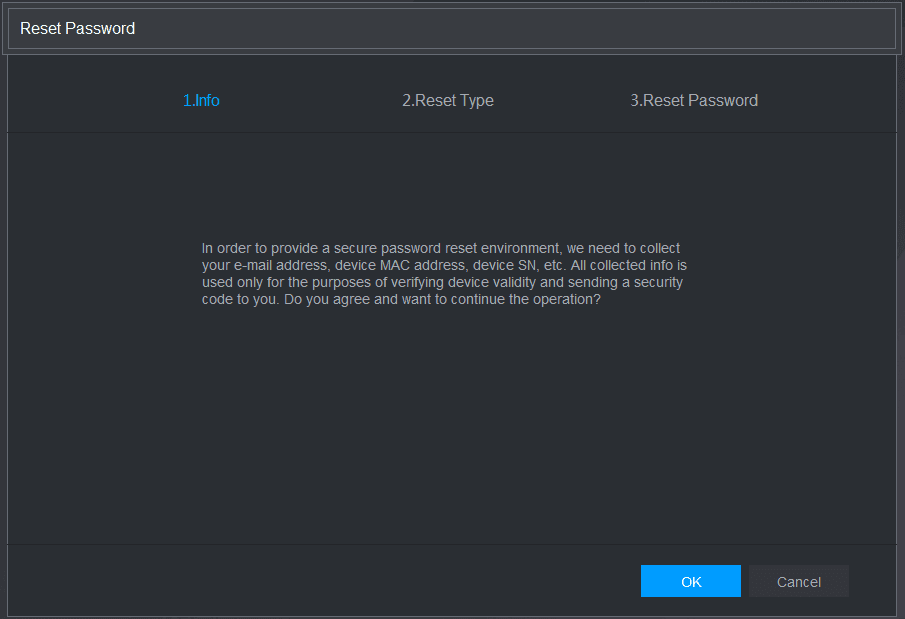
Open the Reset Password interface
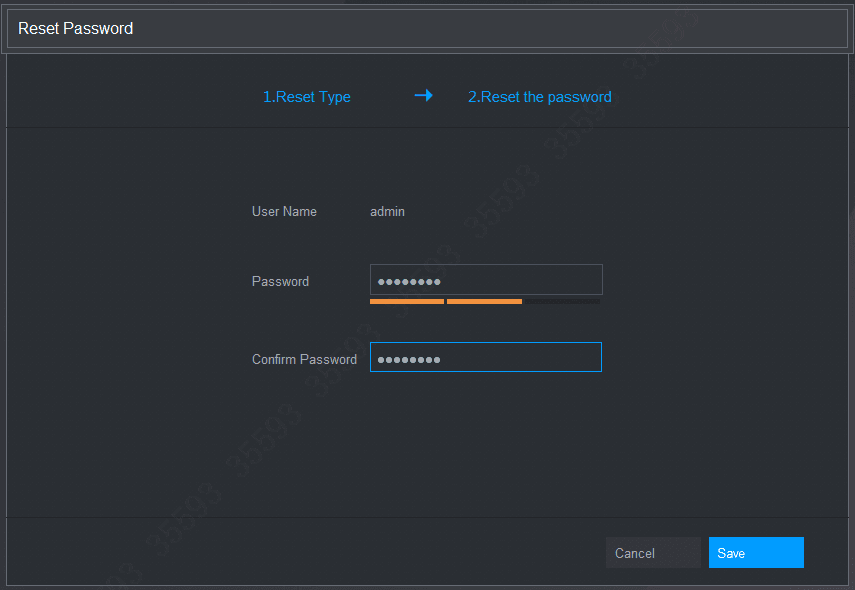
Click Forgot Password. The Reset Password interface is displayed. See Figure 5-3.
Scan the QR code
Follow the onscreen instructions to scan the QR code and get the security code.
- You can get the security code twice by scanning the same QR code. If you need to get the security code once again, refresh the interface.
- Use the security code received in your email box to reset the password within 24 hours; otherwise the security code becomes invalid.
- Wrong security code entrance up to five times will cause the security code locked for five minutes. After five minutes, you can continue to use this security code.
Enter the security code
In the Security code box, enter the security code received in your reserved email box.
Enter the new password
In the Password box, enter the new password and enter it again in the Confirm Password box.
The new password can be set from 8 characters through 32 characters and contains at least two types from number, letter and special characters (excluding "'", """, ";", ":" and "&").
Save the new password
Click Save. The password resetting is started. After resetting is completed, a pop-up message is displayed to indicate the result and you will see the login interface is displayed. Then you can use the new password to login the web.
Web Main Menu
After you have logged in the Web, the main menu is displayed. See Figure 5-6.
For detailed operations, you can refer to 4 Local Basic Operation.
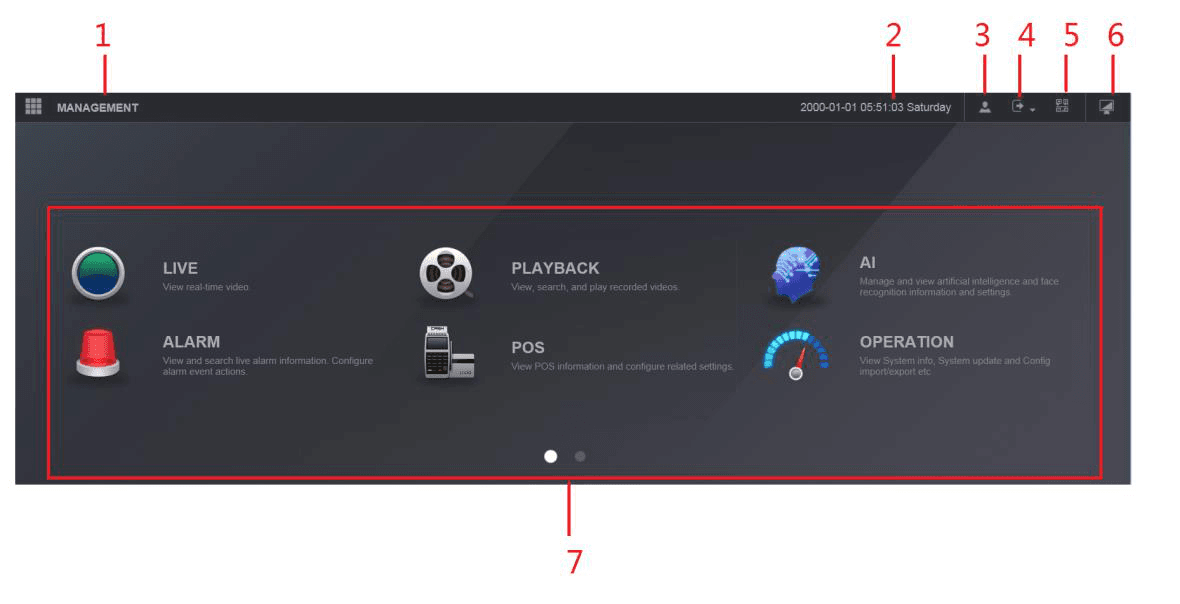
Table 5-1
| No. | Icon | Description |
|---|---|---|
| 1 | Management menu icon | Includes configuration menu through which you can configure camera settings, network settings, storage settings, system settings, account settings, and view information. |
| 2 | None | Displays system date and time. |
| 3 | Account icon | When you point to the account icon, the current user account is displayed. |
| 4 | Operation icon | Click the operation icon, select Logout, Reboot, or Shutdown according to your actual situation. |
| 5 | QR code icon | Displays Cell Phone Client and Device SN QR Code. - Cell Phone Client: Use your mobile phone to scan the QR code to add the device into the Cell Phone Client, and then you can start accessing the Device from your cell phone. - Device SN: Obtain the Device SN by scanning the QR code. Go to the P2P management platform and add the Device SN into the platform. Then you can access and manage the device in the WAN. For details, refer to the P2P operation manual. You can also configure P2P function in the local configurations, refer to 4.1.4.3 P2P. |
| 6 | Web main menu icon | Displays the web main menu. |
| 7 | None | Includes eight function tiles: LIVE, PLAYBACK, AI, ALARM, POS, OPERATION, BACKUP, DISPLAY, and AUDIO. Click each tile to open the configuration interface of the tile. - LIVE: You can perform the operations such as viewing real-time video, configuring channel layout, setting PTZ controls, and using smart talk and instant record functions if needed. - PLAYBACK: Search for and play back the recorded video saved on the Device. - ALARM: Search for alarm information and configure alarm event actions. - AI: Configure and manage artificial intelligent events. It includes smart search, parameters, and database. - POS: View POS information and configure related settings. - OPERATION: View system information, import/export system configuration files, or update system. - BACKUP: Search and back up the video files to the local PC or external storage device such as USB storage device. - DISPLAY: Configure the display effect such as displaying content, image transparency, and resolution, and enable the zero-channel function. - AUDIO: Manage audio files and configure the playing schedule. The audio file can be played in response to an alarm event if the voice prompts function is enabled. |
USB Device Auto Pop-up and Shutdown
How the NVR automatically detects an inserted USB device for backup or upgrade, and how to safely shut down the device from the main menu, remote control, or rear panel.
CVI DVR User Manual
User manual for the LTS Sapphire Series CVI digital video recorders (DVR) — getting started, the grand tour, connecting basics, local configurations, web operations, and FAQ.