مركز مساعدة LTS Connect
Output and Display
Configure the NVR display effect, channel tour, and customized video split modes from the DISPLAY menu.
Output and Display
Display
You can configure the display effect such as displaying time title and channel title, adjusting image transparency, and selecting the resolution.
Open the Display interface
Select Main Menu > DISPLAY > Display.
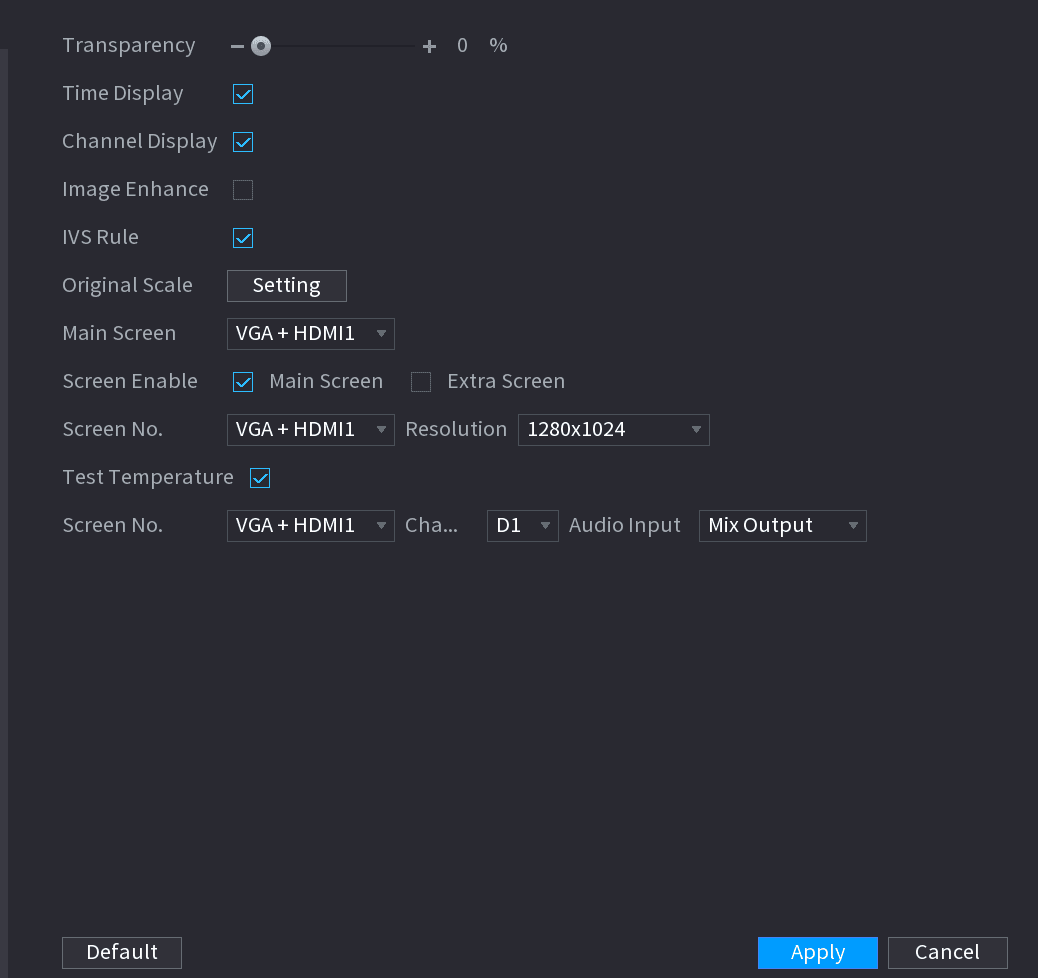
The Display interface is displayed. See Figure 4-247.
Configure the display parameters
Configure the settings for the display parameters. See Table 4-70.
| Parameter | Description |
|---|---|
| Transparency | Set the transparency of the local menu of the NVR device. The higher the transparency, the more transparent the local menu. |
| Time Display/Channel Display | Select the check box and the date and time of the system will be displayed in the preview screen. |
| Image Enhance | Select the check box to optimize the preview image edges. |
| IVS Rule | Select the check box to display the IVS rules in the preview interface. This function is for some series products only. |
| Original Scale | Click Setting and select the channel to restore the corresponding channel image to the original scale. |
| Main Screen | Select VGA+HDMI1 or HDMI2. Different devices display different contents. See the actual situation. |
| Screen Enable | Select the check box to enable this screen. The image can only be displayed when the screen is enabled. |
| Test Temperature | Check the box to test the object temperature, including trace the high/low temperature. |
| Resolution | Support 1920×1080, 1280×1024 (default), 1280×720. |
| Screen No. | Enter the screen number you want to set the audio input. |
| Channel | Select the channel number. |
| Audio Input | Select from audio 1, audio 2 and mix output. |
Apply
Click Apply.
Tour
You can configure a tour of selected channels to repeat playing videos. The videos display in turn according to the channel group configured in tour settings. The system displays one channel group for a certain period and then automatically changes to the next channel group.
Open the Tour interface
Select Main Menu > DISPLAY > Tour.
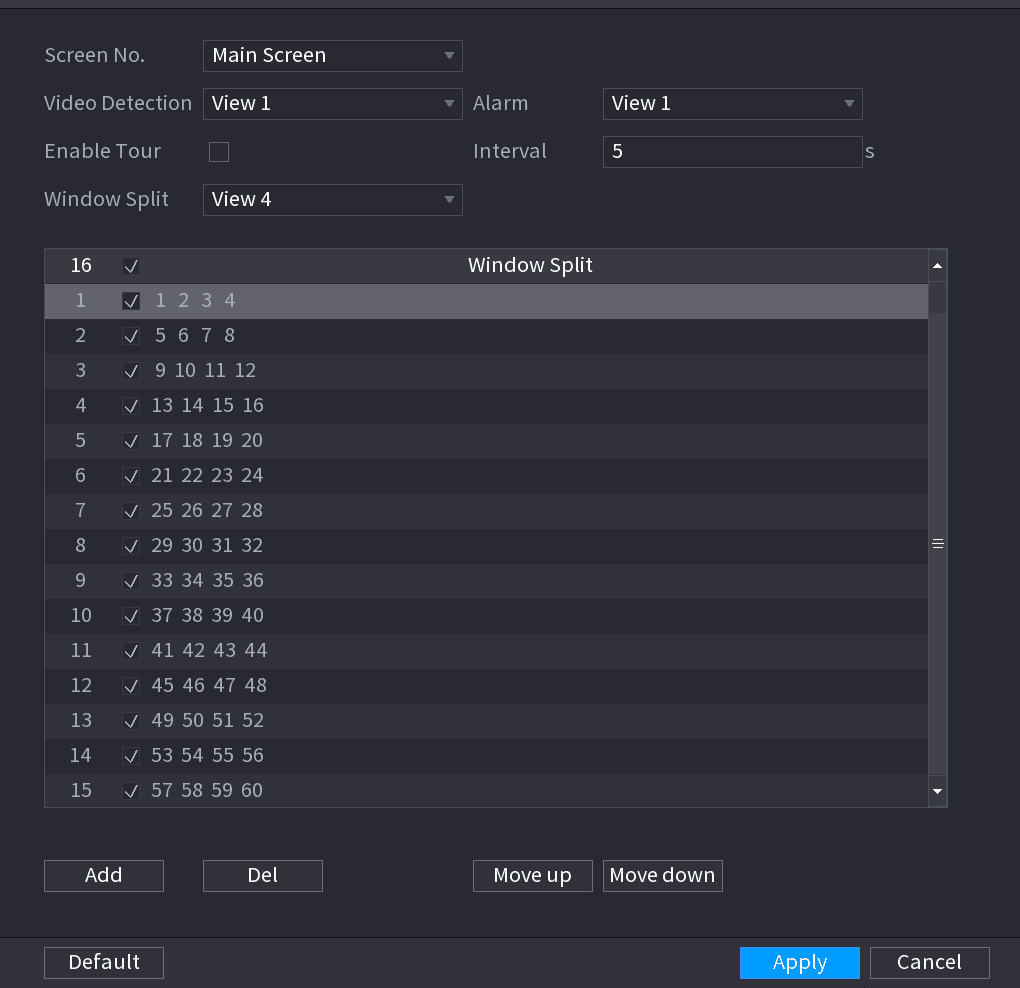
The Tour interface is displayed. See Figure 4-248.
On the top right of the live view screen, use the left mouse button or press Shift to switch between the "image switching is allowed" icon and the "image switching is not allowed" icon to turn on/off the tour function.
On the navigation bar, click the enable tour icon to enable the tour and click the disable icon to disable it.
Configure the tour parameters
Configure the settings for the tour parameters. See Table 4-71.
| Parameter | Description |
|---|---|
| Enable | Enable tour function. |
| Interval (Sec.) | Enter the amount of time that you want each channel group displays on the screen. The value ranges from 5 seconds to 120 seconds, and the default value is 5 seconds. |
| Video Detect, Alarm | Select the View 1 or View 8 for Motion Detect tour and Alarm Tour (system alarm events). |
| Window Split | In the Window Split list, select View 1, View 4, View 8, or other modes that are supported by the Device. |
| Channel Group | Display all channel groups under the current Window Split setting.
|
Apply
Click Apply to save the settings.
Customized Display
You can set customized video split mode.
- This function is for some series products. Refer to the actual product for detailed information.
- Device max. supports 5 customized videos.
Open the Custom Split interface
Select Main Menu > DISPLAY > Custom Split.
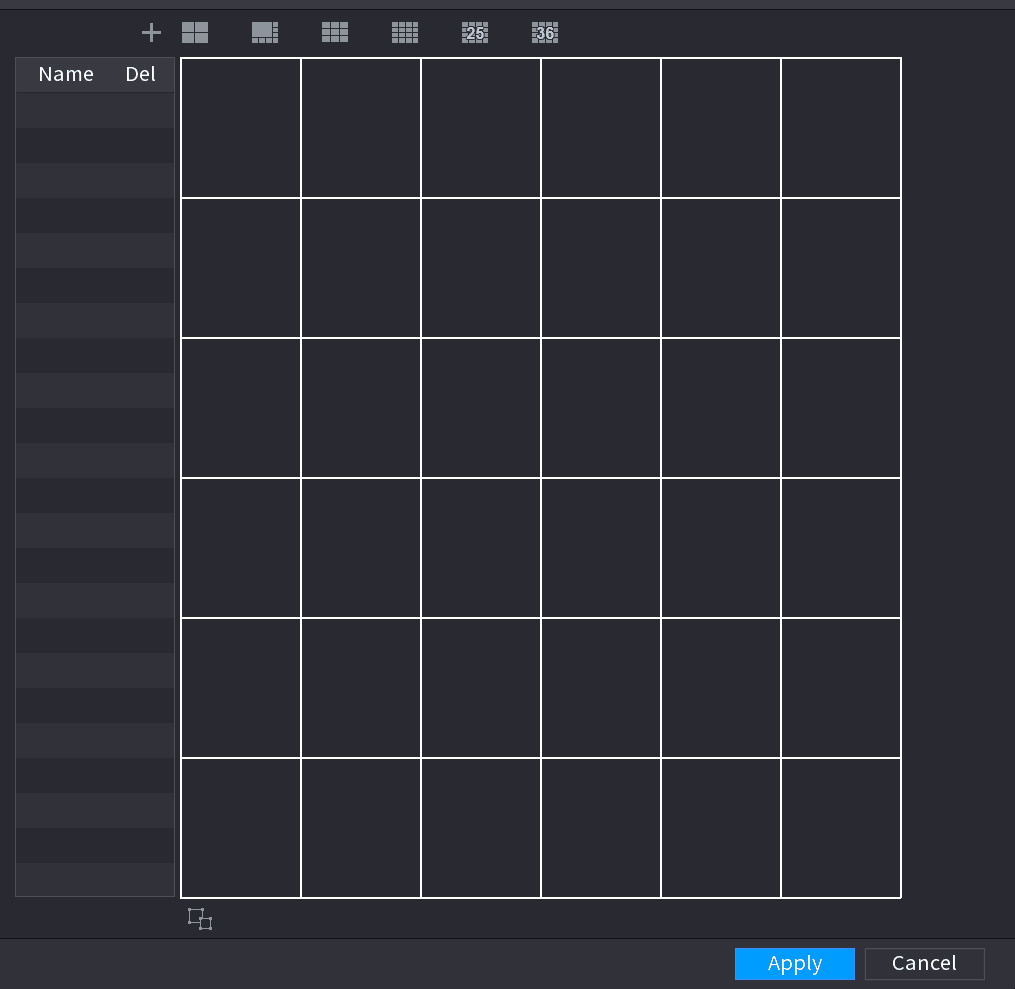
The Custom Split interface is displayed. See Figure 4-249.
Figure 4-249 has no screenshot embedded in the source manual; only its caption appears on the page.
Select a basic mode
Click the add icon and then click a split layout icon to select basic mode.
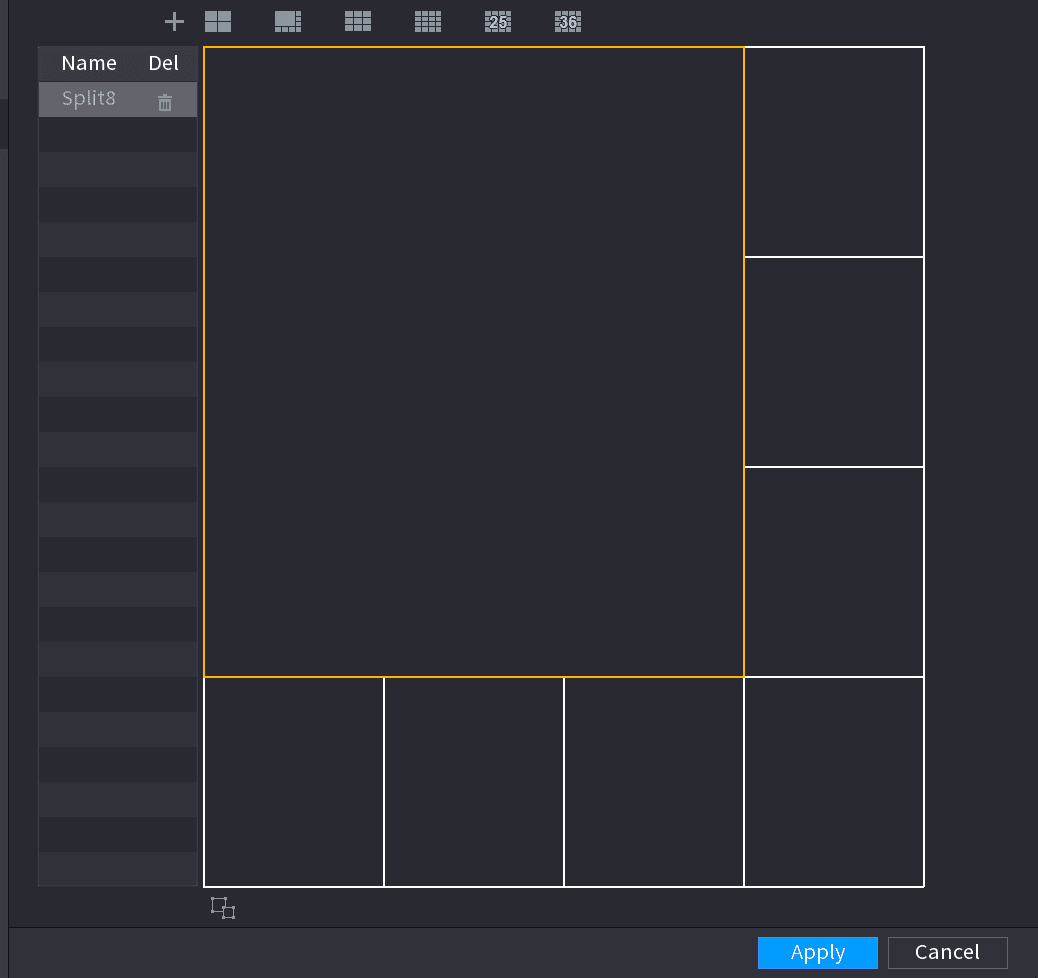
System adopts the basic window mode as the new window name. For example, if you select the 8 display mode, the default name is Split8.
In regular mode, drag the mouse in the preview frame; you can merge several small windows to one window so that you can get you desired split mode. See Figure 4-250.
- After merge the window, system adopts the remaining window amount as the new name such as Split6.
- Select the window you want to merge (red highlighted), click the cancel icon to cancel the merge to restore the basic mode.
- Click the delete icon to delete the customized window mode.
Apply
Click Apply to exit.
After the setup, you can go to the preview window, right click mouse and then select Custom Split. See Figure 4-251.